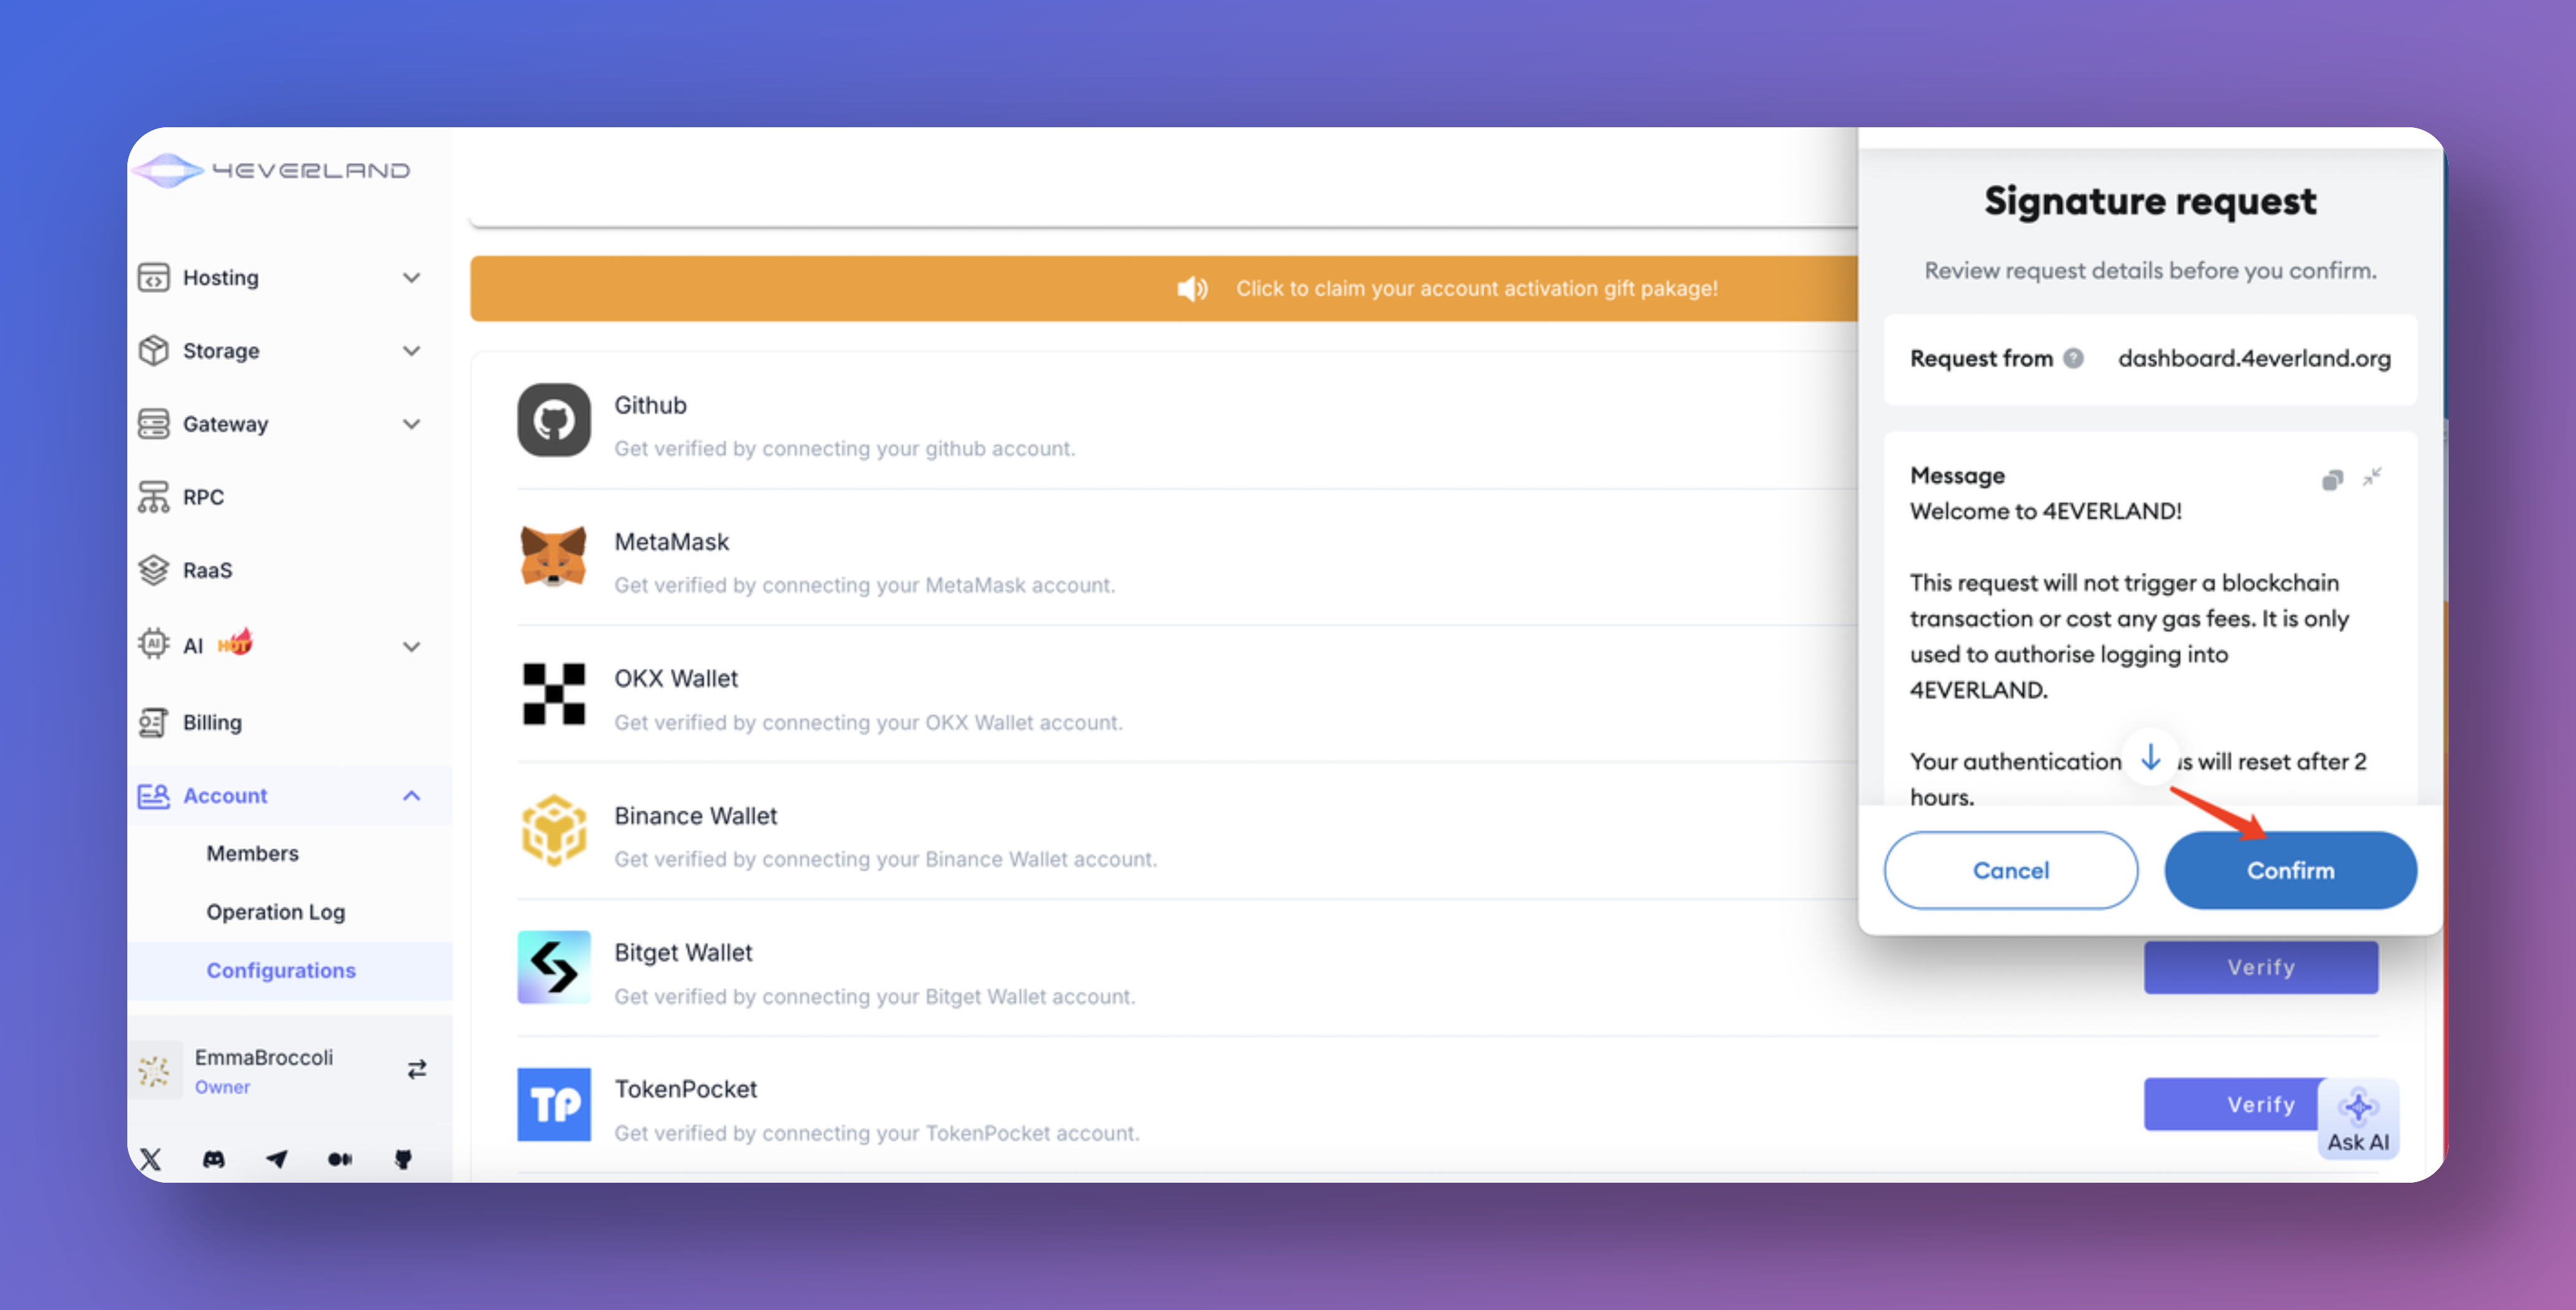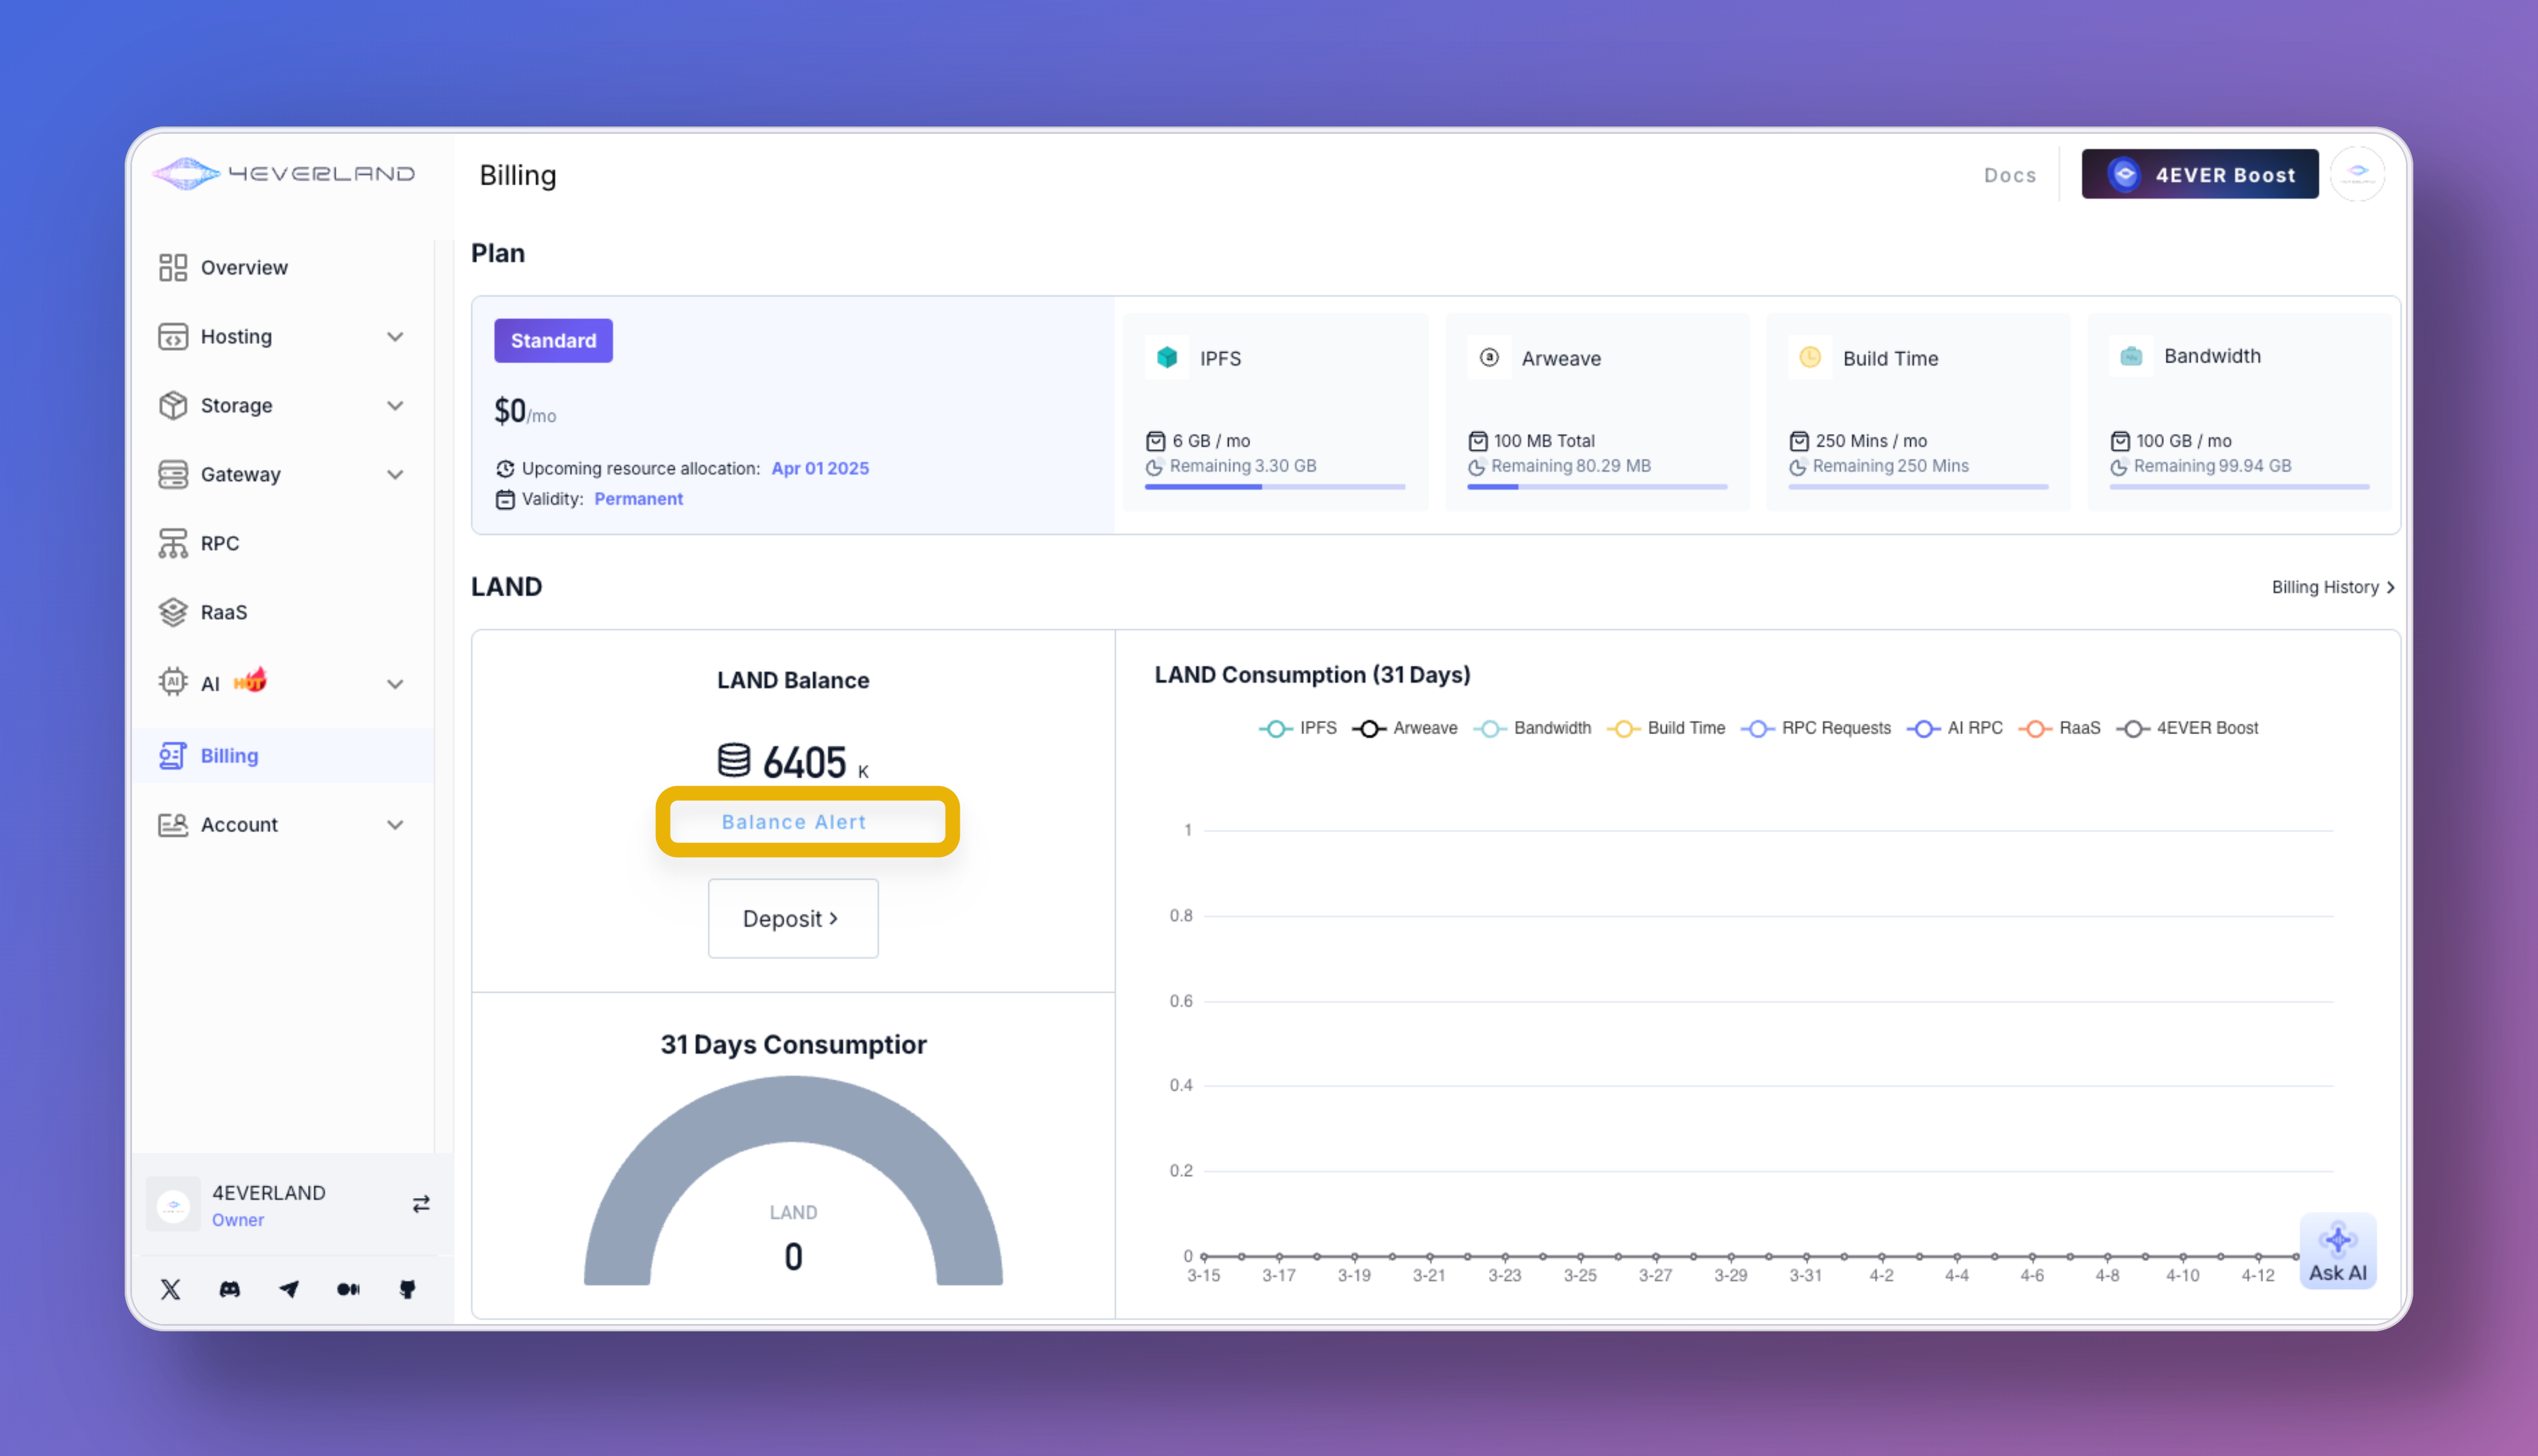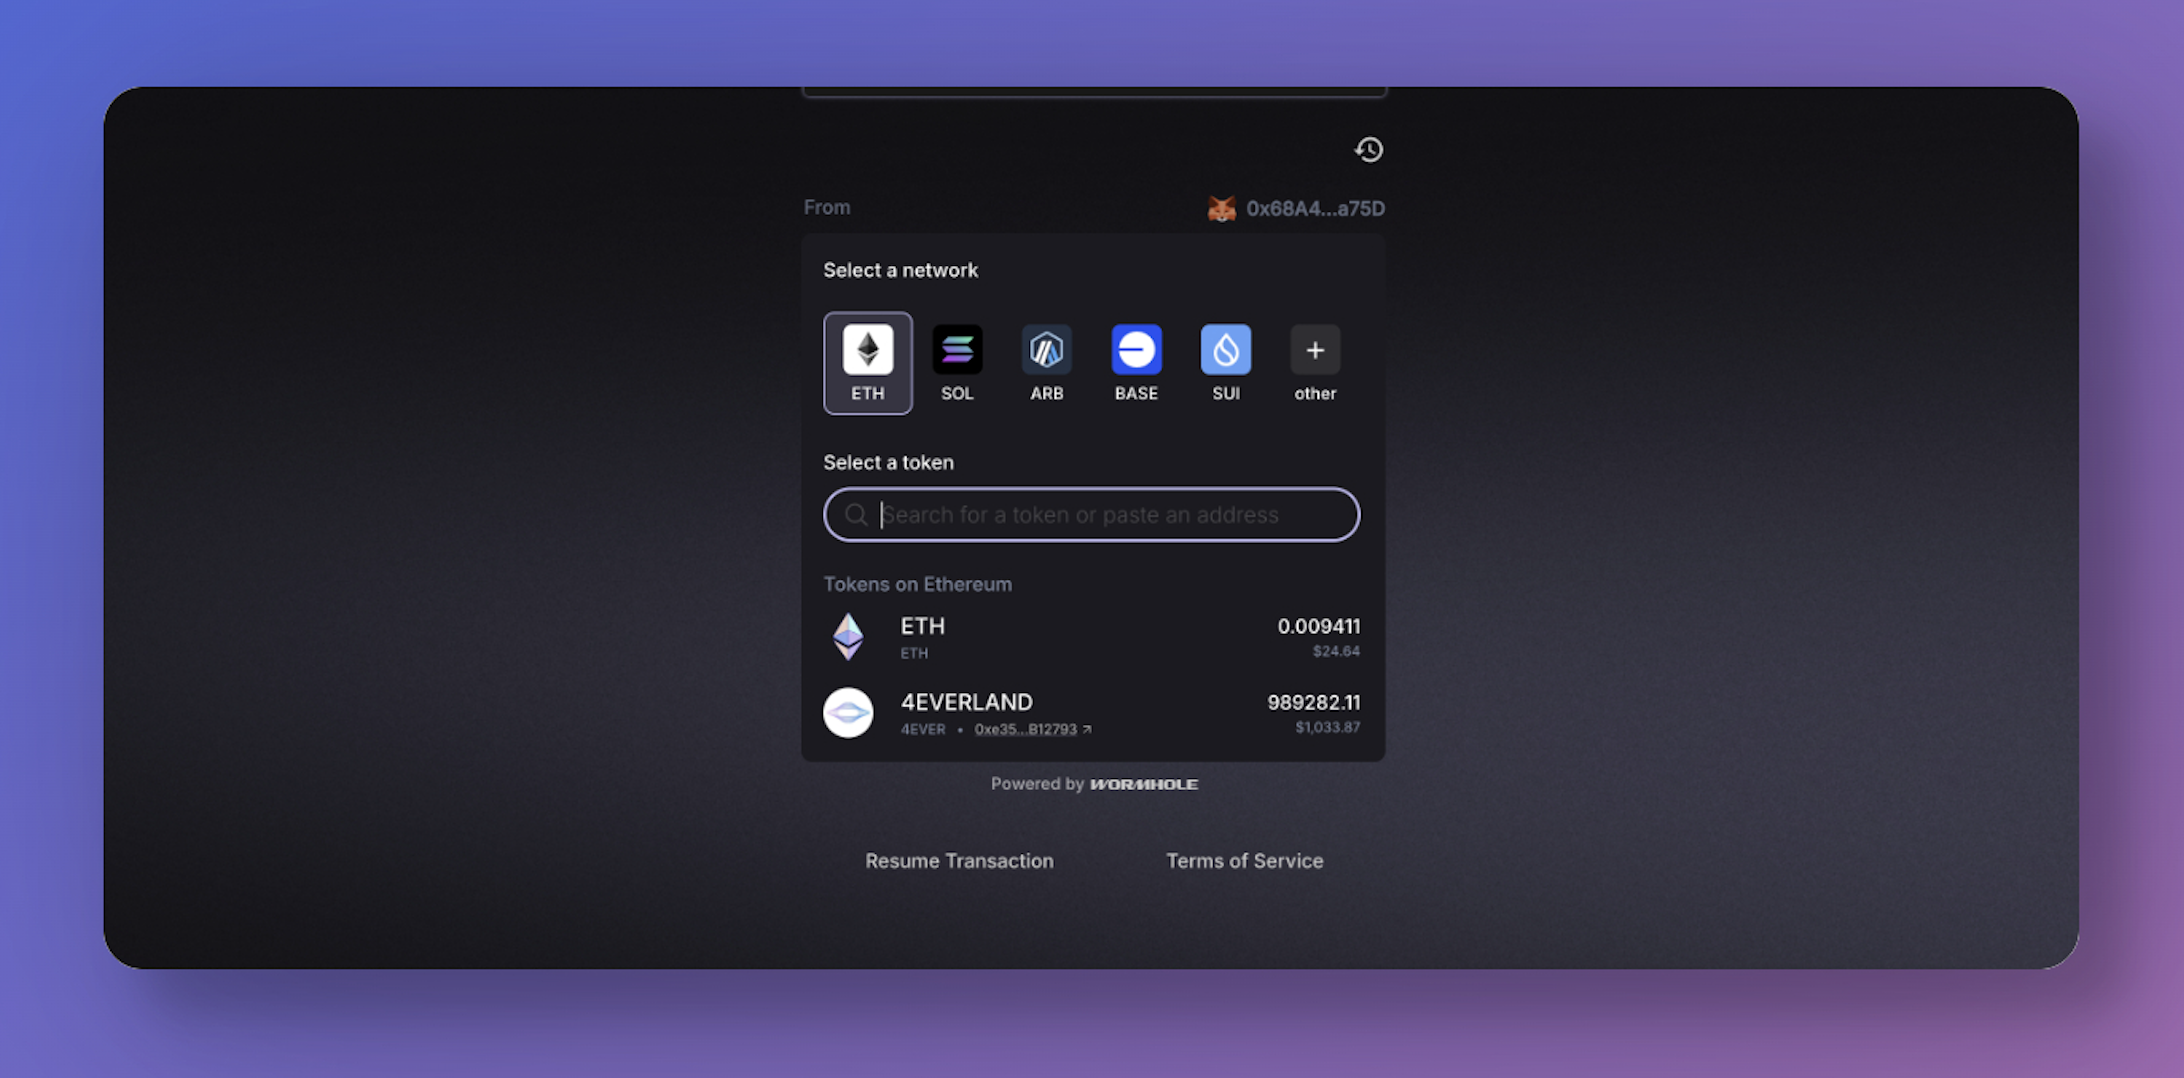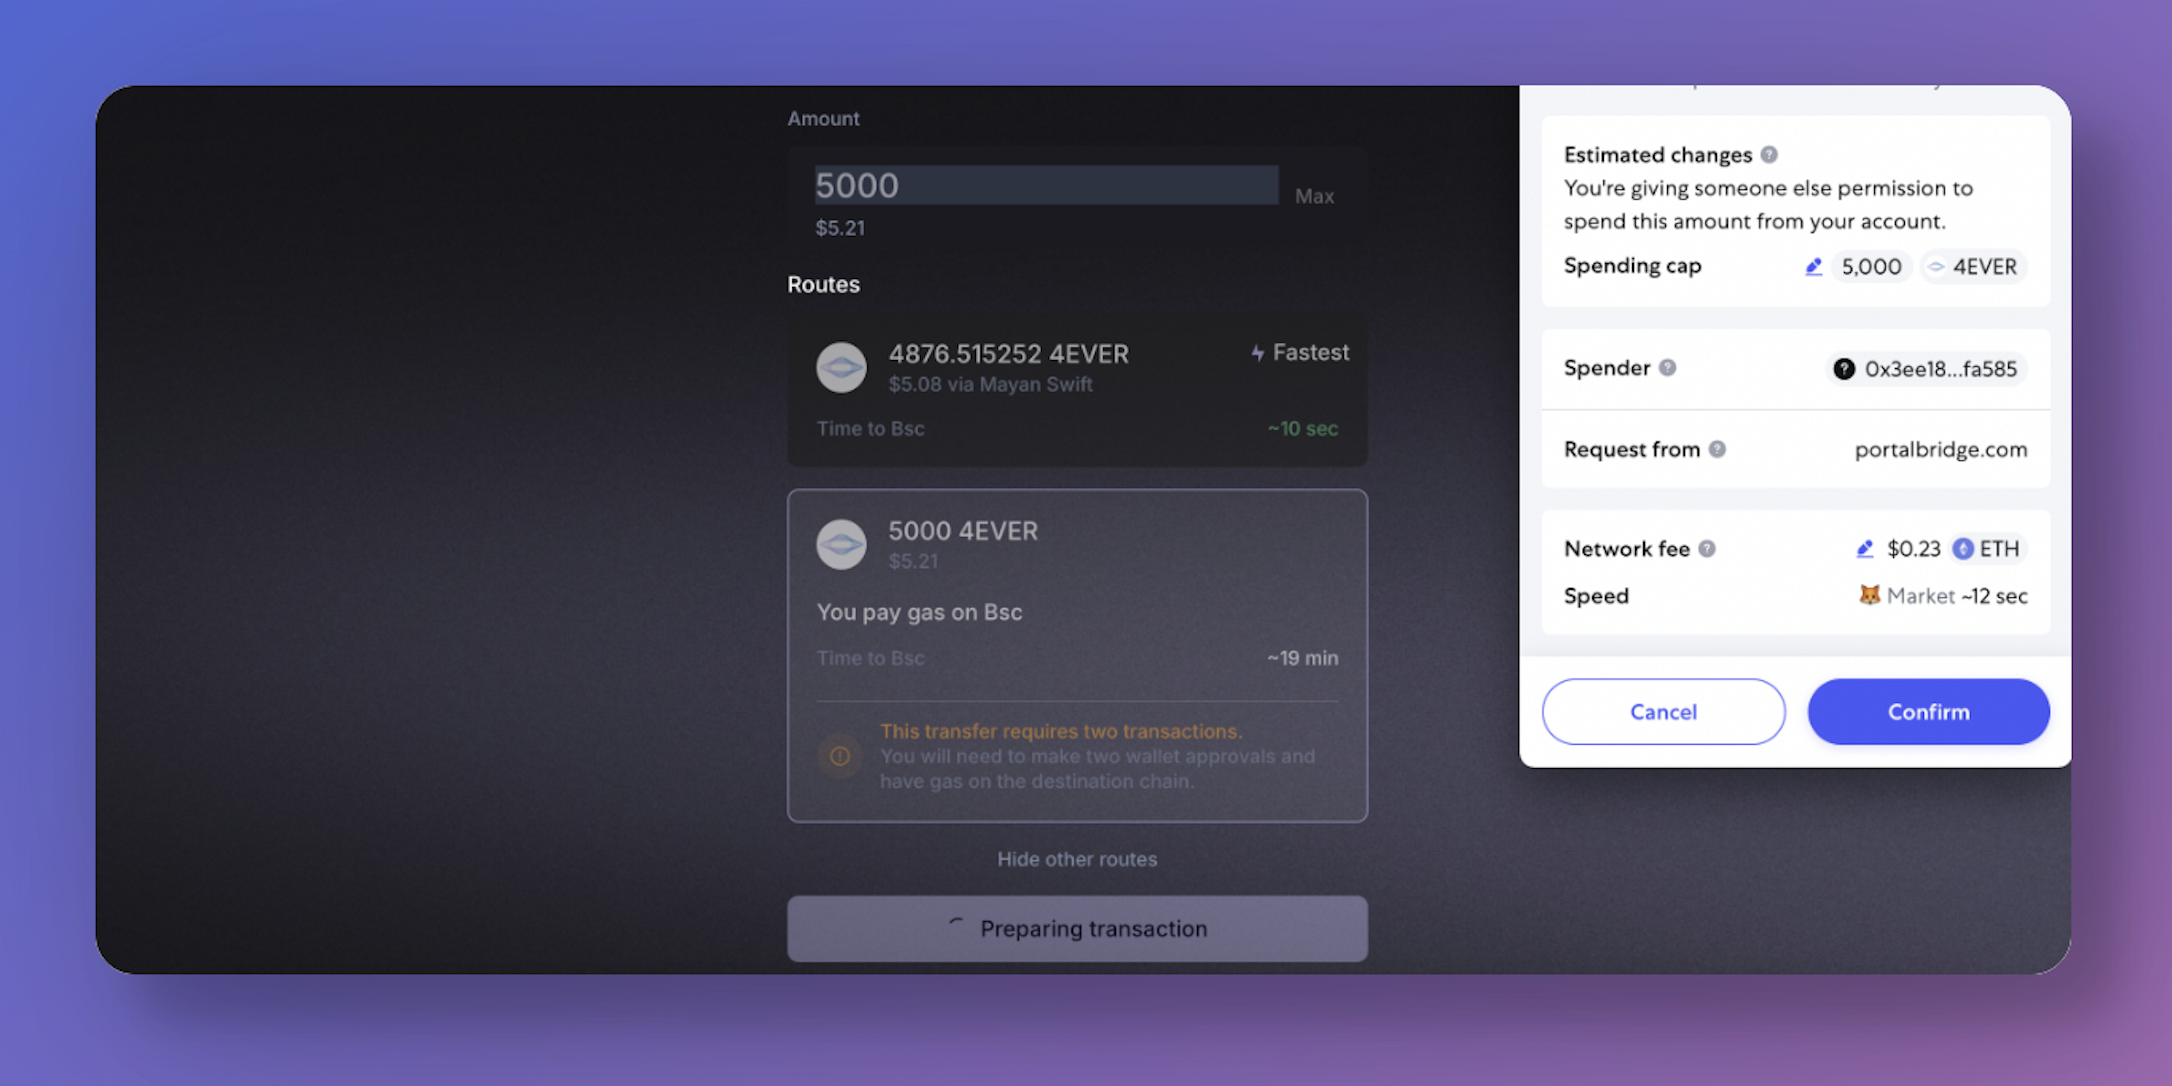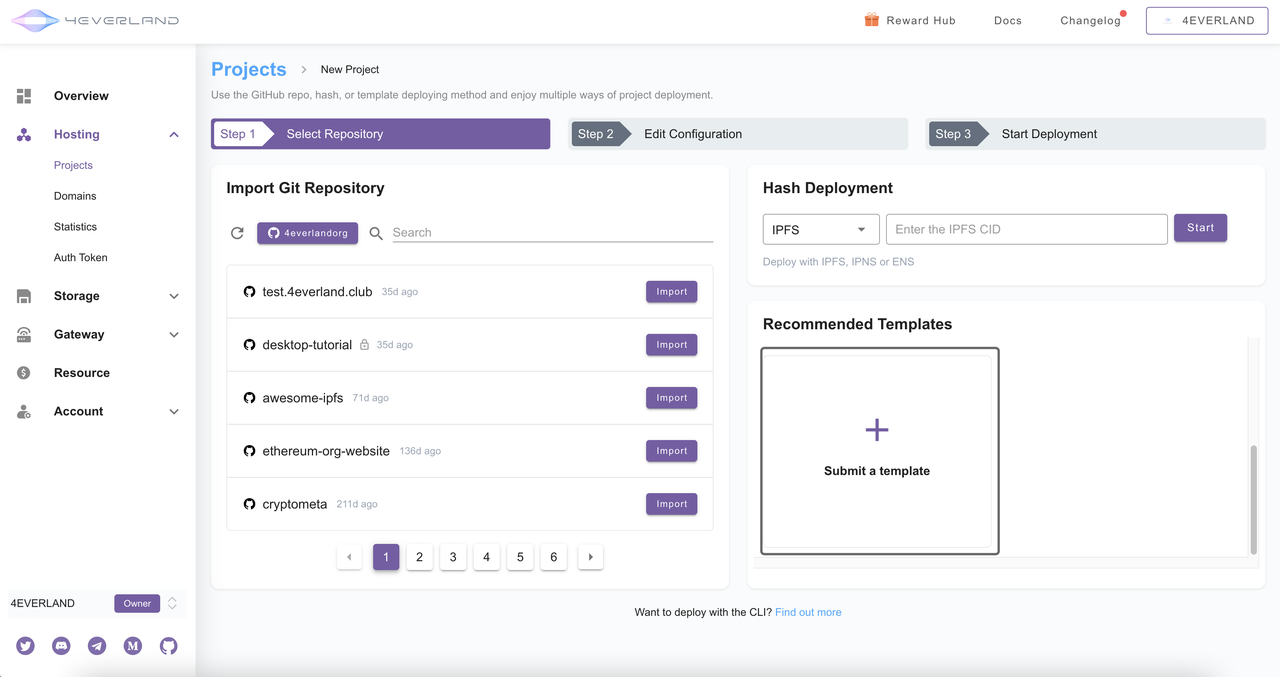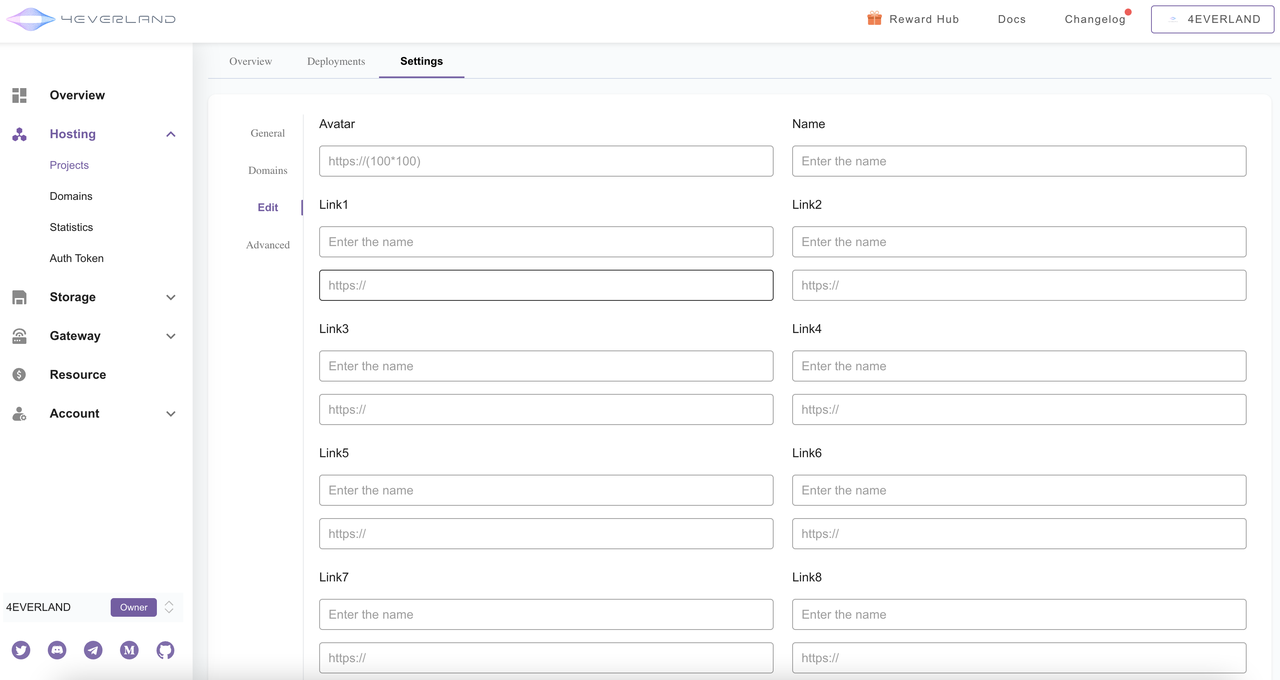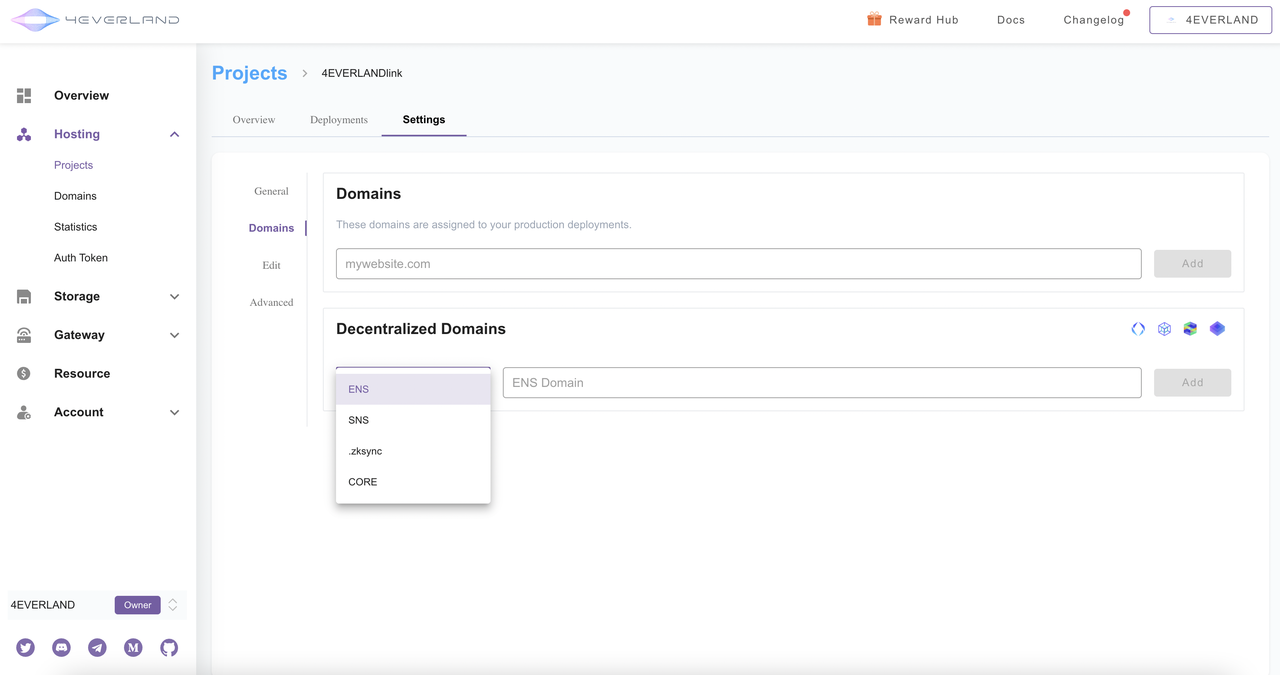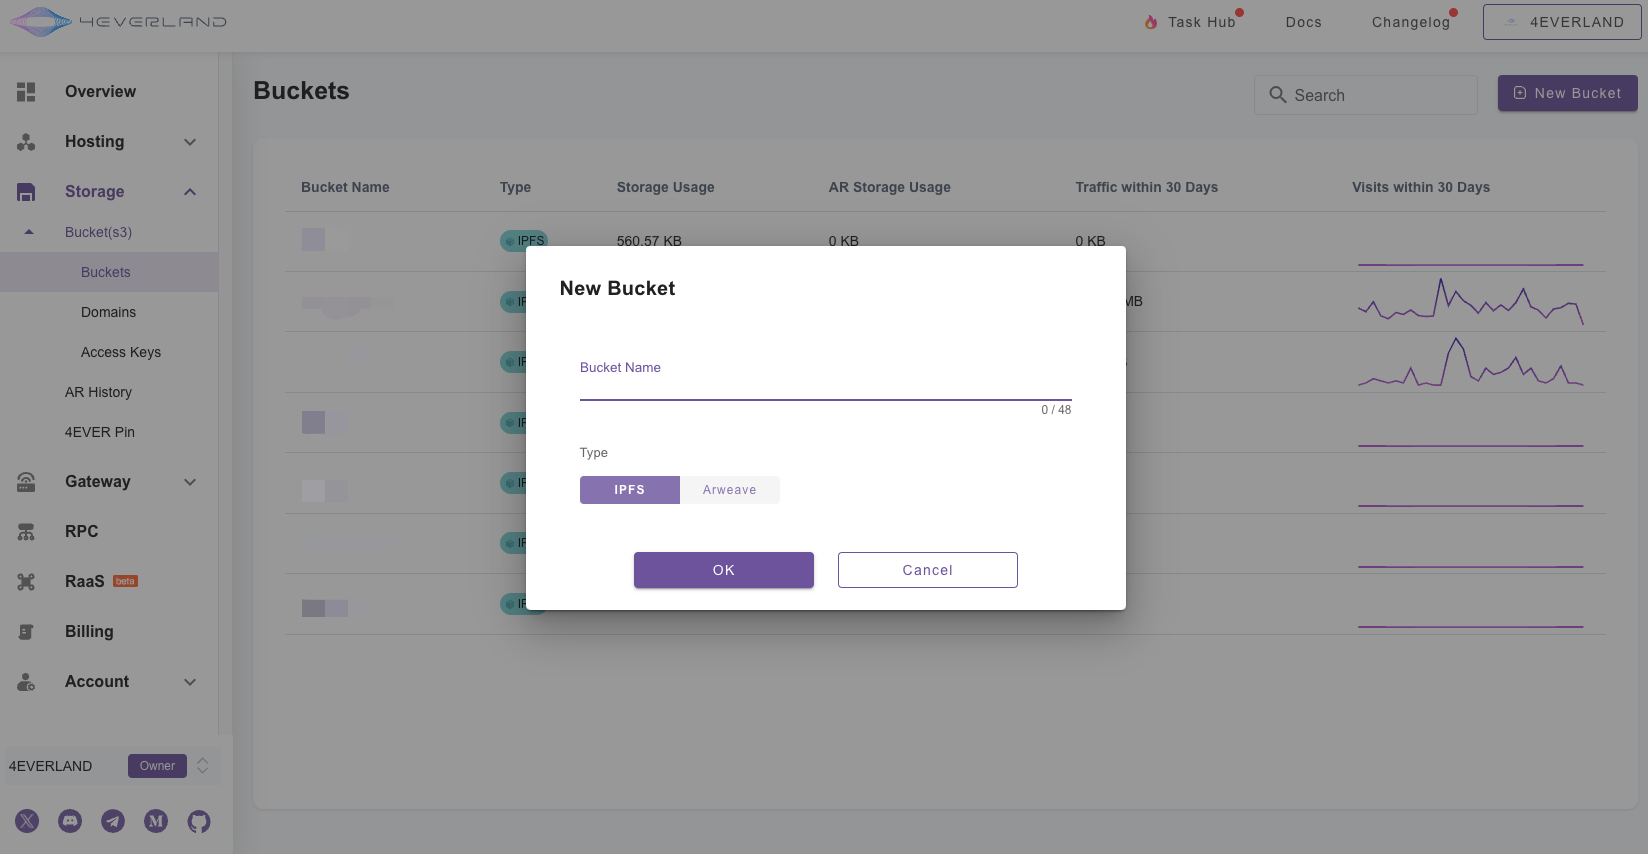

# Welcome to 4EVERLAND

We are delighted to have you here with us. Let us explore and discover new insights about Web3 development through 4EVERLAND!

<figure><img src="/files/KQrpNJBNHcDbUvkpuK80" alt=""><figcaption></figcaption></figure>

## What is 4EVERLAND?

4EVERLAND is a Web3 AI cloud platform that integrates storage, computing, and network core capabilities.&#x20;

4EVERLAND is committed to providing a distributed, highly efficient, self-motivated, and low-cost data hosting gateway that hopes to help the internet to make a smooth leap from Web 2.0 to Web 3.0, and become the infrastructure for millions of Web 3.0 developers and applications.&#x20;

### 4EVERLAND Universe

4EVERLAND's Universe is a portal that serves as a showcase for integrated 4EVERLAND technology projects, as well as a hub for the Web3 tech community, tools, products, and more.

{% embed url="<https://www.4everland.org/universe>" %}

### Everyone Can Start for <mark style="color:blue;">FREE</mark>

To begin your journey with 4EVERLAND, simply [log in](https://dashboard.4everland.org/login) to our platform and create a free account to enjoy free resources.

**Dweb Hosting**

{% hint style="success" %}
[**Scalable, Secure, and Efficient Decentralized Hosting Solution**](/hositng/what-is-hosting): Effortlessly build, deploy, and host decentralized websites and apps on lPFS. Arweave, Dfinity, or BNB Greenfield in seconds.
{% endhint %}

**Storage**

{% hint style="success" %}
[**Effortlessly Upload & Pin Files to IPFS and Arweave**](/storage/bucket): Use our Ul, CLl, or SDK to easily decentralize your files. Our built-in pinning orchestration makes the process of uploading and pinning files to lPFS and Amweave seamless.
{% endhint %}

**Gateway**

{% hint style="success" %}
[**Enhanced Speed, Reliability, and Automatic Resource Allocation**](/gateways/ipfs-gateway): The 4EVERLAND gateway leverages globally distributed nodes to facilitate seamless access to decentralized networks like lPFS, Arweave, Dfinity, and BNB Greenfield.
{% endhint %}

**RPC**

{% hint style="success" %}
[**High-Speed, Reliable, and Cost- Effective Blockchain Node Access**](/rpc/guides): 4EVERLAND RPC offers high-speed, reliable remote procedure call (RPC) services for seamless interaction with diverse blockchain networks.&#x20;
{% endhint %}

**RaaS**

{% hint style="success" %}
[**Customizable Rollup Solutions for Enhanced Blockchain Scalability**](/raas-beta/whats-rollups): Customize your Layer2 blockchain with 4EVERLAND Rollup as a Service(RaaS).
{% endhint %}

**AI Solution**

{% hint style="success" %}
[**A Streamlined Interface to Leverage Diverse Large Language Models**](/ai/ai-rpc): A unified interface for 100+ LLMs, enabling to explore, compare, and selectmodels and pricing options tailored to your specific needs.
{% endhint %}

### **Ready to get started using 4EVERLAND right now?**&#x20;

Follow this quickstart guide to get up and running in a matter of minutes!

{% content-ref url="/pages/jvJzozlZ5h24slIObt3T" %}
[Quick Start Guide](/get-started/quick-start-guide)
{% endcontent-ref %}


# Our Features

{% embed url="<https://www.youtube.com/watch?t=3s&v=zXAUvWJlvrg>" %}
What is 4EVERLAND
{% endembed %}

## Global Acceleration&#x20;

The consensus-driven Swarm network technology greatly improves network availability and provides global developers with more efficient and faster WEB 3.0 accessibility services.

## Privacy Protection&#x20;

4EVERLAND does not need any KYC details. Users are anonymous, and their data is safe and secured.

## Distributed Storage&#x20;

4EVERLAND uses a Swarm distributed storage network to achieve data availability and reliability.

## Convenient and Efficient&#x20;

4EVERLAND provides a series of developer tools to help developers quickly implement functions such as one-click front-end deployment and multi-chain contract deployment. Developers can easily grasp the product design, release, and maintenance without any complicated operations.

## Low-Cost&#x20;

4EVERLAND cooperates with various public chain ecological miners to obtain miner support with batch scale effect to help developers reduce deployment and maintenance costs.

## Interconnection&#x20;

4EVERLAND supports a variety of heterogeneous chains, including Ethereum, BSC, Solana, Polygon, Filecoin, etc., through an open and transparent access mechanism to achieve interoperability between multiple chains, helping developers to better enjoy multiple ecosystems system resources.


# Quick Start Guide

Introduction, Dashboard, and FAQs

<figure><img src="/files/hvsXZr7YakQu6k2jAhQZ" alt=""><figcaption></figcaption></figure>

## Get to Know the Dashboard

{% content-ref url="/pages/V24fzD8KJb1RbQvWUMoF" %}
[Login options](/get-started/quick-start-guide/login-options)
{% endcontent-ref %}

{% content-ref url="/pages/bwNXjNQXXuu0wKt1eOPt" %}
[Usage Introduction](/get-started/quick-start-guide/usage-introduction)
{% endcontent-ref %}

{% content-ref url="/pages/SUqrEwzKq5w1A3PflaE0" %}
[Dashboard stats](/get-started/quick-start-guide/dashboard-stats)
{% endcontent-ref %}

## Start of development

{% content-ref url="/pages/E0Sg669o7V1tmY4PiuFp" %}
[HOSITNG](/hositng/what-is-hosting)
{% endcontent-ref %}

{% content-ref url="/pages/293nIgKFNq6gU0P2gBKR" %}
[Storage](/storage/bucket)
{% endcontent-ref %}

{% content-ref url="/pages/tP56ntLVwJgRxsKV8sEA" %}
[Gateways](/gateways/ipfs-gateway)
{% endcontent-ref %}

{% content-ref url="/pages/CxusD3lReR0qbpRpHVqF" %}
[DePIN](/depin/4ever-network)
{% endcontent-ref %}

Have a question? The answer can likely be found in our FAQ section:

{% content-ref url="/pages/UtWemjdFFhO3zx5NJs43" %}
[4EVERLAND FAQ](/more/4everland-faq)
{% endcontent-ref %}


# Registration

We are excited to announce that our 4EVERLAND account system has undergone a significant upgrade. The registration process for new users now provides both centralized and decentralized UID options. This gives users the autonomy to choose whether or not to link their identity and resource data to the blockchain, promoting transparency and self-custody, and contributing to the creation of a more robust decentralized Web3 network.

As part of our commitment to rewarding our loyal users, we have automatically upgraded the accounts of existing users to decentralized UID at no charge. This upgrade provides an added incentive to reward their continued support, and we are thrilled to offer this benefit to our dedicated users. Additionally, these users may claim additional resources from the Reward Hub, which are specifically tailored to their needs as longtime patrons of the platform.

## Trial

Unconditional access to a 7-day free trial, with services ceasing upon expiration of the trial period. During the trial, 4EVERLAND provides the following resources to facilitate exploration of Hosting, Bucket storage, and other platform services:<br>

* IPFS Storage: 1 GB
* Arweave Storage: 10 MB
* Build Time: 50 minutes
* Bandwidth: 1 GB
* RPC: Not supported

\
These resources are available for use within the 7-day trial period, and services will stop automatically once the trial expires. This trial offers new users a straightforward way to experience the core capabilities of the platform.

## Standard

By completing on-chain identity registration and account activation, your account information and resource usage will be recorded on the blockchain. As part of the Standard plan, 4EVERLAND provides the following monthly resource allocations, with free resources reset on the 1st of each month:<br>

* IPFS Storage: 5 GB/month
* Arweave Storage: Total 100 MB (available indefinitely)
* Build Time: 250 minutes/month
* Bandwidth: 10 GB/month
* RPC: 100,000,000 CUs/month (with a rate limit of 300 CUPS)

#### Benefits Comparison (Trial vs Standard)

The table below details the accessibility of features for **Trial** and **Standard** accounts:

| Feature           | Trial Account Status   | Standard Account Status |
| ----------------- | ---------------------- | ----------------------- |
| Hosting           | ✅ Enabled              | ✅ Enabled               |
| Hosting API       | ❌ Disabled             | ✅ Enabled               |
| Bucket            | ✅ Enabled              | ✅ Enabled               |
| Bucket S3 API     | ✅ Enabled              | ✅ Enabled               |
| 4EVER PIN         | ✅ Enabled              | ✅ Enabled               |
| 4EVER PIN API     | ❌ Disabled             | ✅ Enabled               |
| Dedicated Gateway | ❌ Disabled             | ✅ Enabled               |
| RaaS              | ❌ Disabled             | ✅ Enabled               |
| AI RPC            | ✅ Enabled (Free Model) | ✅ Enabled               |
| Team Member       | ❌ Disabled             | ✅ Enabled (3 members)   |
| IPNS Manager      | ✅ Enabled              | ✅ Enabled               |
| IPNS Manager API  | ❌ Disabled             | ✅ Enabled               |

\
Moreover, users with activated accounts gain access to a wider range of activities and incentives through the Reward Hub, offering ample opportunities to earn additional resource rewards. This upgrade allows you to maximize platform benefits and fully leverage the decentralized Web3 network.

For specific resource pricing models and costs, please refer to:

{% content-ref url="/pages/ulzpibRAeiNR5JnSrkQs" %}
[Pricing Model](/get-started/billing-and-pricing/pricing-model)
{% endcontent-ref %}

## Upgrade Options:

* Polygon: Upgrade using the Polygon network to pay gas fees and complete on-chain identity registration.
* zkSync Lite(V1): Upgrade using zkSync network, which relies on cross-chain communication technology to interact with the Polygon network and complete on-chain identity registration.
* More

<figure><img src="/files/XMyHGCrzXpad3k3XXMpj" alt=""><figcaption></figcaption></figure>

We highly recommend that 4EVERLAND users upgrade their accounts to gain access to additional storage resources and link their identities to the Web3 network.&#x20;

By taking this step, users will be able to fully participate in the decentralized world and align with the core principles of Web3. This upgrade represents a significant move towards embracing a more decentralized philosophy, which is becoming increasingly important in today's world. By linking their identities to the We3 network, users can ensure that their data is secure and that they are in control of their personal information. This is a crucial step towards building a more transparent and trustworthy internet for all.


# Login options

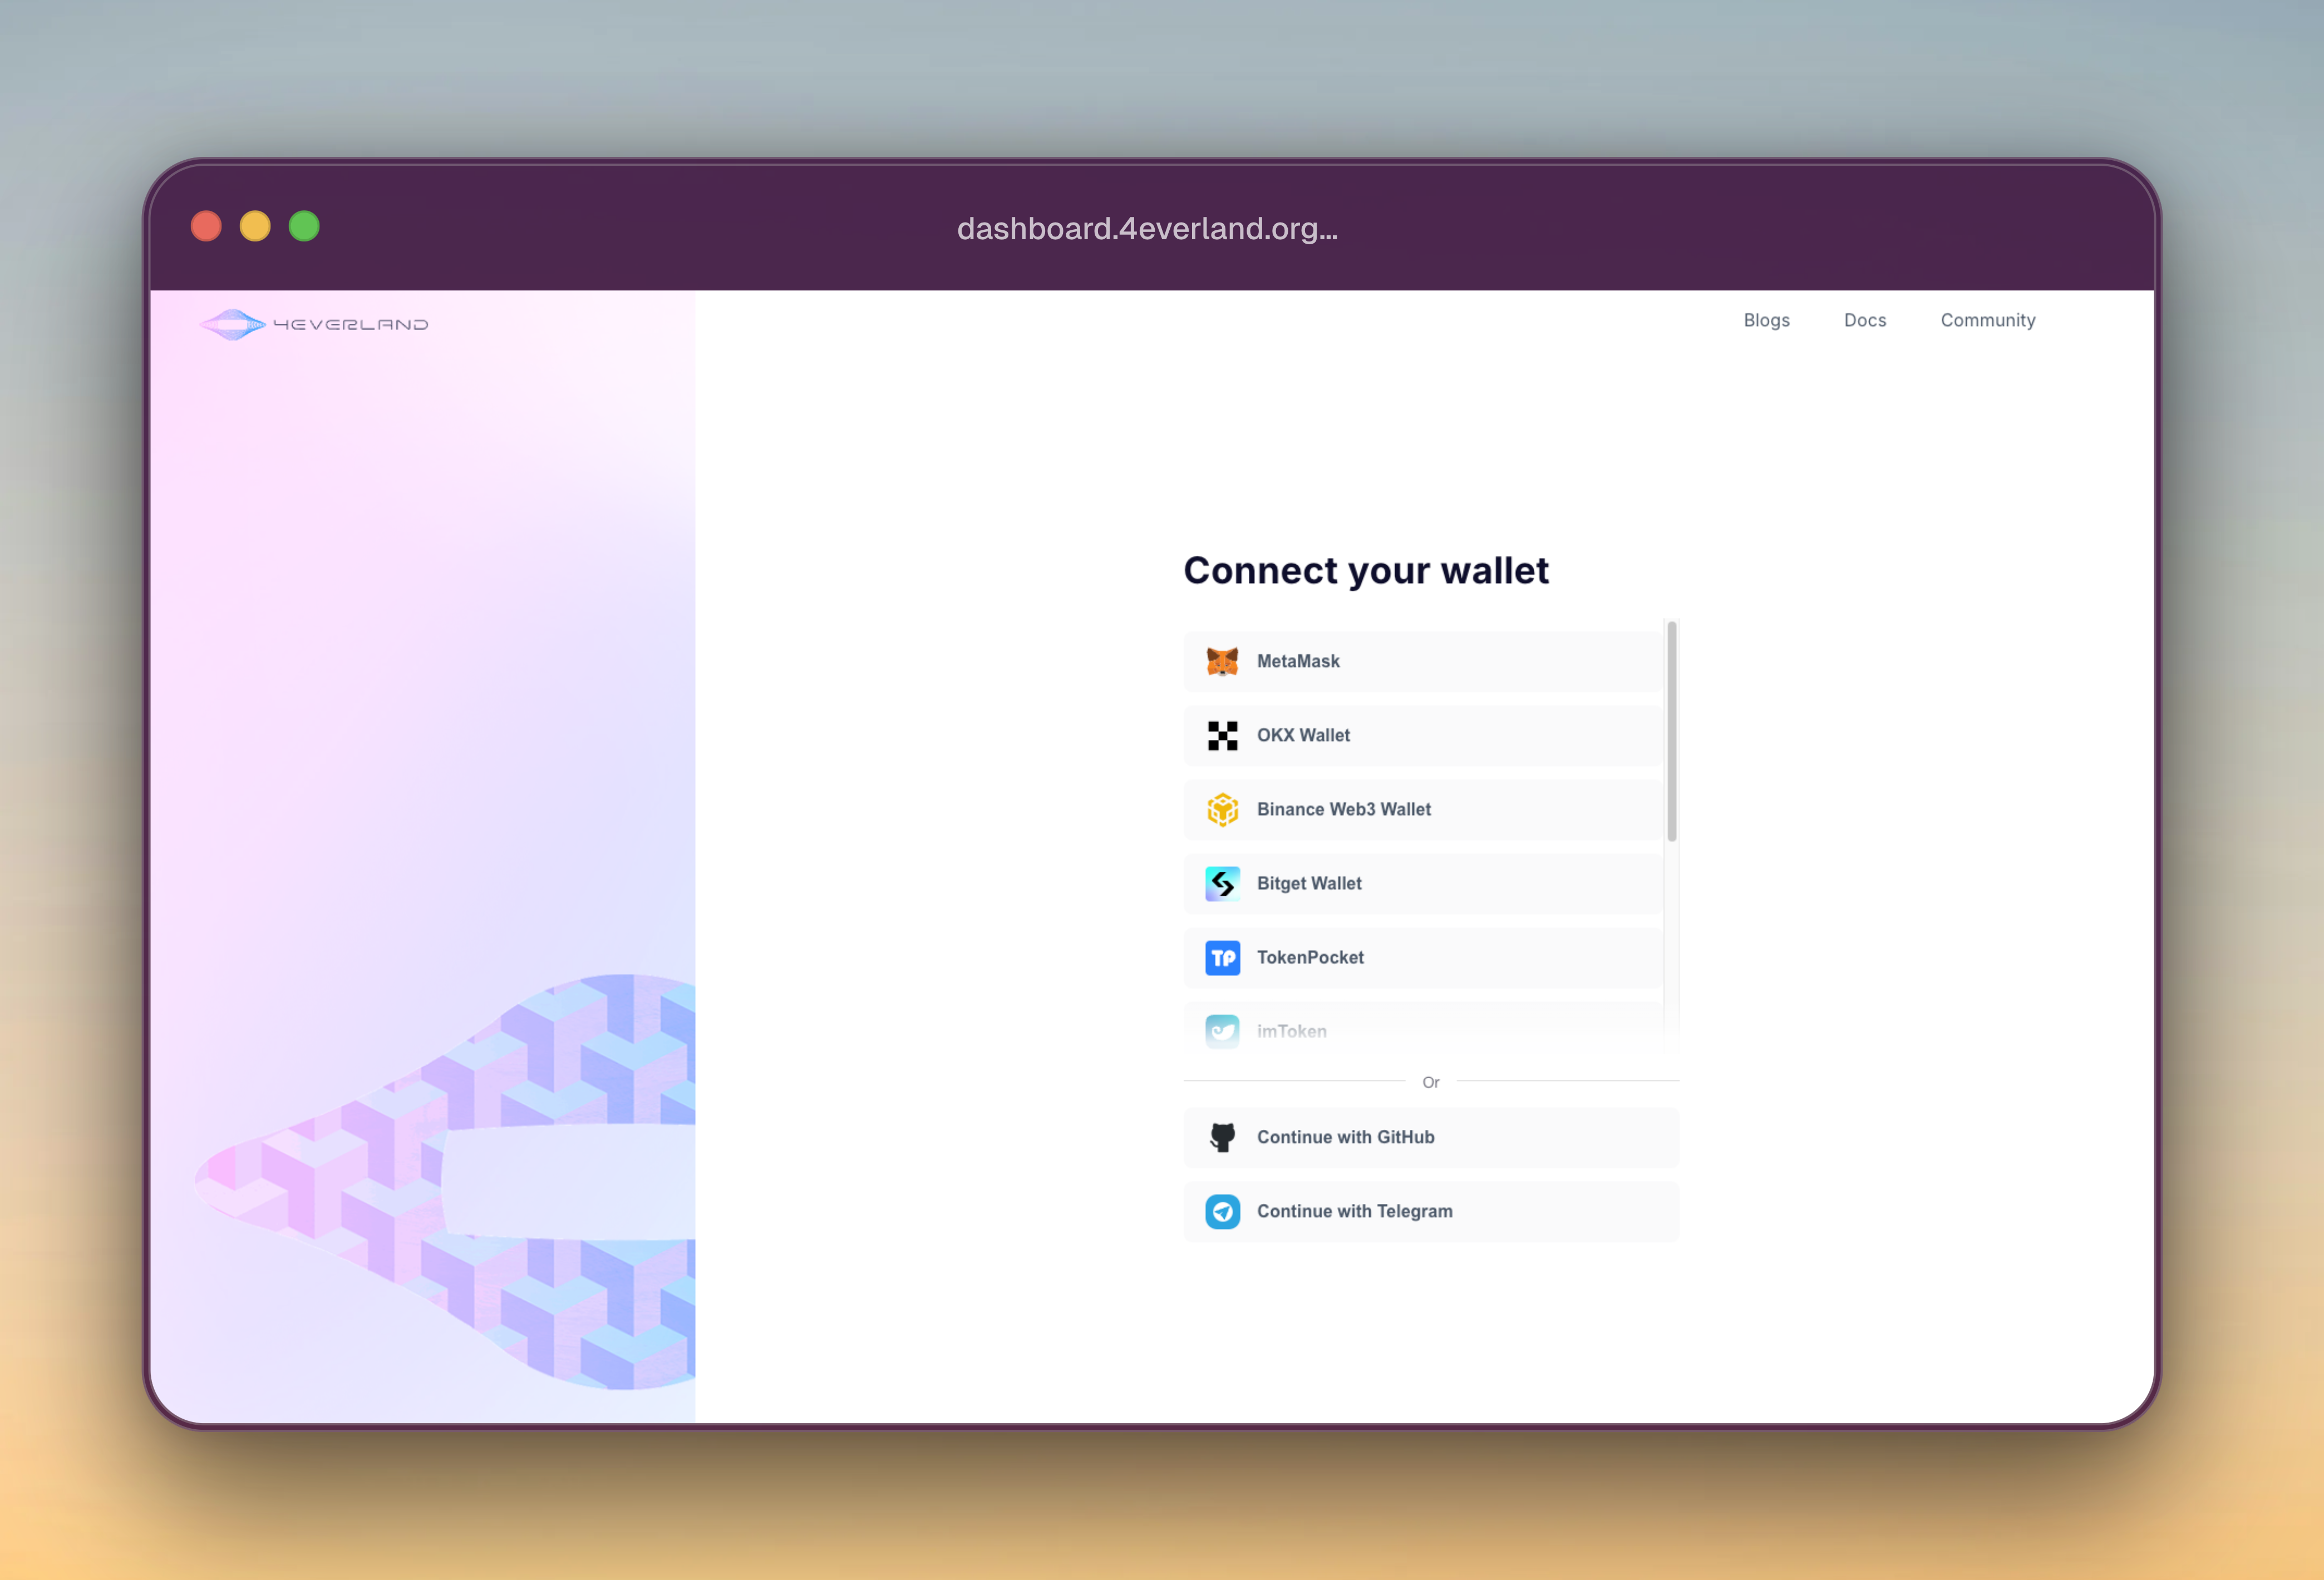
4EVERLAND currently supports three types of login, wallet login, Github account login and Telegram account login.&#x20;

<figure><img src="/files/PFd6YipNJl04PgICIh5w" alt=""><figcaption></figcaption></figure>

## Wallet login

1. To use Web3 Wallet, select your usual wallet on the [following page](https://dashboard.4everland.org/login) and wait for the wallet to respond.
2. Select 'Sign' in the pop-up box to authorize.

<figure><img src="/files/BiEF6Xwst3UCe1GfyjQh" alt=""><figcaption></figcaption></figure>

3. Please visit the following sub-pages to find more information about the wallets.

{% content-ref url="/pages/lfbQ7oAwpfRMGcc7eEn6" %}
[MetaMask](/get-started/quick-start-guide/login-options/metamask)
{% endcontent-ref %}

{% content-ref url="/pages/BpZHE1OPQvQ7oaBt2GrX" %}
[Phantom](/get-started/quick-start-guide/login-options/phantom)
{% endcontent-ref %}

{% content-ref url="/pages/Bnq3SatuzFDniB7Bvh8s" %}
[Binance Web3 Wallet](/get-started/quick-start-guide/login-options/binance-web3-wallet)
{% endcontent-ref %}

{% content-ref url="/pages/lVxf45uqw2C3fwxltlp9" %}
[Bitget Wallet](/get-started/quick-start-guide/login-options/bitget-wallet)
{% endcontent-ref %}

{% content-ref url="/pages/1Lx4S1Pr5xxnMWlmXCkW" %}
[Lilico](/get-started/quick-start-guide/login-options/lilico)
{% endcontent-ref %}

{% content-ref url="/pages/M7oxsSODYeqXxANeneIX" %}
[Petra](/get-started/quick-start-guide/login-options/petra)
{% endcontent-ref %}

{% content-ref url="/pages/7uV00W0ktBrJlwNz56jb" %}
[OKX Wallet](/get-started/quick-start-guide/login-options/okx-wallet)
{% endcontent-ref %}

## Github login

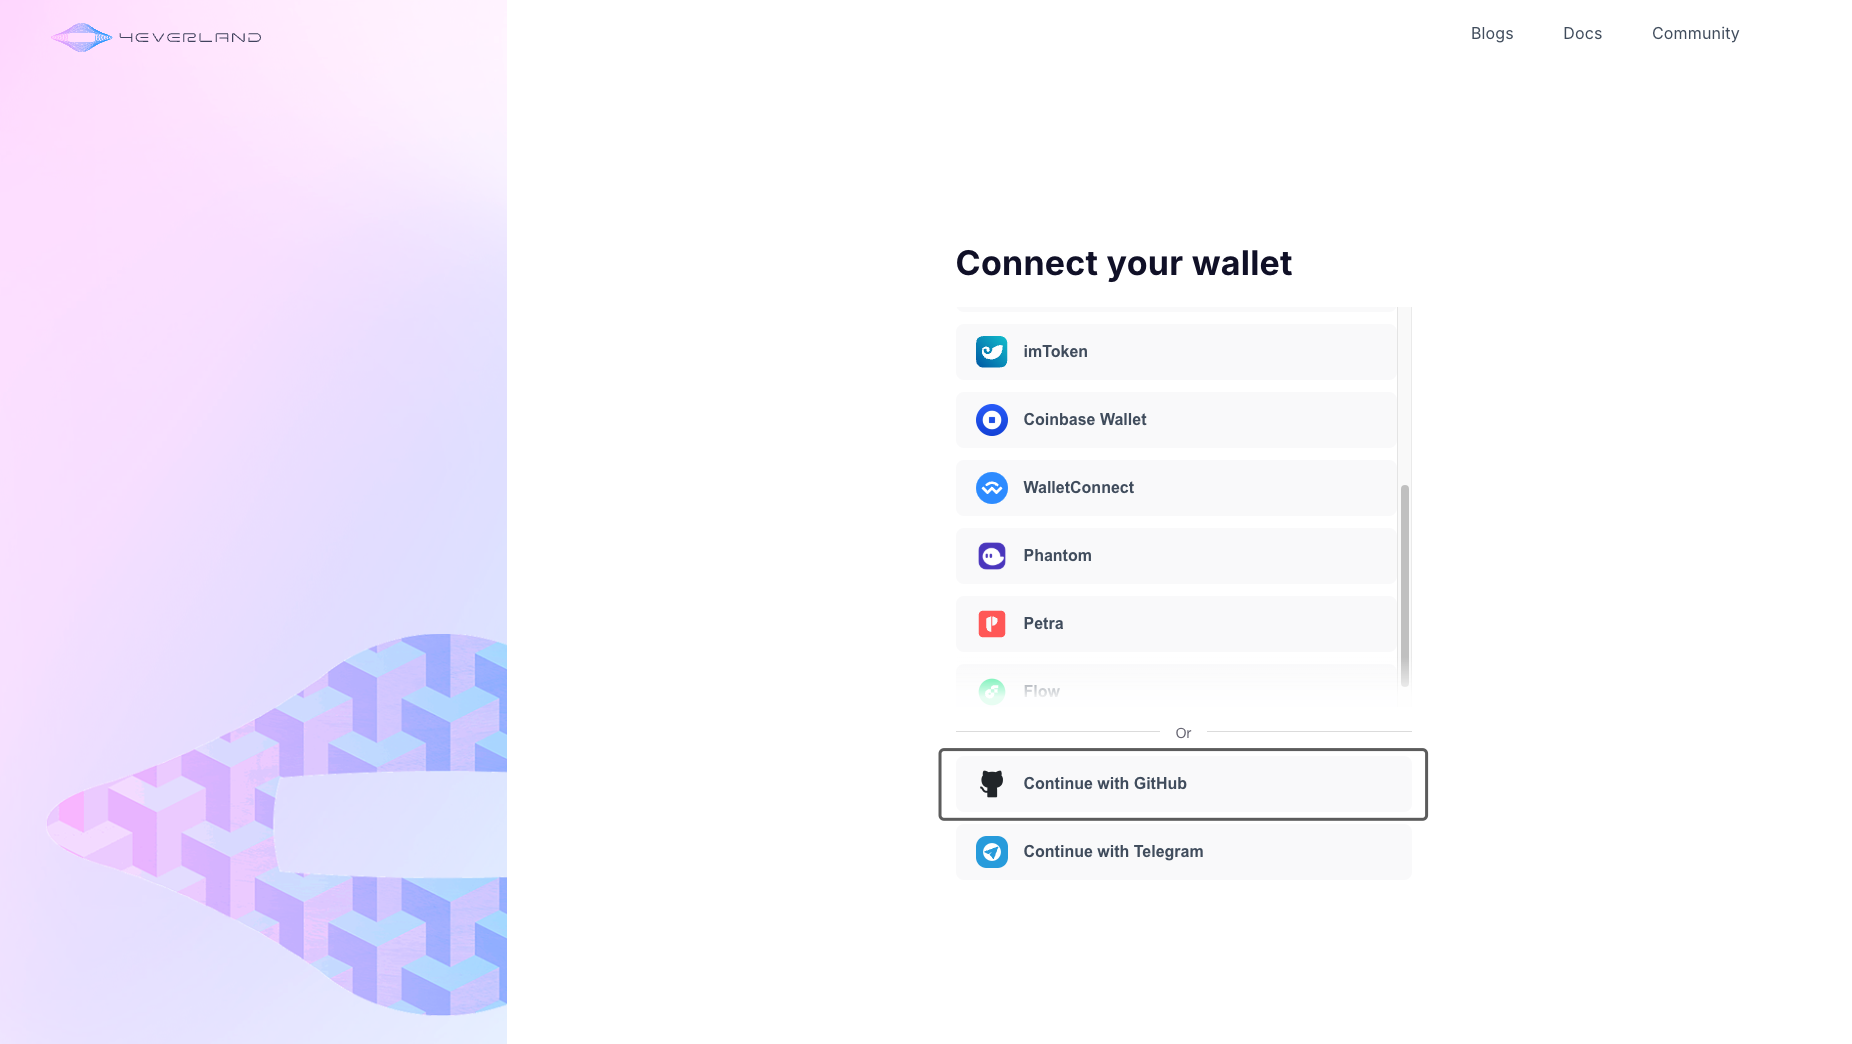
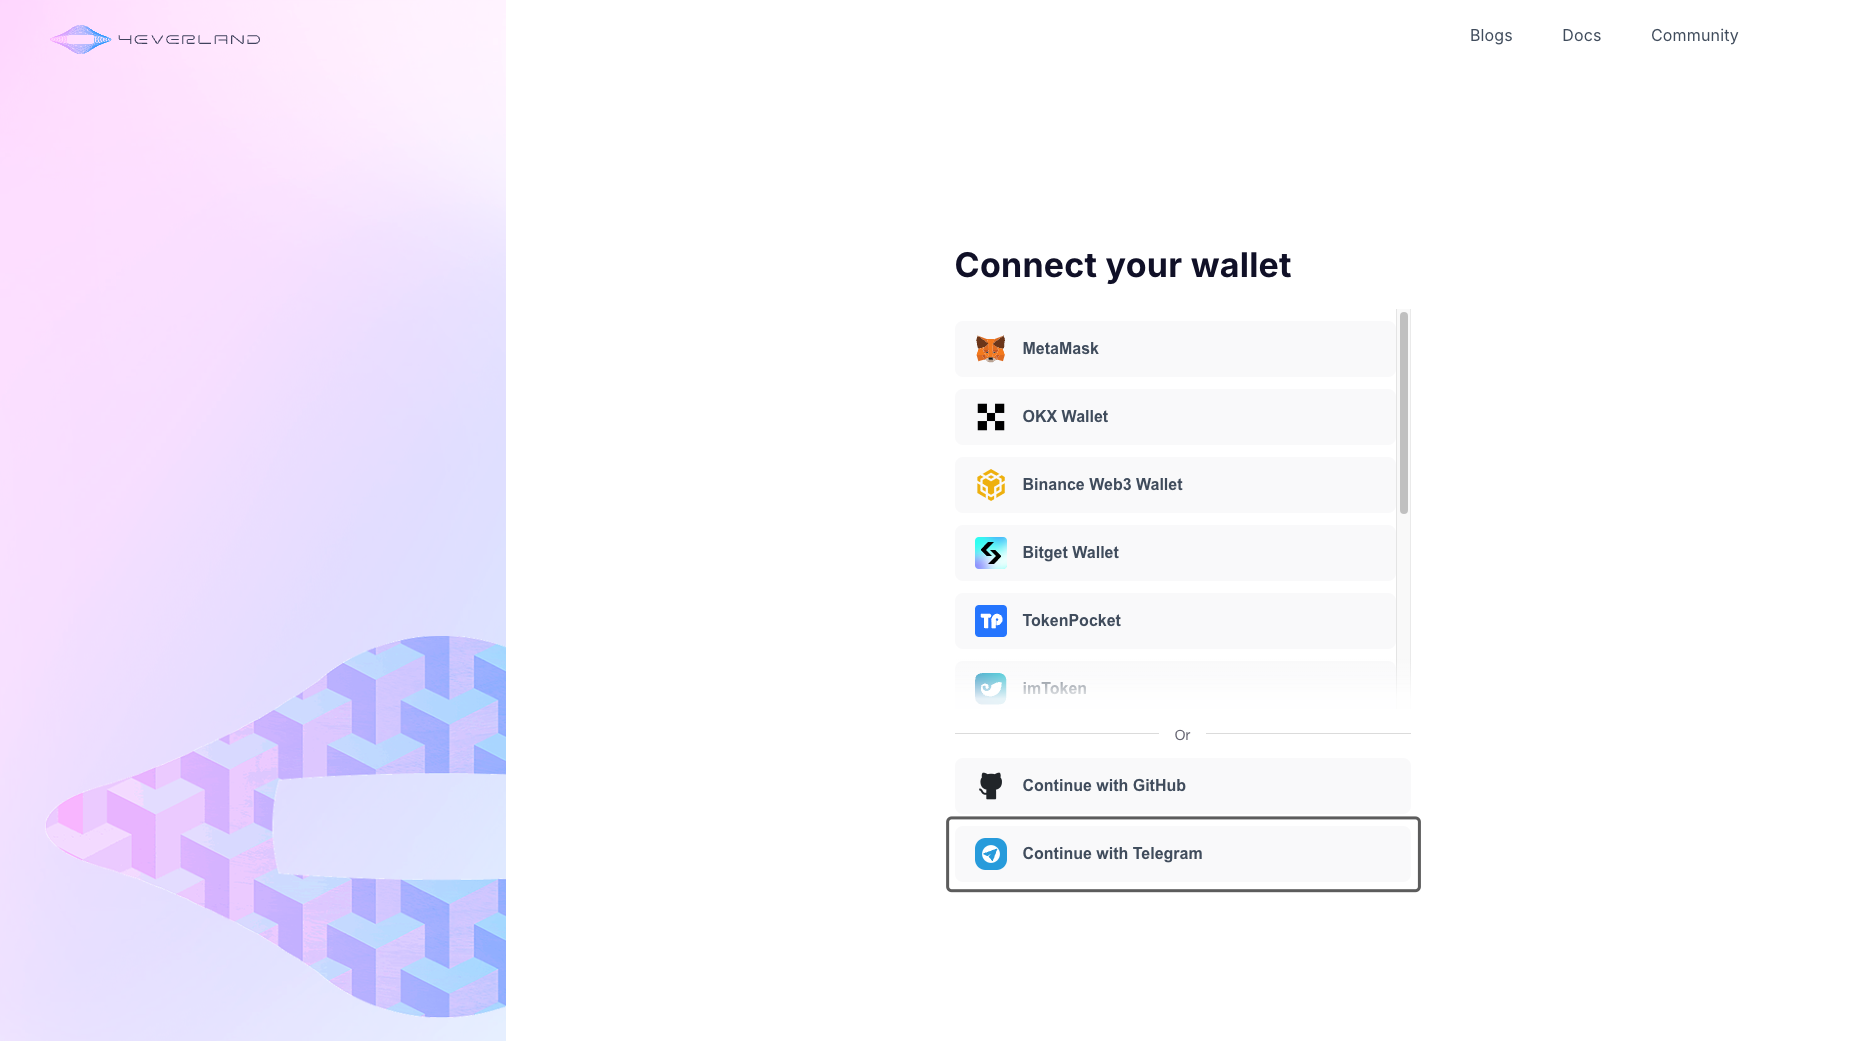
Github registration for new users is not currently supported. If you are an early registered member, please link your Github account to 4EVRLAND by doing the following:

Click to 'Continue with Github'.

<figure><img src="/files/q77X55vZhn6kIdW2sAPw" alt=""><figcaption></figcaption></figure>

Sign in to your Github account on the pop-up page.

<figure><img src="/files/7VbvYBbiTN5Rufqrf5oI" alt=""><figcaption></figcaption></figure>

## Telegram login

When users log in with Telegram, 4EVERLAND will first attempt to connect to your Telegram account. Click 'Continue with Telegram' and then select 'Log in as UID' in the pop-up window.

<figure><img src="/files/JUaMbbBA5Afpmb4I2Sar" alt=""><figcaption></figcaption></figure>

Now you have successfully logged into 4EVERLAND, and you will be redirected to the Dashboard page, please read the '[Usage Introduction](/get-started/quick-start-guide/usage-introduction)' page to find out how the Dashboard works.

{% hint style="info" %}
For more on InfoSec, please check out the page [Security](/more/security).
{% endhint %}


# MetaMask

Metamask login

MetaMask is a global community of developers and designers dedicated to making the world a better place with blockchain technology. Please click on the following [website](https://metamask.io/) to download and install the program.

<figure><img src="/files/I0GSlSJ6GZGx0hIQXHTB" alt=""><figcaption></figcaption></figure>

Choose the platform you want to install on, if you choose to install on Chrome, the website will direct you to the Chrome Web Store.

<figure><img src="/files/F10Axdnv0FLkRTaEvef4" alt=""><figcaption></figcaption></figure>

Click to 'Add to Chrome'.

<figure><img src="/files/maWkXsOcR4XLeFvClvlm" alt=""><figcaption></figcaption></figure>

Click on 'Get started' when the installation is complete.

<figure><img src="/files/pGGD4xircXeWEFxEYaNH" alt=""><figcaption></figcaption></figure>

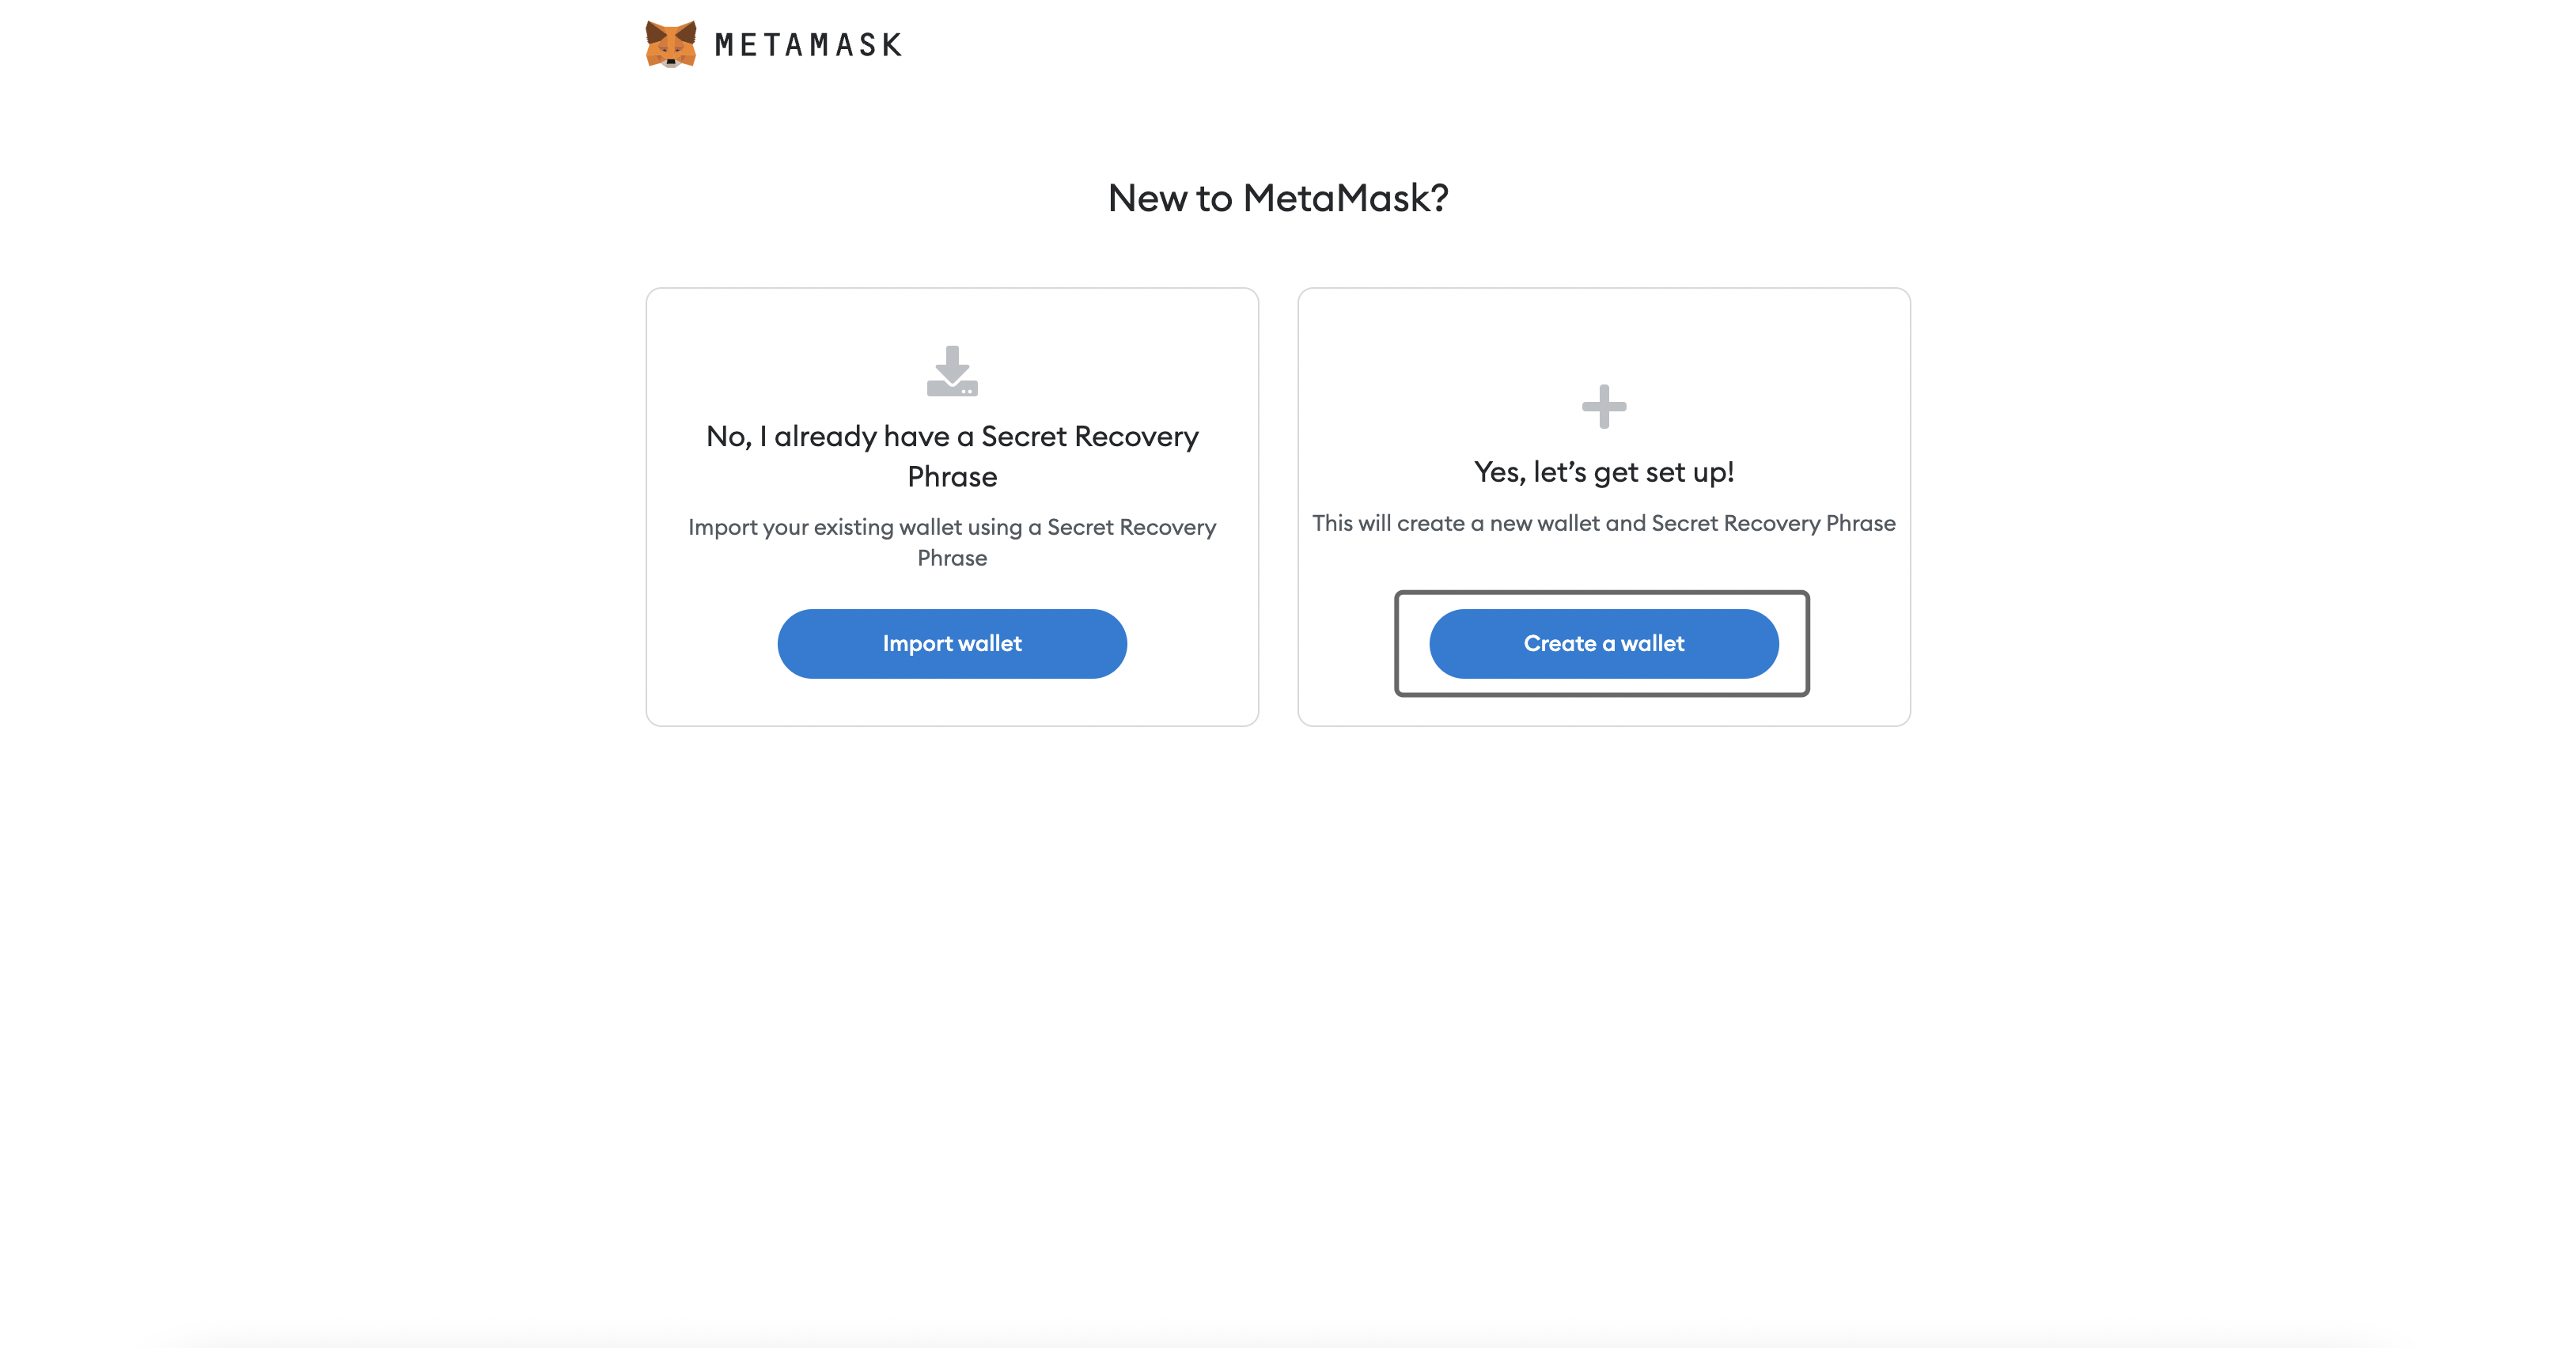
New to the area? Click on 'Create a wallet'.

<figure><img src="/files/X3NSuvzp70wmk2OHVlAv" alt=""><figcaption></figcaption></figure>

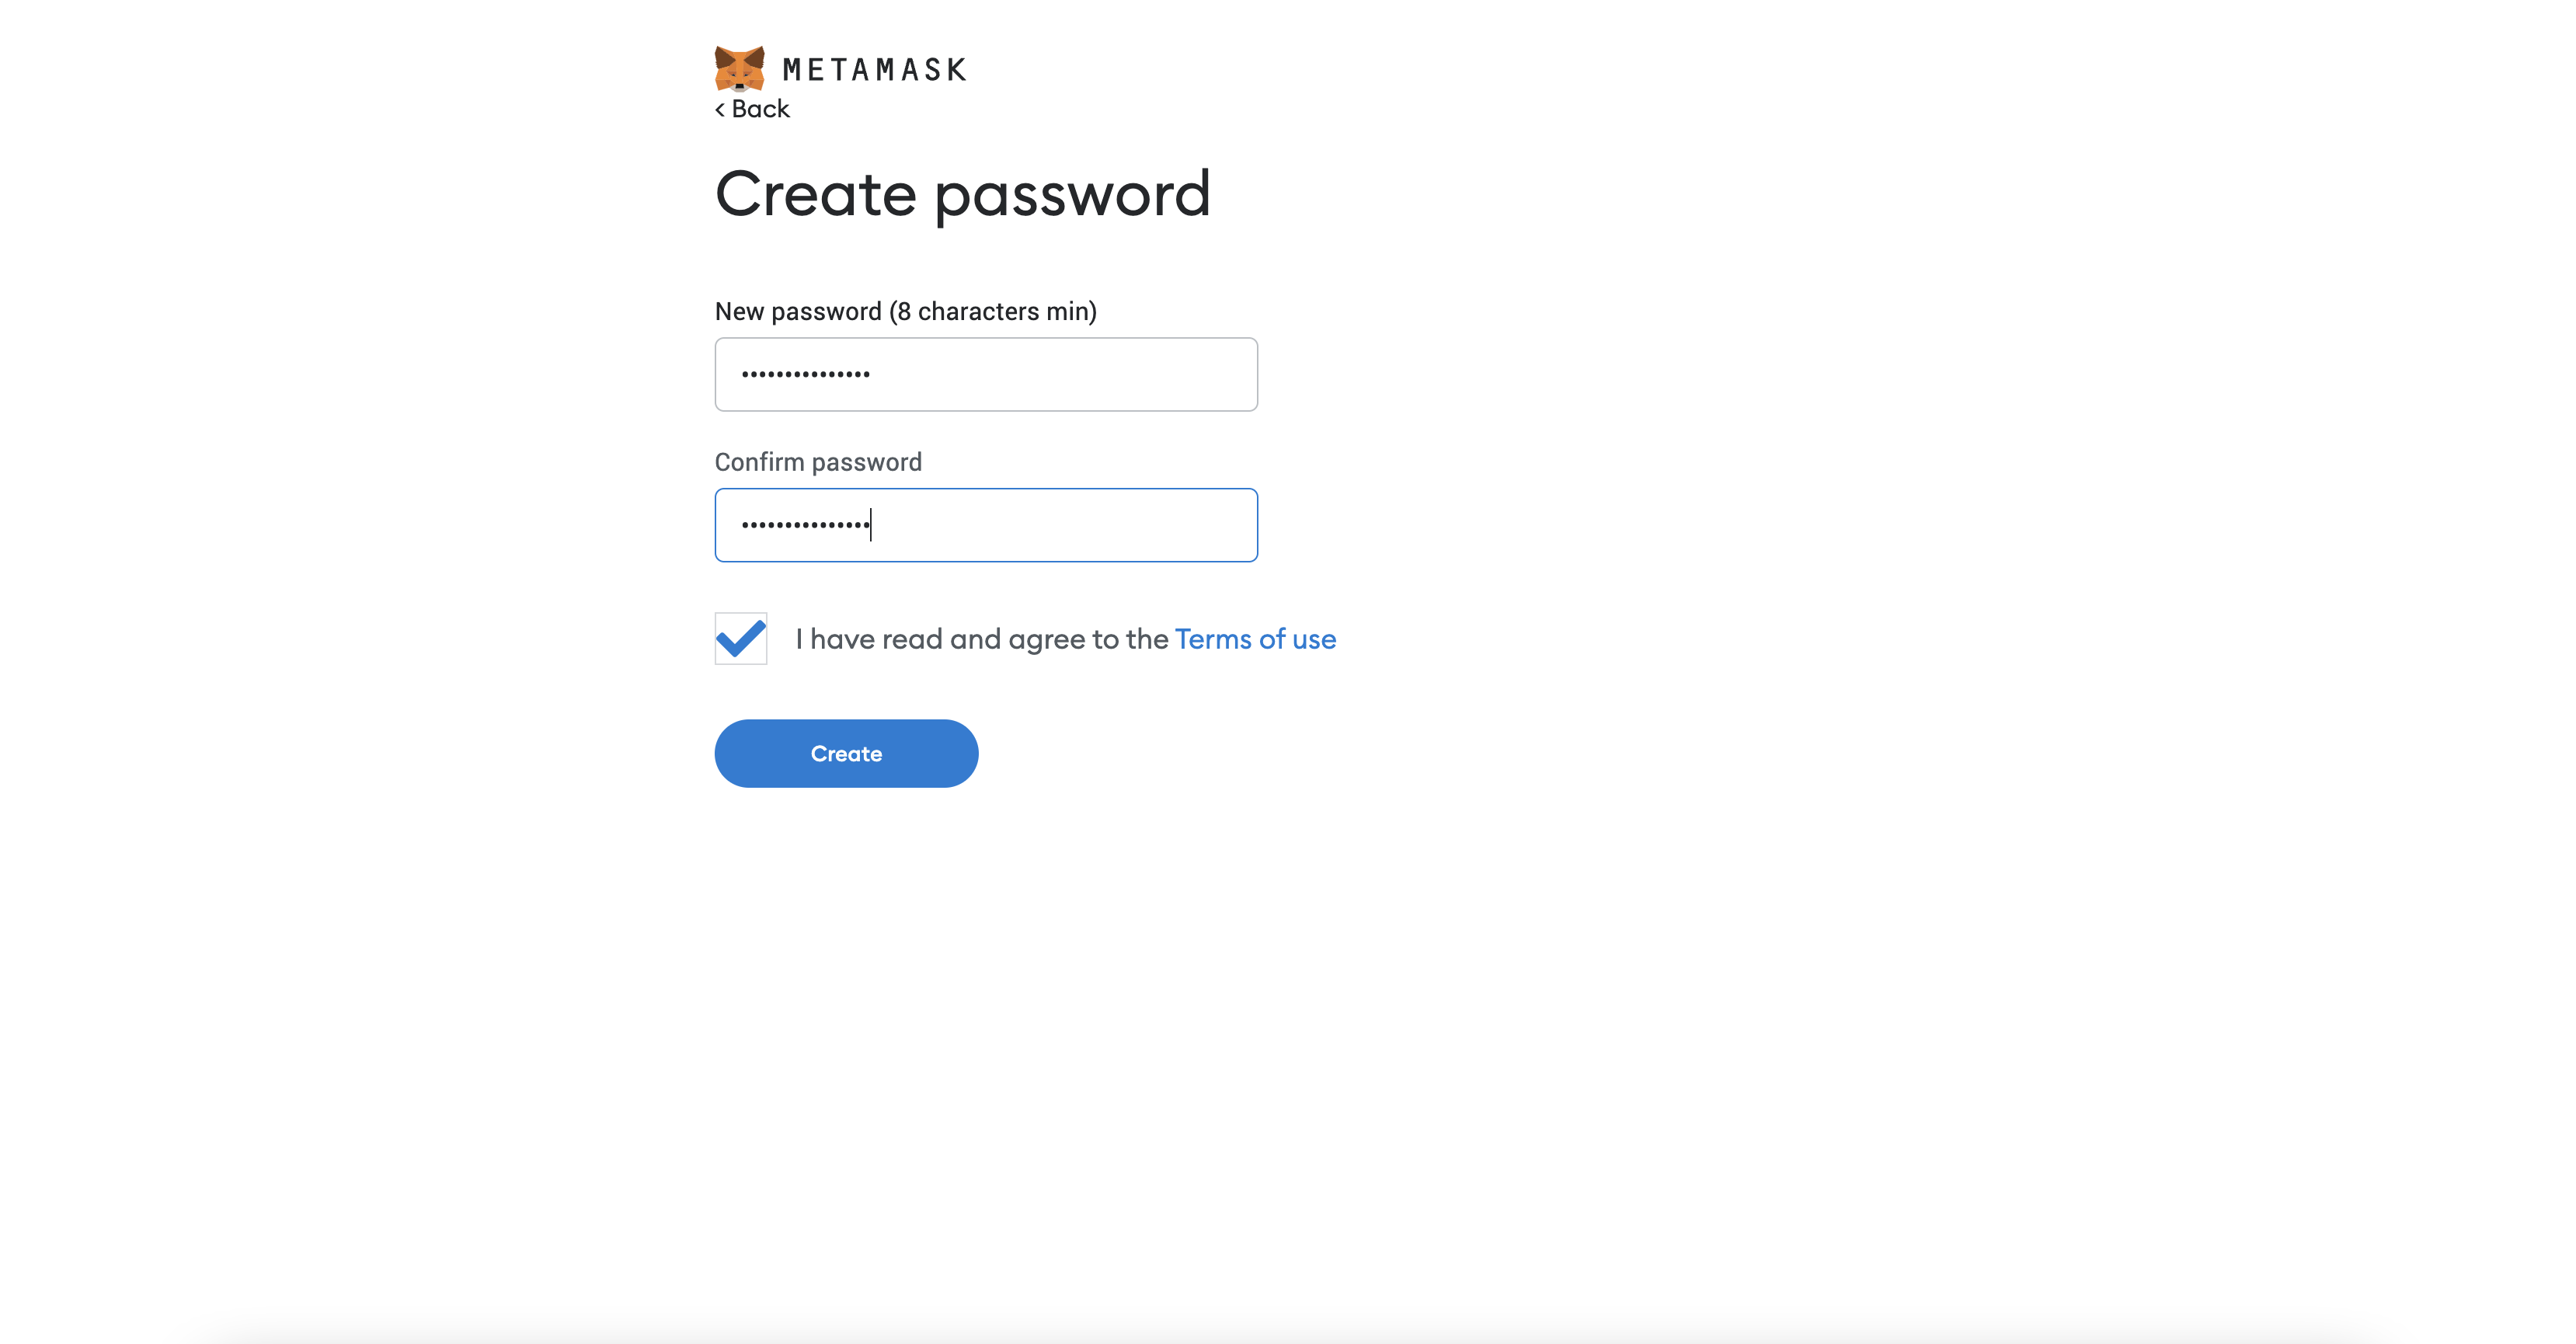
Enter the password to access the wallet and click 'Create'.

<figure><img src="/files/41aTAb9MucjDpkUFpba5" alt=""><figcaption></figcaption></figure>

Please read the relevant tutorial video carefully and click 'Next'.

<figure><img src="/files/OYhebtsoYfBMzYxvvDnI" alt=""><figcaption></figcaption></figure>

Record and back up any random keys that appear, it's the only proof you have to retrieve your wallet!

<figure><img src="/files/dhvRKKBuKkSEFOBkCmIF" alt=""><figcaption></figcaption></figure>

Enter the keys in order until the following page appears and click on 'All done'.

<figure><img src="/files/2mp8cz2mACEvsJ7dpBMB" alt=""><figcaption></figcaption></figure>

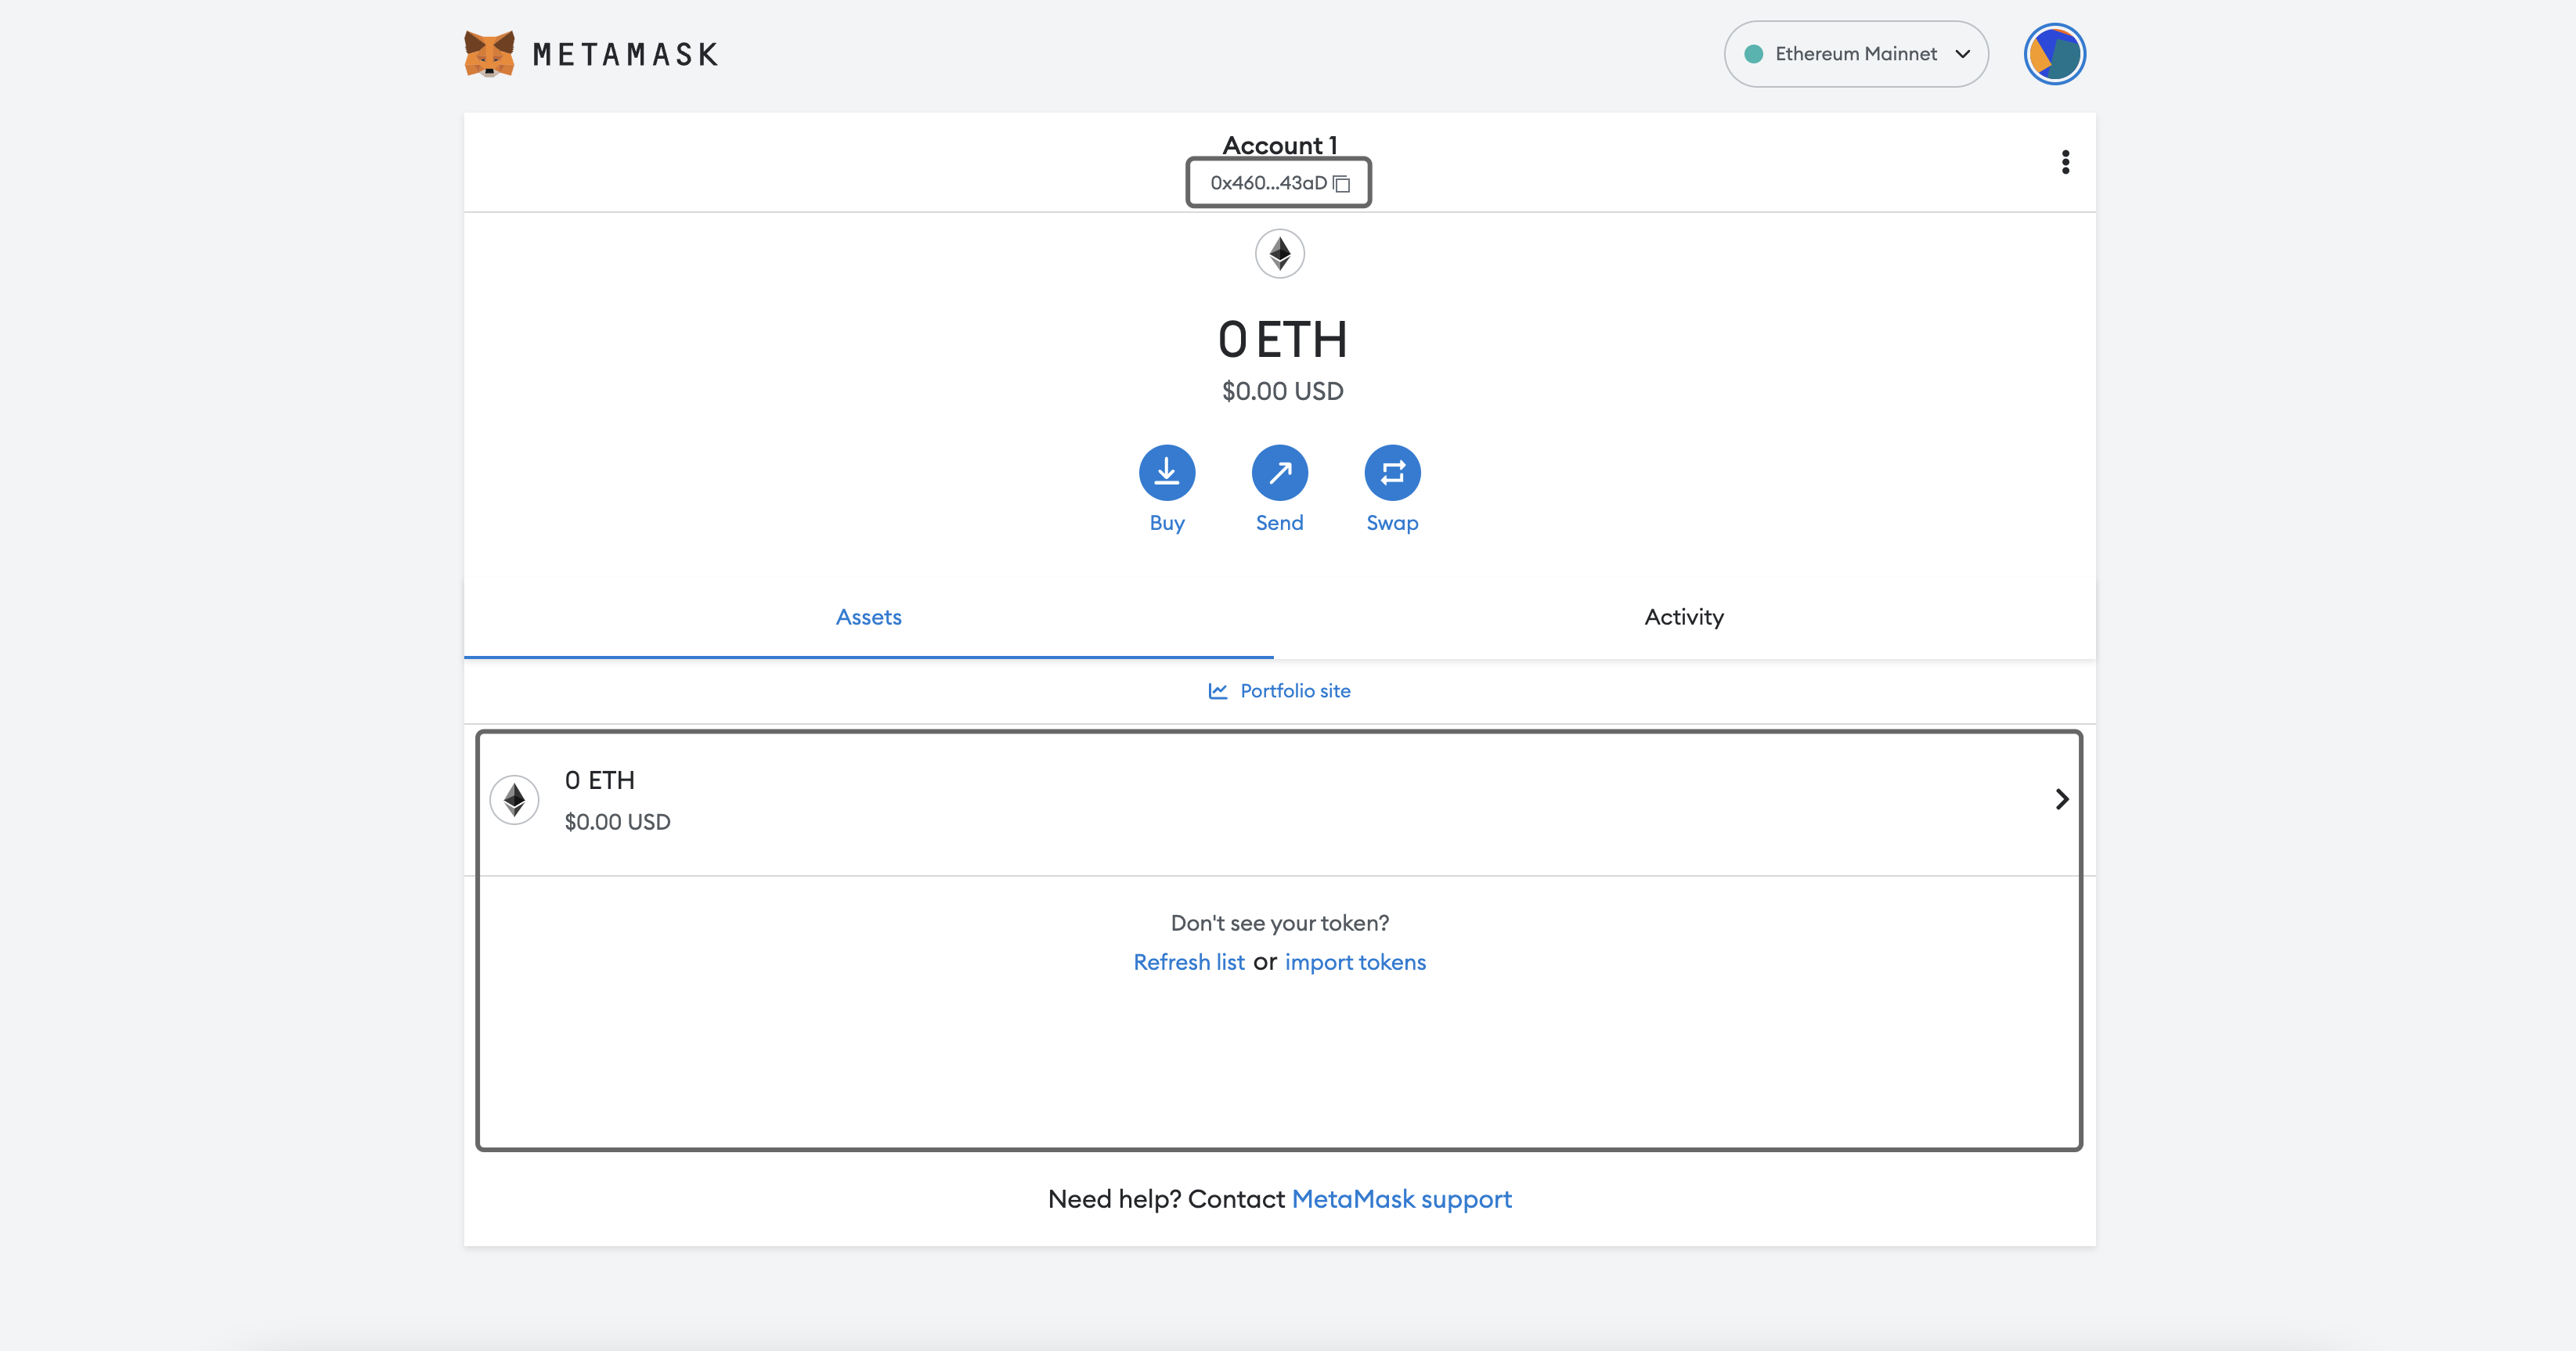
Congratulations, you've created your first Web3 wallet! Please note your wallet address as well as your assets.

<figure><img src="/files/RyU56zeXOdrswApCT4gY" alt=""><figcaption></figcaption></figure>

Finally, please pin the program to the Chrome Extensions for next time.

<figure><img src="/files/nu2shX17Ce7Br8B5mfPK" alt=""><figcaption></figcaption></figure>

For more information on how to use MetaMask, please visit the official [MeraMask support](https://metamask.zendesk.com/hc/en-us/).


# OKX Wallet

[OKX Wallet](https://www.okx.com/web3) is a multi-platform (mobile/web/extension) universal crypto wallet.

<figure><img src="/files/weEOQvP5aWnJTw5cuYOT" alt=""><figcaption></figcaption></figure>

Click on Install on the following page, the website will direct you to the Expansion Store.

<figure><img src="/files/VFqUGA0DTZLxF6xzo7yl" alt=""><figcaption></figcaption></figure>

Now, click 'Add to Chrome'.

<figure><img src="/files/aRXacCEm4IBQ53KT8daE" alt=""><figcaption></figcaption></figure>

Click on 'Create a wallet'.

![](/files/UTYVdc8AatjXwNqVF96o)

Set your password.

![](/files/KQ5GZwatnehoNvcqRhzv)

The process has been successful and please remember to back up your wallet.

![](/files/csbRTG2QAYZlPugSrxCR)

For more information on how to use OKX Wallet please visit the official [Documention](https://www.okx.com/web3-docs/introduction.html).&#x20;


# Binance Web3 Wallet

## What is Binance Web3 Wallet?

Binance Web3 Wallet is a self-custody crypto wallet within the Binance app, designed to empower users in the realm of decentralized finance (DeFi). Serving as a digital gateway to blockchain-based applications (dApps), it offers users a secure and streamlined method to manage their cryptocurrencies, execute token swaps across multiple chains, earn yields, and interact with a variety of blockchain platforms.

[Learn More](https://www.binance.com/support/faq/048ee79532494c03918dc4004214ad11)

## What are the benefits of using Binance Web3 Wallet?

Binance Web3 Wallet is the easiest way to get involved with Web3. It offers users a secure and streamlined method to manage their cryptocurrencies, execute token swaps across multiple chains, earn yields, and interact with a variety of blockchain platforms.

* Simple:  Create a wallet in seconds using your Binance app without having to worry about seed phrases or private keys.
* Convenient:  With integration to Binance Bridge and other providers, Web3 wallet fosters easy cross-blockchain token swaps at better prices. You can explore dApps and generate yield effortlessly with a single click.
* Secure:  MPC (multi-party computation) technology governs every transaction and mitigates single points of failure to ensure that your assets are SAFU.

## Setting up the Web3 Wallet <a href="#id-437e" id="id-437e"></a>

1. Web3 wallet is part of the Binance app, open your Binance app on your cellphone. If you don’t have the app, you can download it for Android PlayStore or iOS AppStore.
2. Sign-in to your Binance account. Once you’re on the home page, tap the ‘Wallet’ tab in the bottom right.
3. On the top of your wallet, you’ll see two options ‘Exchange’ and ‘Web3’. Exchange is the default option. Tap ‘Web3’.
4. Now tap the ‘Create Wallet’ button.
5. Within a few seconds, your Binance web3 wallet will be created.
6. Once the wallet is created, you’ll be asked to backup your wallet. Do that by clicking ‘Back Up Now’.
7. You can back up to the cloud or back up through QR code. Choose the type of back up you want to do and complete the process.

## **Connecting Binance Web3 Wallet to 4EVERLAND** <a href="#id-913b" id="id-913b"></a>

Click ‘Binance Web3 Wallet’ and a QR code will be displayed on the screen

<figure><img src="/files/wIkp3PFSMA43ZMc4RblR" alt=""><figcaption></figcaption></figure>

Use the QR scanner option on the top-left corner of the Binance wallet to scan the code. Then your Binance Web3 wallet is connected to 4EVERLAND.<br>


# Bitget Wallet

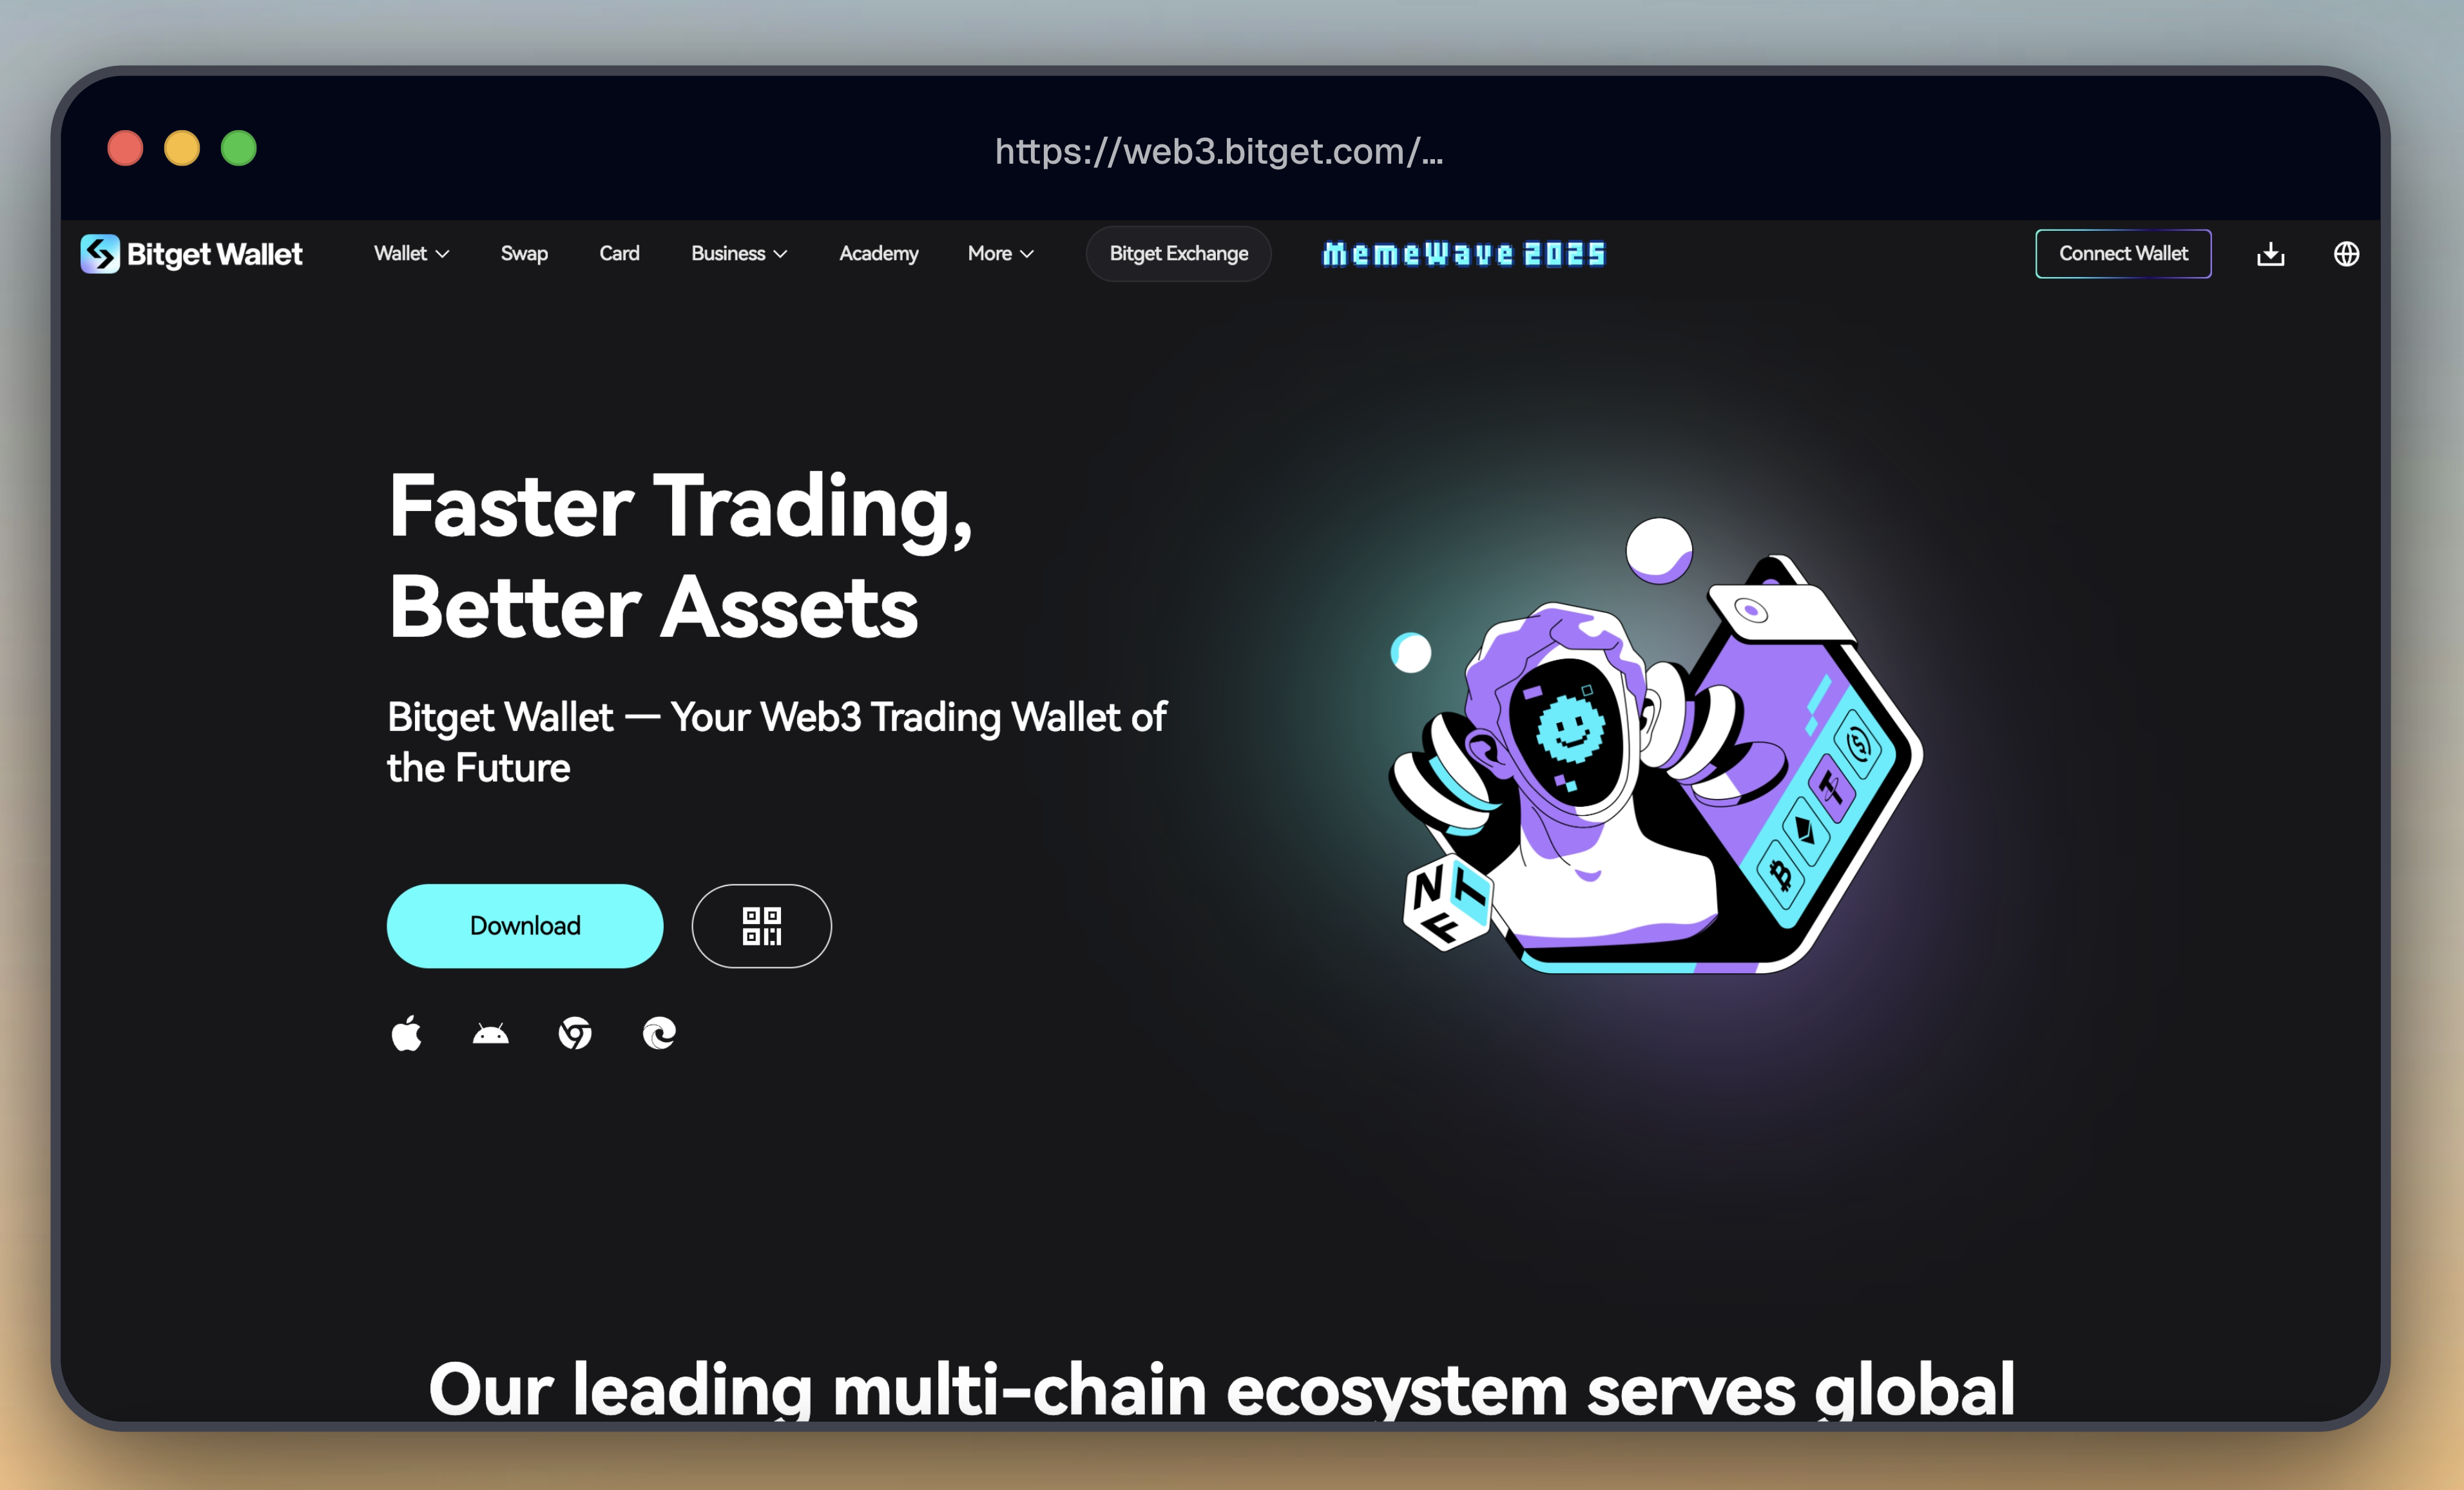
Bitget Wallet is a secure digital wallet that allows you to store, manage, and trade various types of cryptocurrencies. It offers a user-friendly interface, robust security features, and seamless integration with leading cryptocurrency exchanges. With Bitget Wallet, you can easily access your digital assets, track your portfolio, and make transactions with just a few clicks.

<figure><img src="/files/eomkQ8F3D6eKqkZZkwau" alt=""><figcaption></figcaption></figure>

## Features of Bitget Wallet

* **Multi-Currency Support**: Bitget Wallet supports a wide range of cryptocurrencies, allowing you to store and manage multiple digital assets in one place.
* **Security**: Bitget Wallet employs advanced security protocols to ensure the safety of your funds and transactions. Your private keys are encrypted and stored securely on your device.
* **Trading**: With Bitget Wallet, you can easily trade cryptocurrencies on top exchanges without leaving the platform. It offers seamless integration with leading exchanges, allowing you to make trades quickly and efficiently.
* **Portfolio Tracking**: Bitget Wallet provides real-time portfolio tracking tools that help you monitor the performance of your investments and make informed decisions.

[**How to Set Up and Use Bitget Wallet?**](https://web3.bitget.com/en/academy/how-to-set-up-and-use-bitget-wallet)

## **Connecting Bitget Wallet to 4EVERLAND** <a href="#id-913b" id="id-913b"></a>

Click ' Gitget Wallet' and a QR code will be displayed on the screen

<figure><img src="/files/qI73IPmRlnPgMHVEfztr" alt=""><figcaption></figcaption></figure>

Scan this QR code with your mobile wallet or camera to get connected.


# Phantom

Phanton login

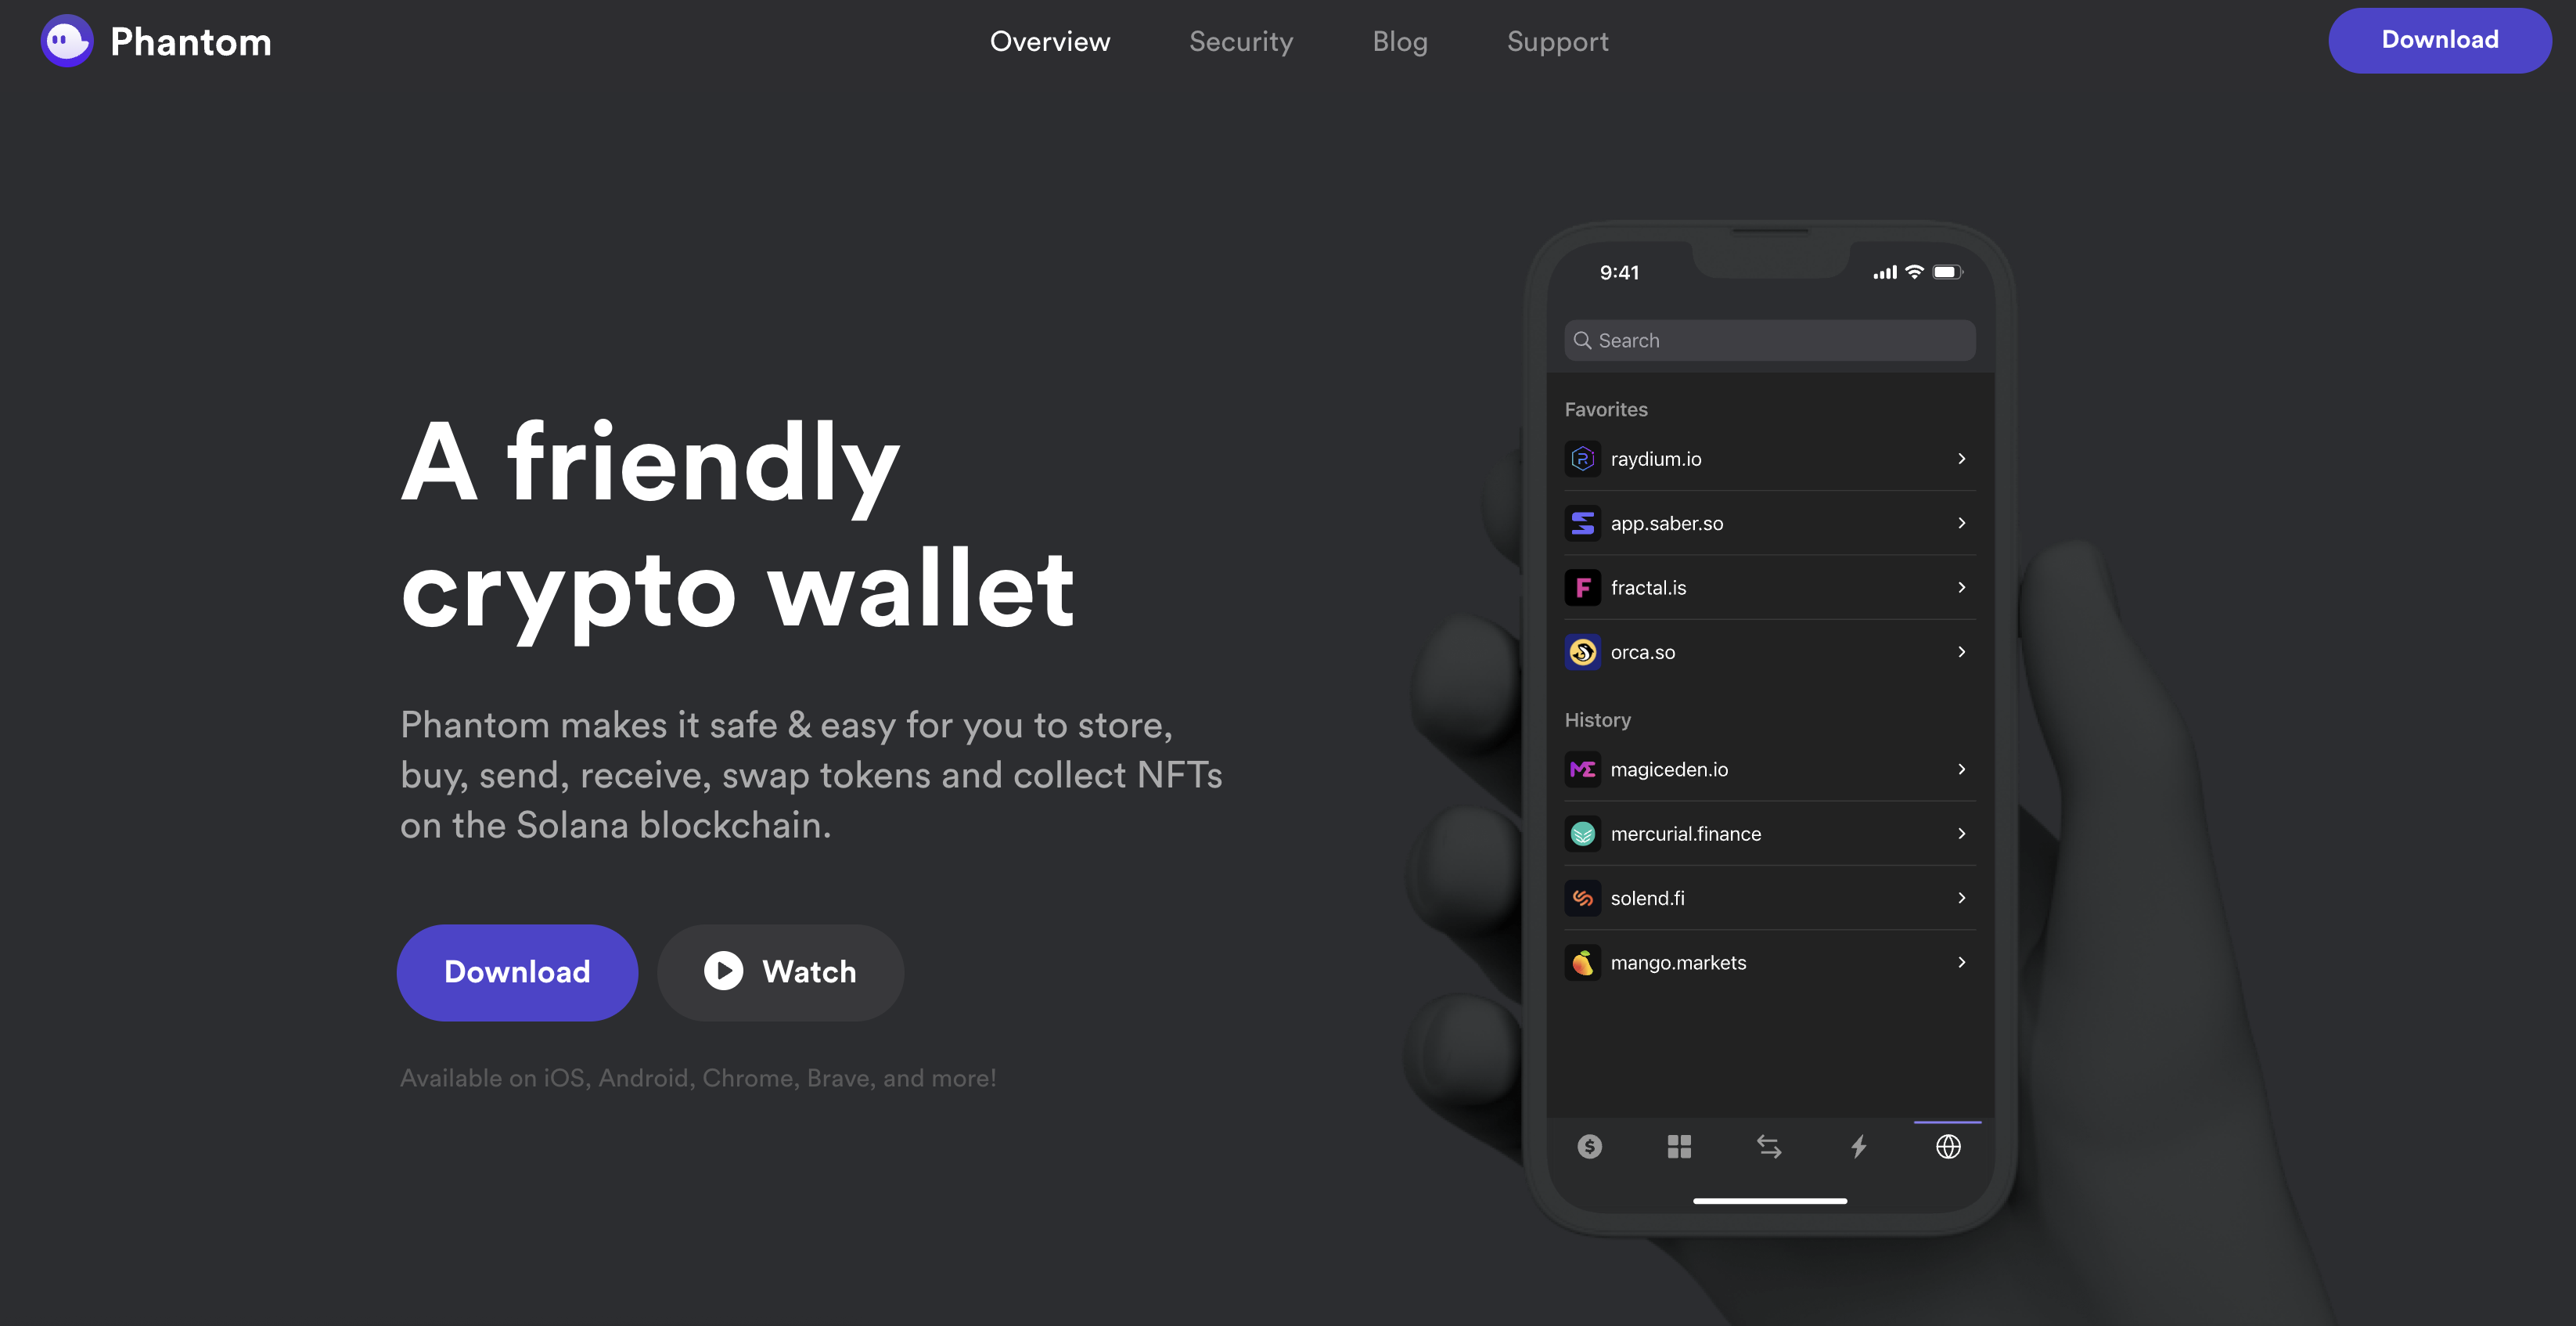
[**Phantom**](https://phantom.app/) is a crypto wallet that can be used to manage digital assets and access decentralized applications on the [Solana](https://solana.com/) blockchain.&#x20;

<figure><img src="/files/33cpeSzMM29RQucduTiX" alt=""><figcaption></figcaption></figure>

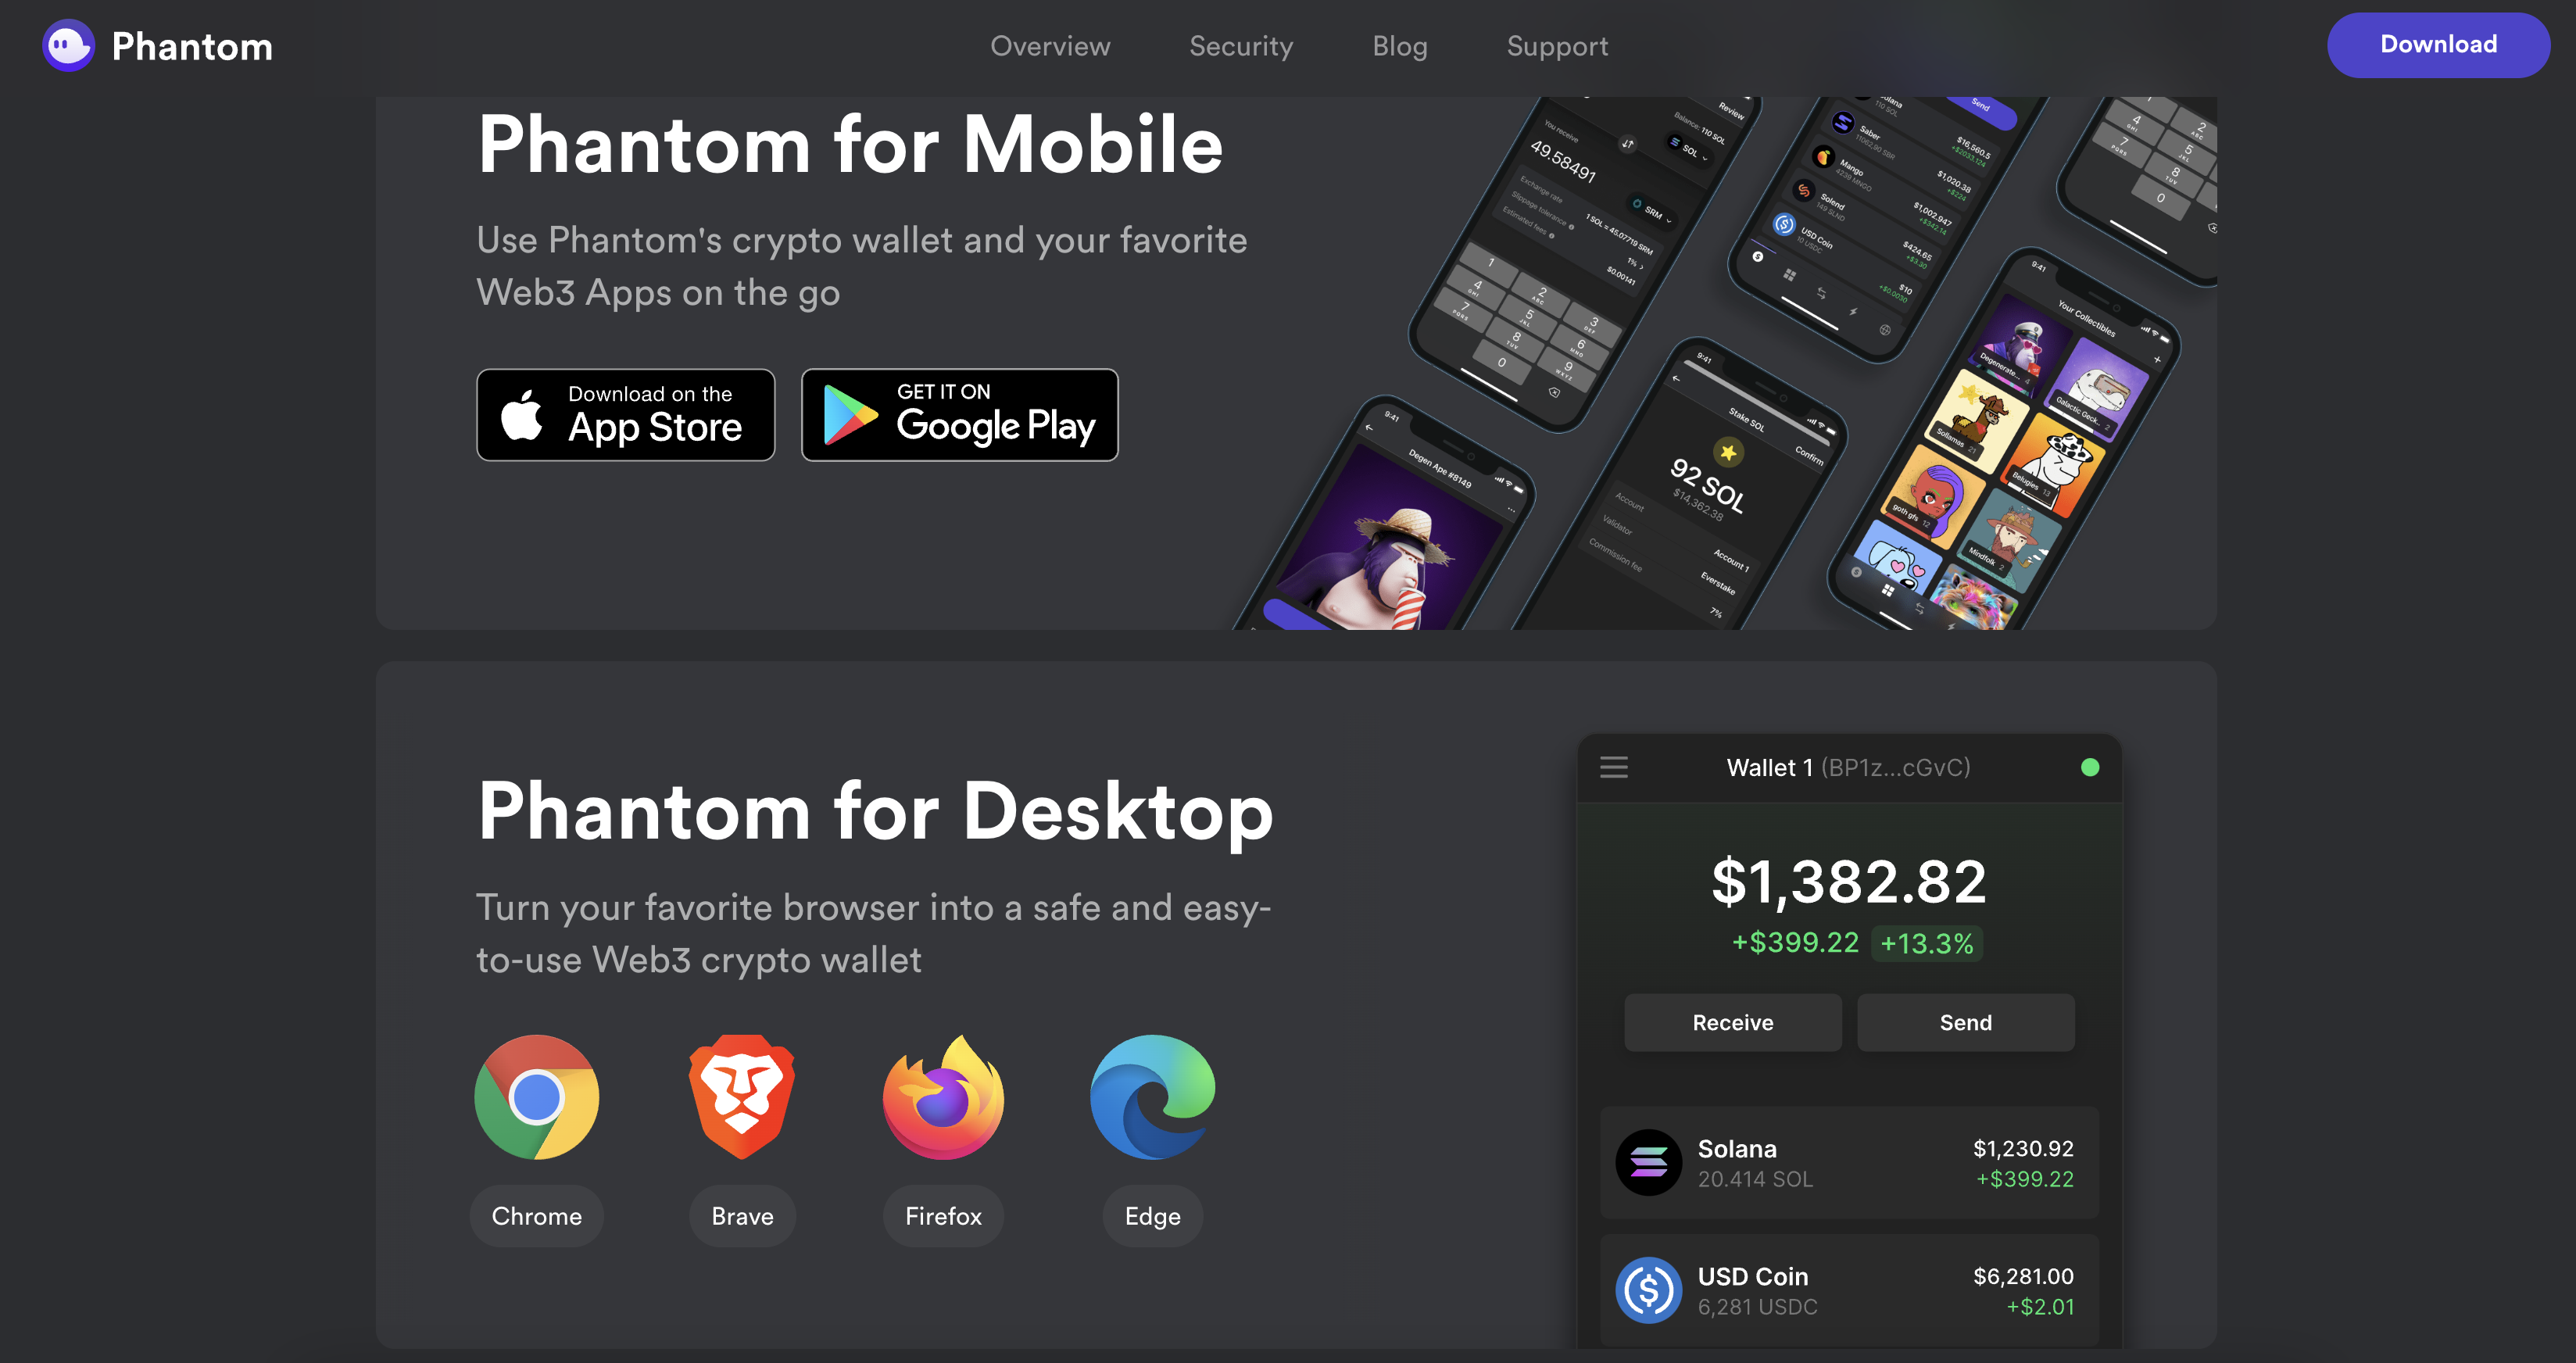
Again, select the platform you want to install and download the program. if you choose to install on Chrome, the website will direct you to the Chrome Web Store.

<figure><img src="/files/bWFewHbZ9qG39GXoNHIE" alt=""><figcaption></figcaption></figure>

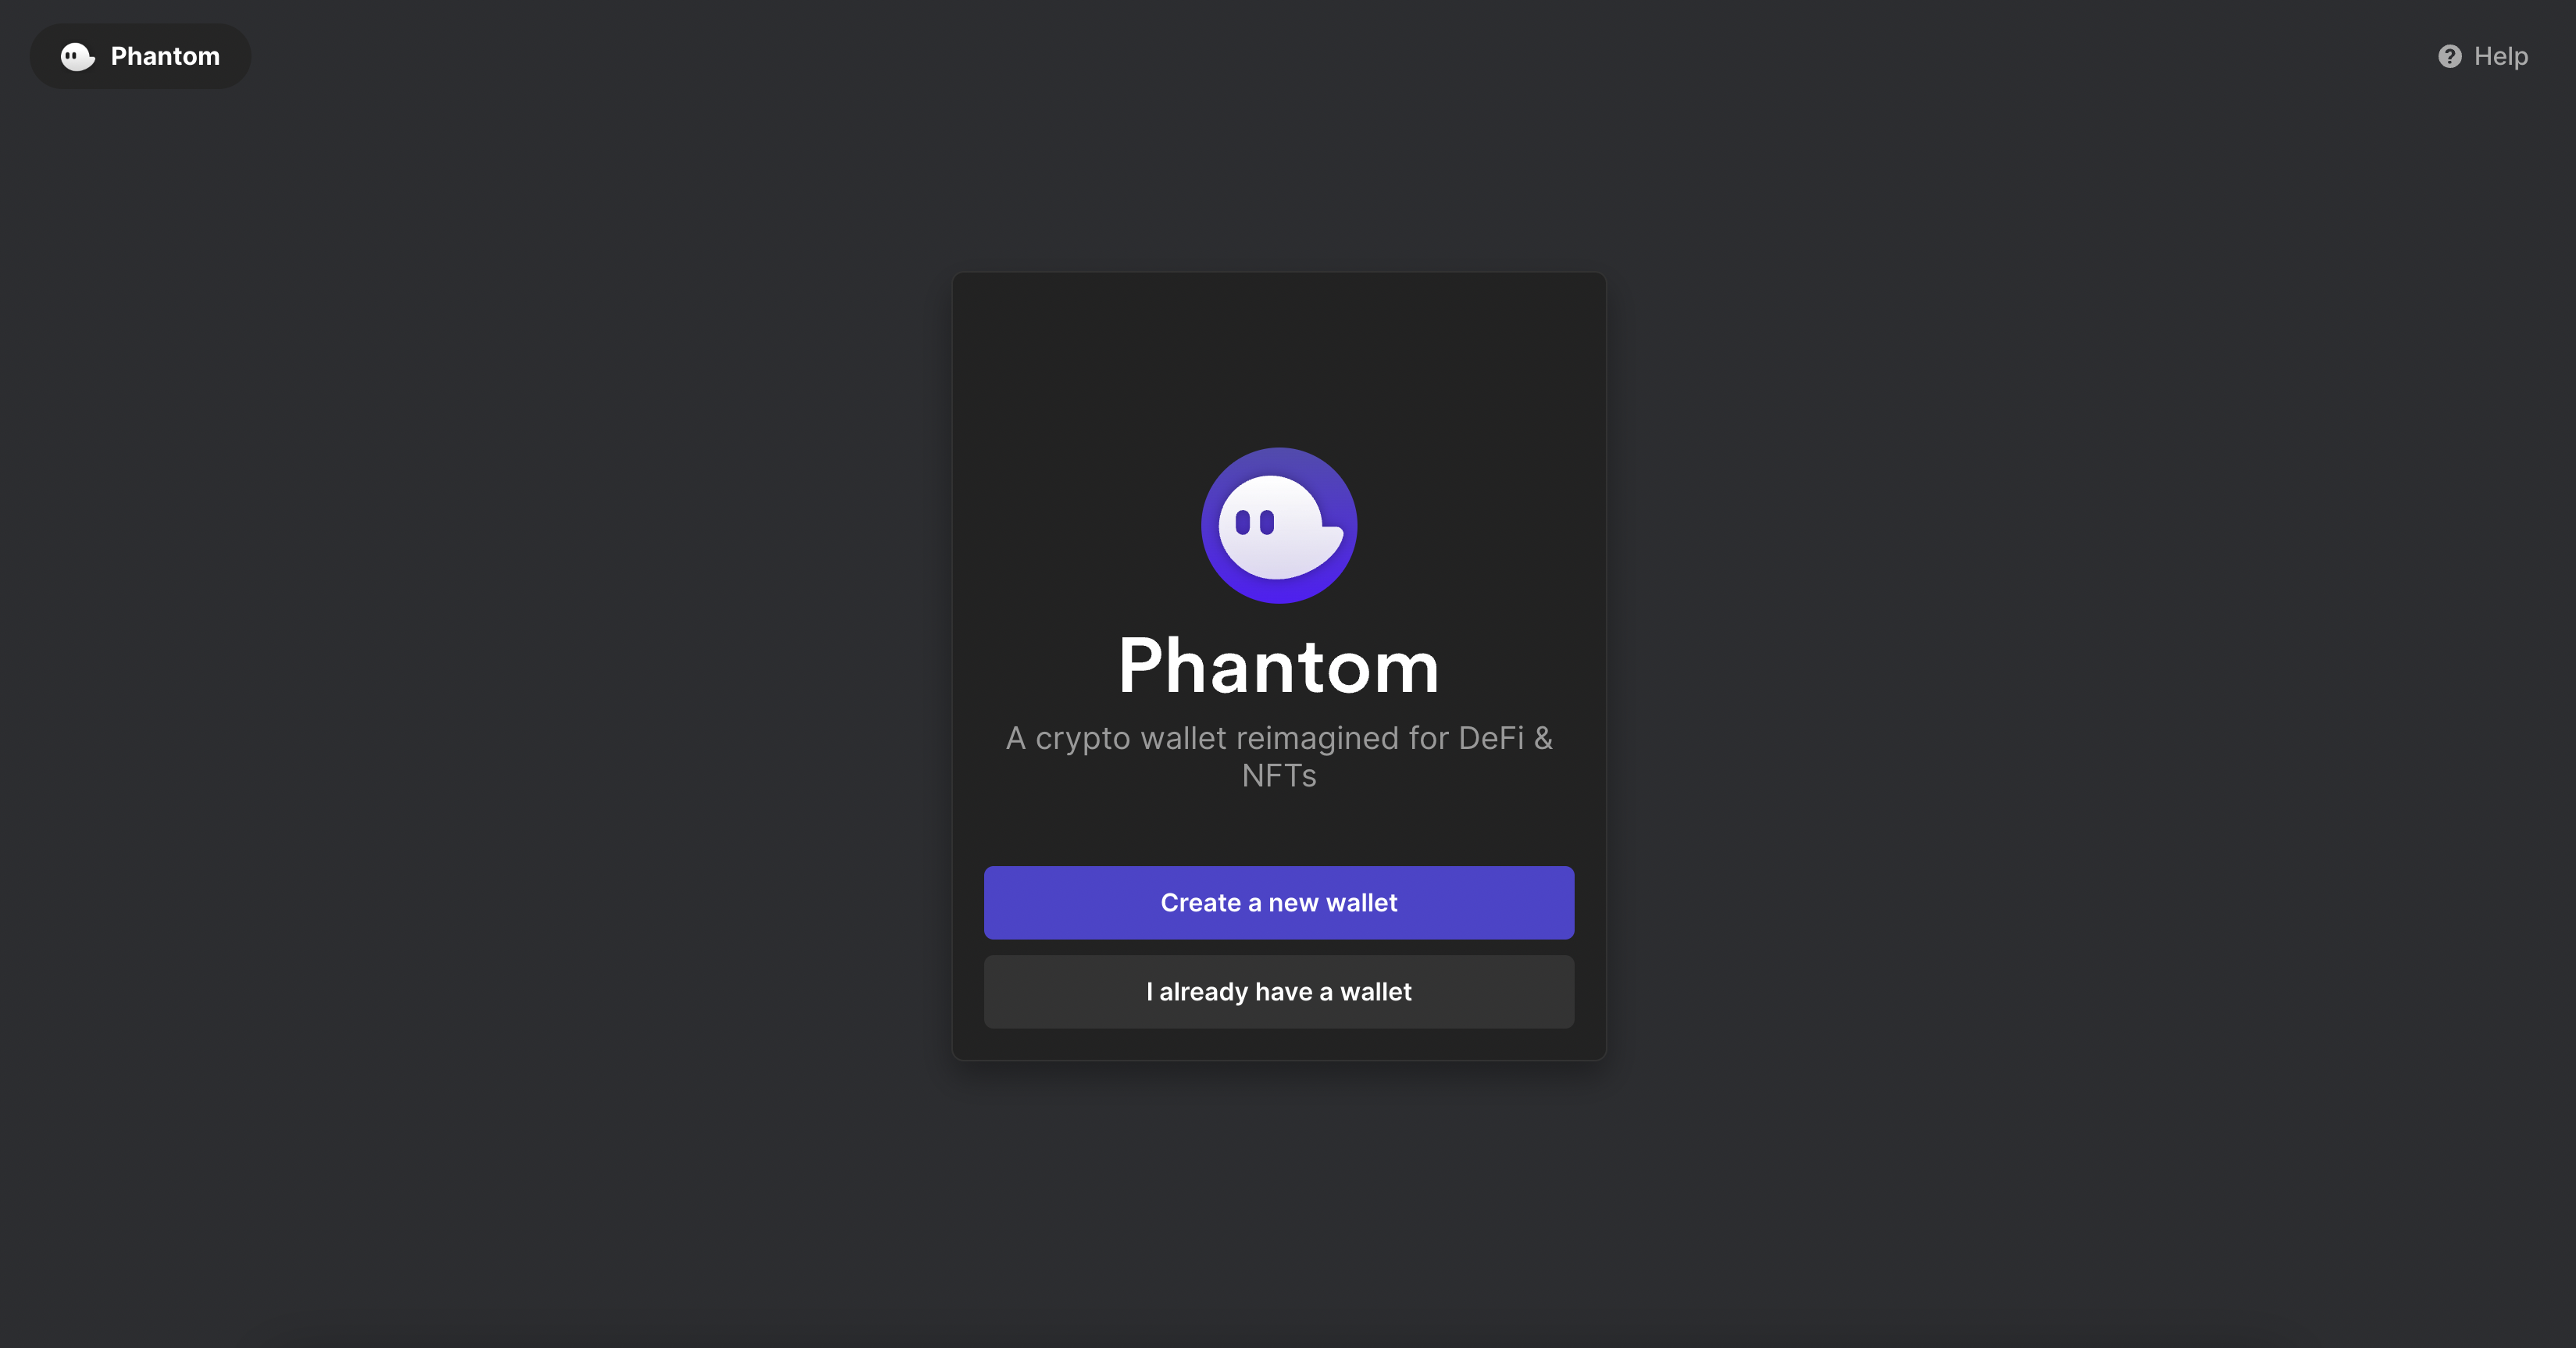
Click to 'Create a new wallet' to start using Phantom.

<figure><img src="/files/17PabrGoK07TmvkyBE2m" alt=""><figcaption></figcaption></figure>

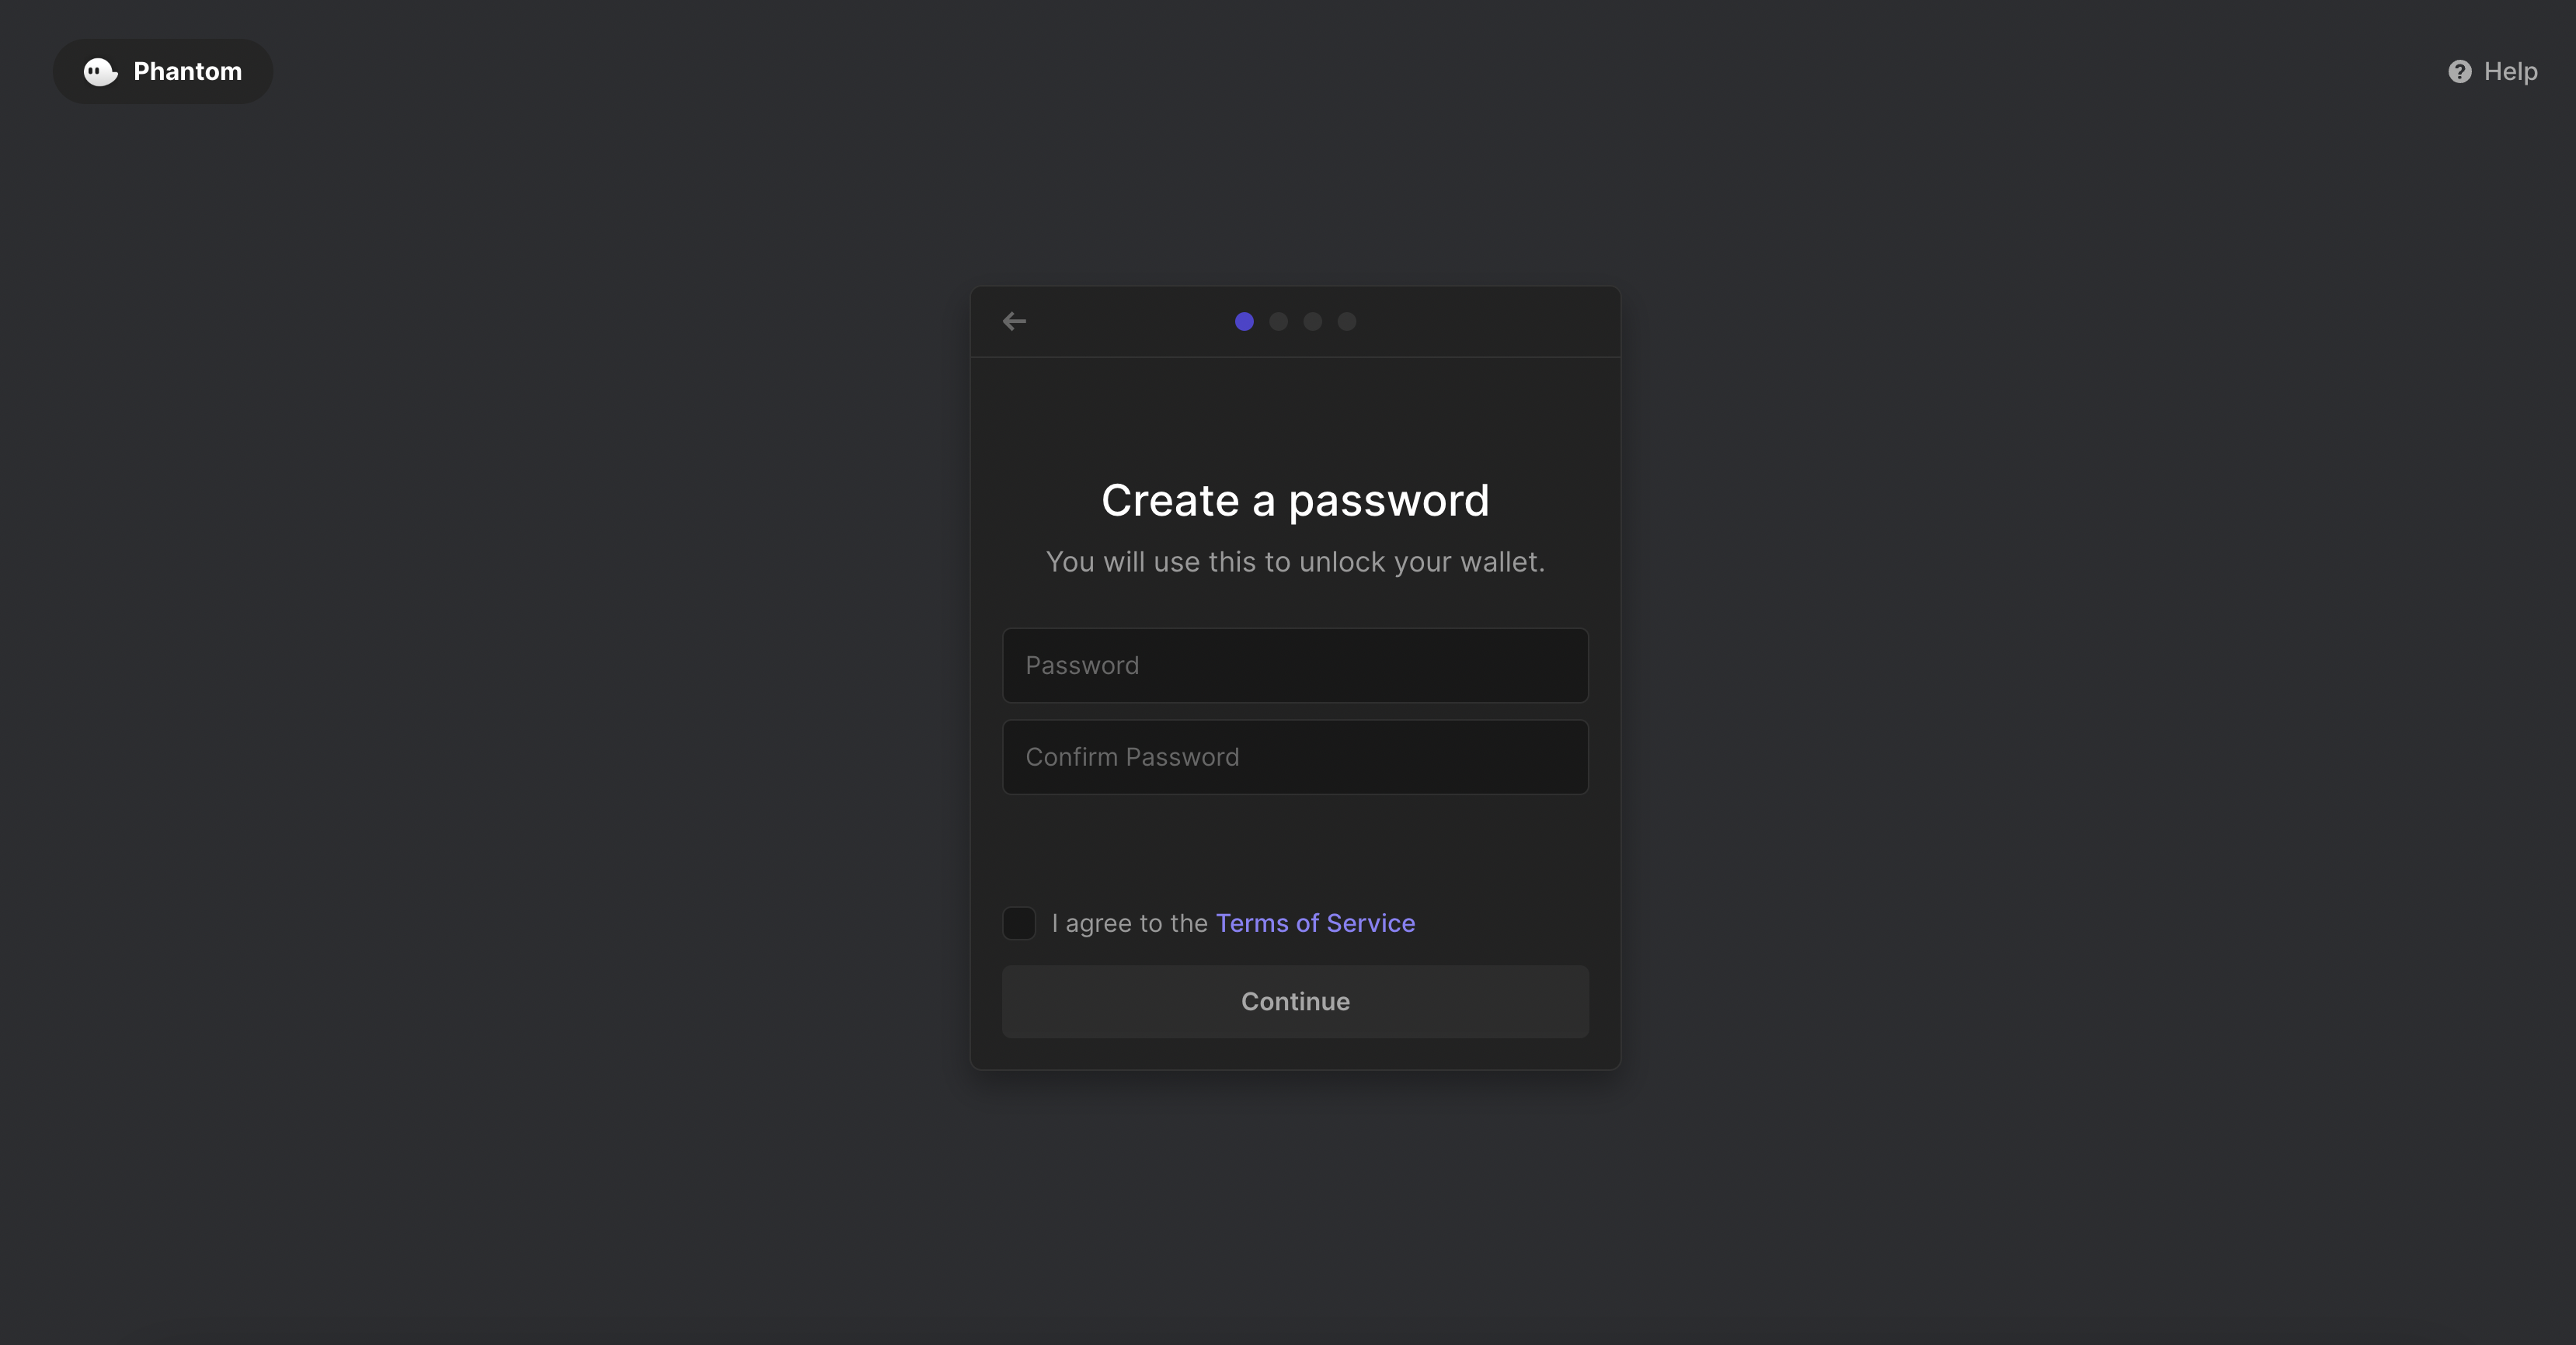
Enter the password to access the wallet and click 'Continue'.

<figure><img src="/files/4a5MXwZeTe3cmS03rpjK" alt=""><figcaption></figcaption></figure>

Record and back up any random keys that appear, it's the only proof you have to retrieve your wallet!

<figure><img src="/files/f2566Py2BFdNKgFVzotJ" alt=""><figcaption></figcaption></figure>

Congratulations, you've created your Phantom wallet! Please note your wallet address as well as your assets.

![](/files/byhU0zCGosrYwn6jtlZQ)

For more information on how to use Lilico please visit the official [Phantom Support](https://help.phantom.app/hc/en-us).


# Petra

[Petra](https://petra.app/) is a crypto wallet on Aptos.

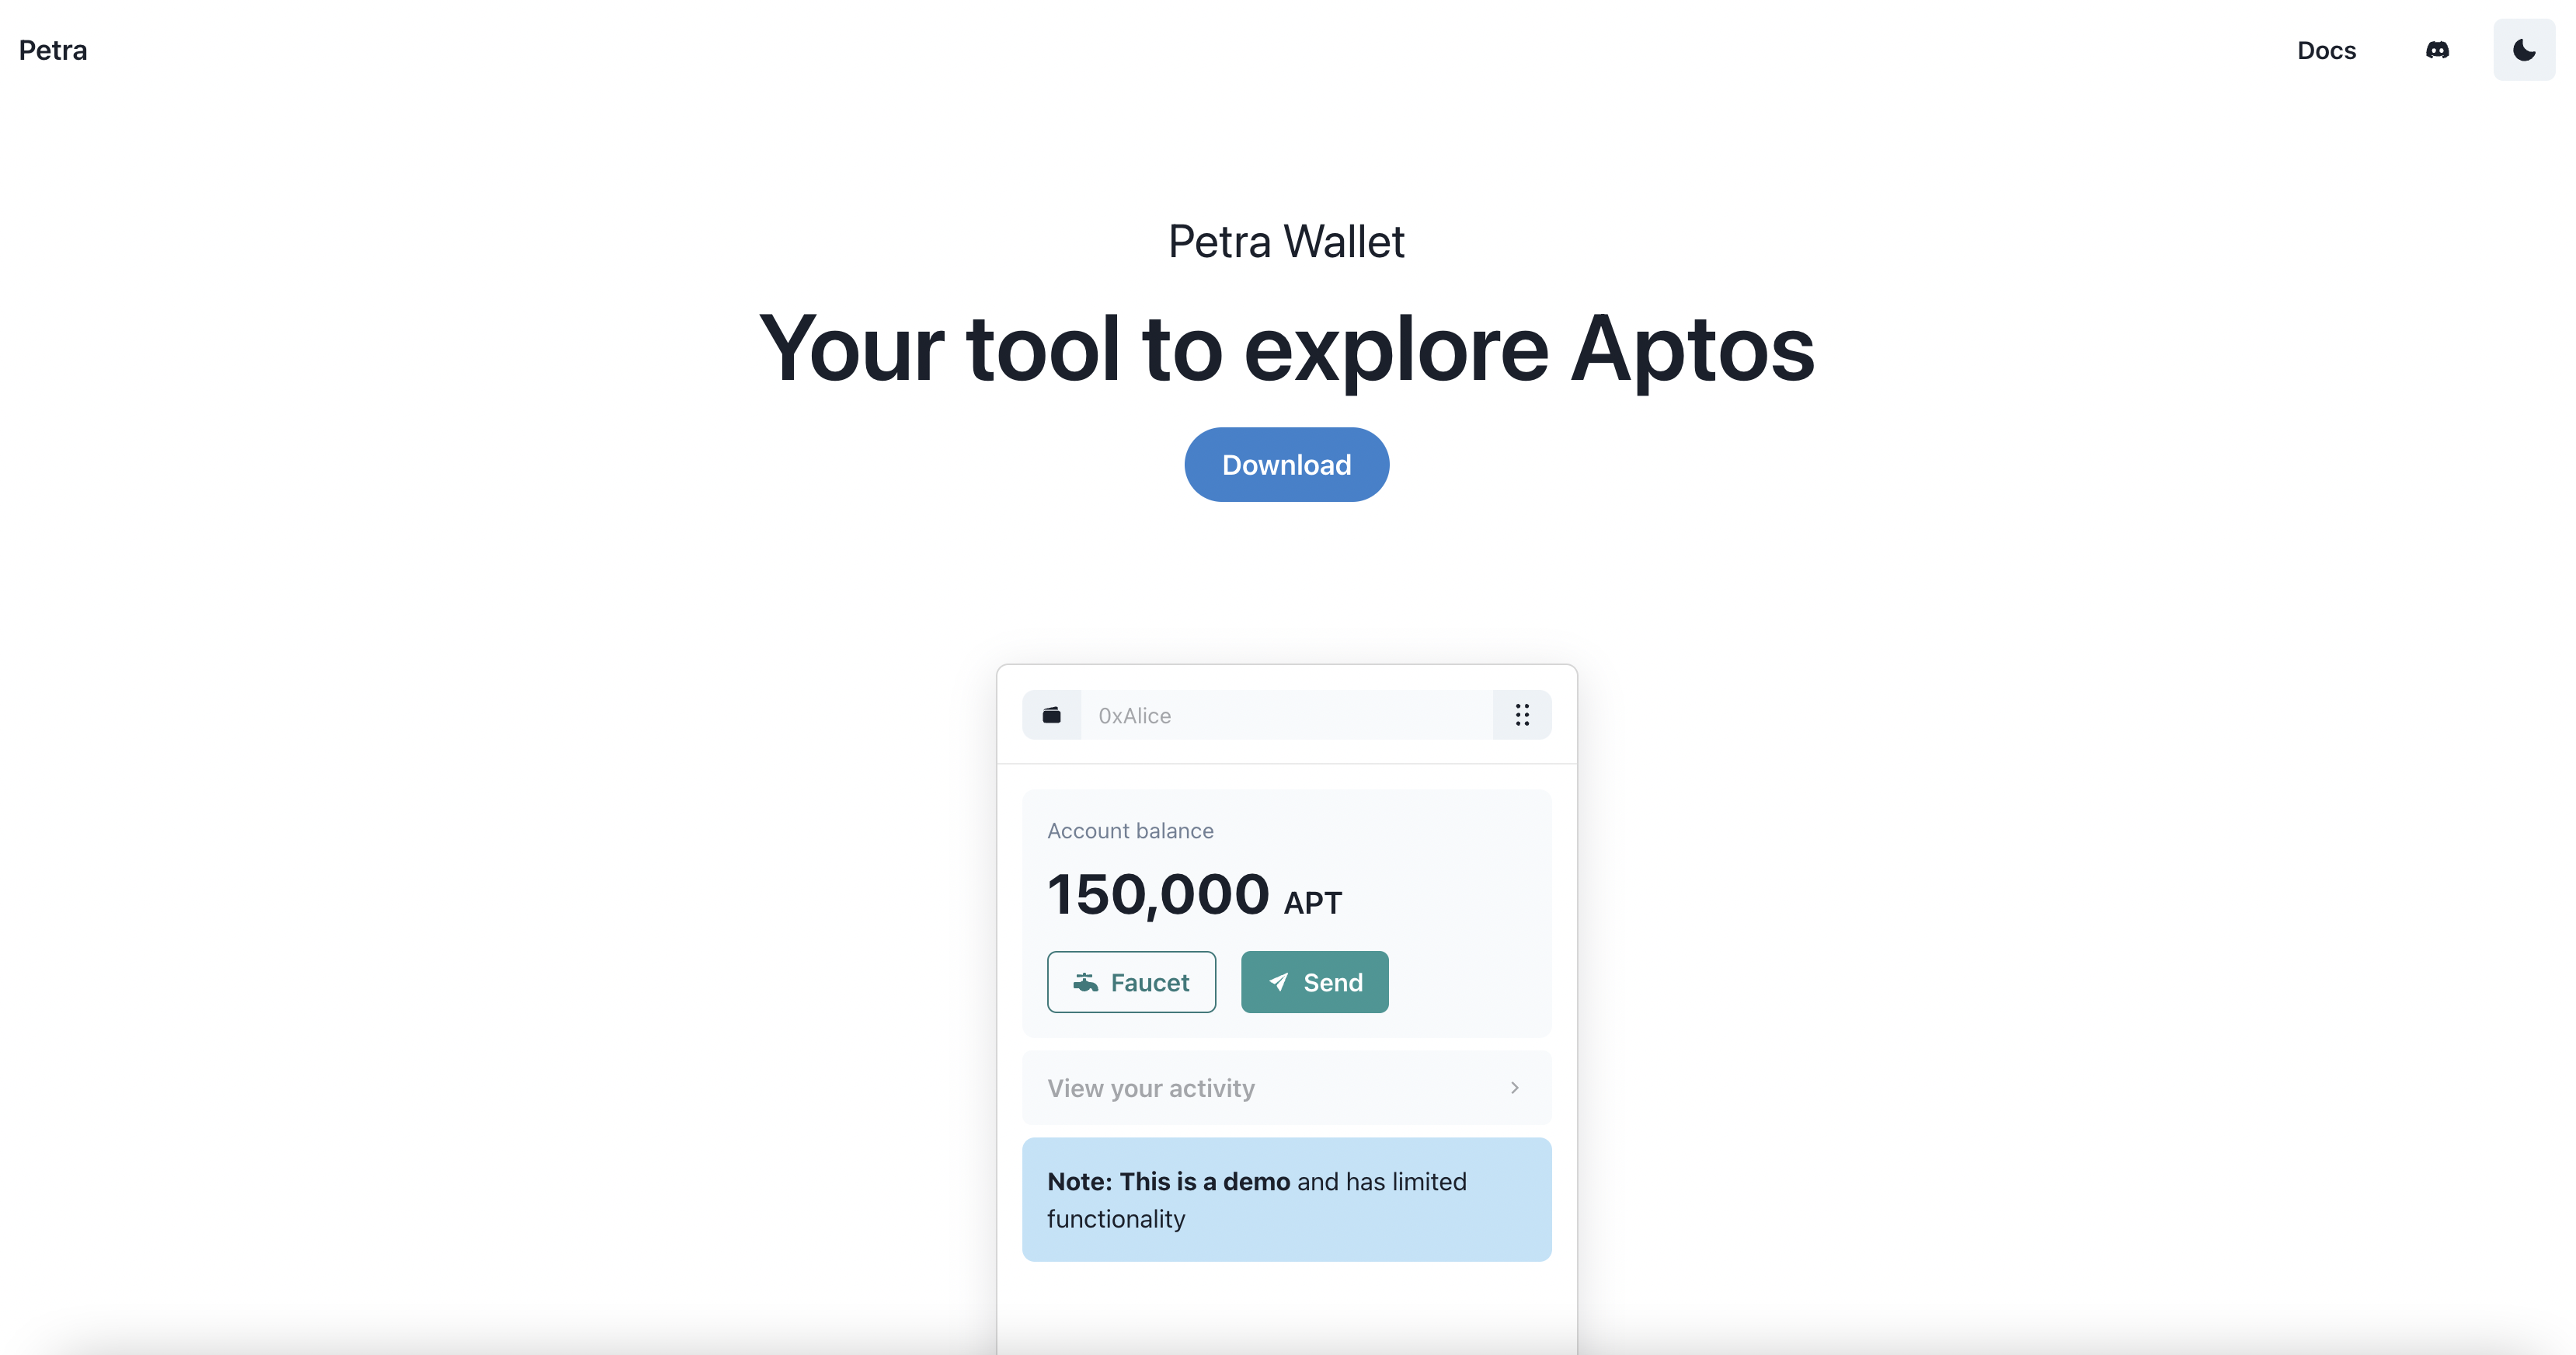
Click on Download on the following page, the website will direct you to the Expansion Store.

<figure><img src="/files/iarxifh7lKGYngepXO4p" alt=""><figcaption></figcaption></figure>

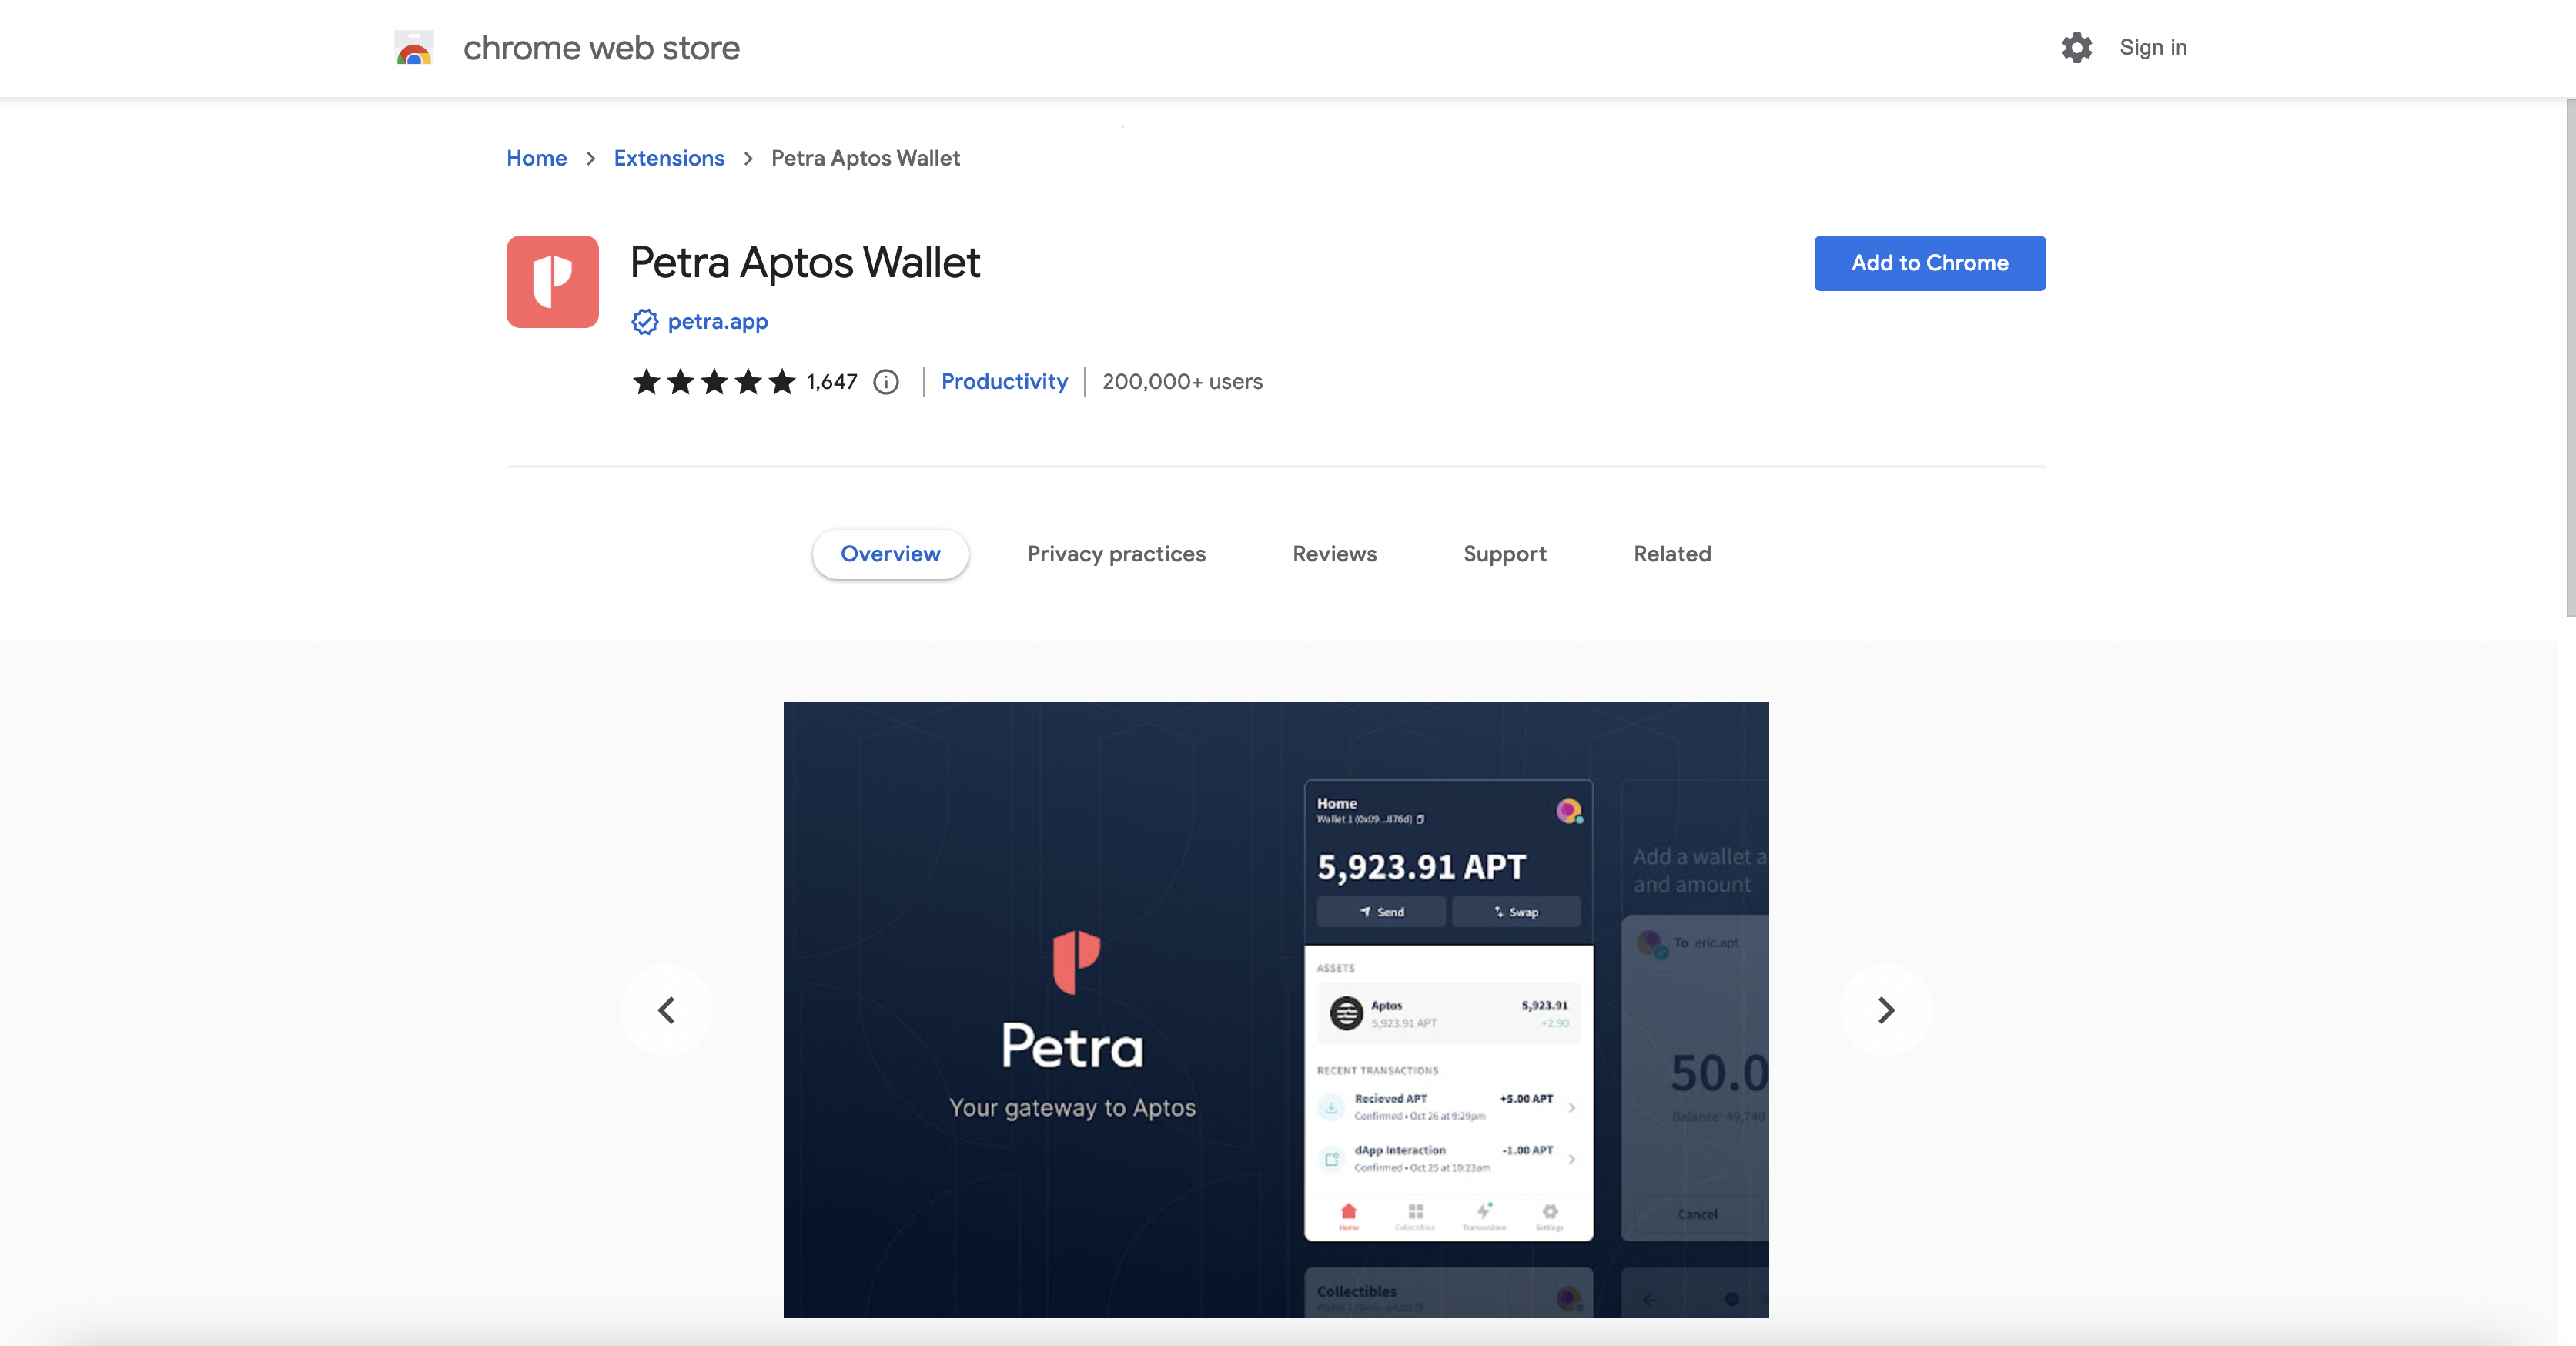
Now, click 'Add to Chrome'.

<figure><img src="/files/Fo0GAFJhJa54JIgk8ycS" alt=""><figcaption></figcaption></figure>

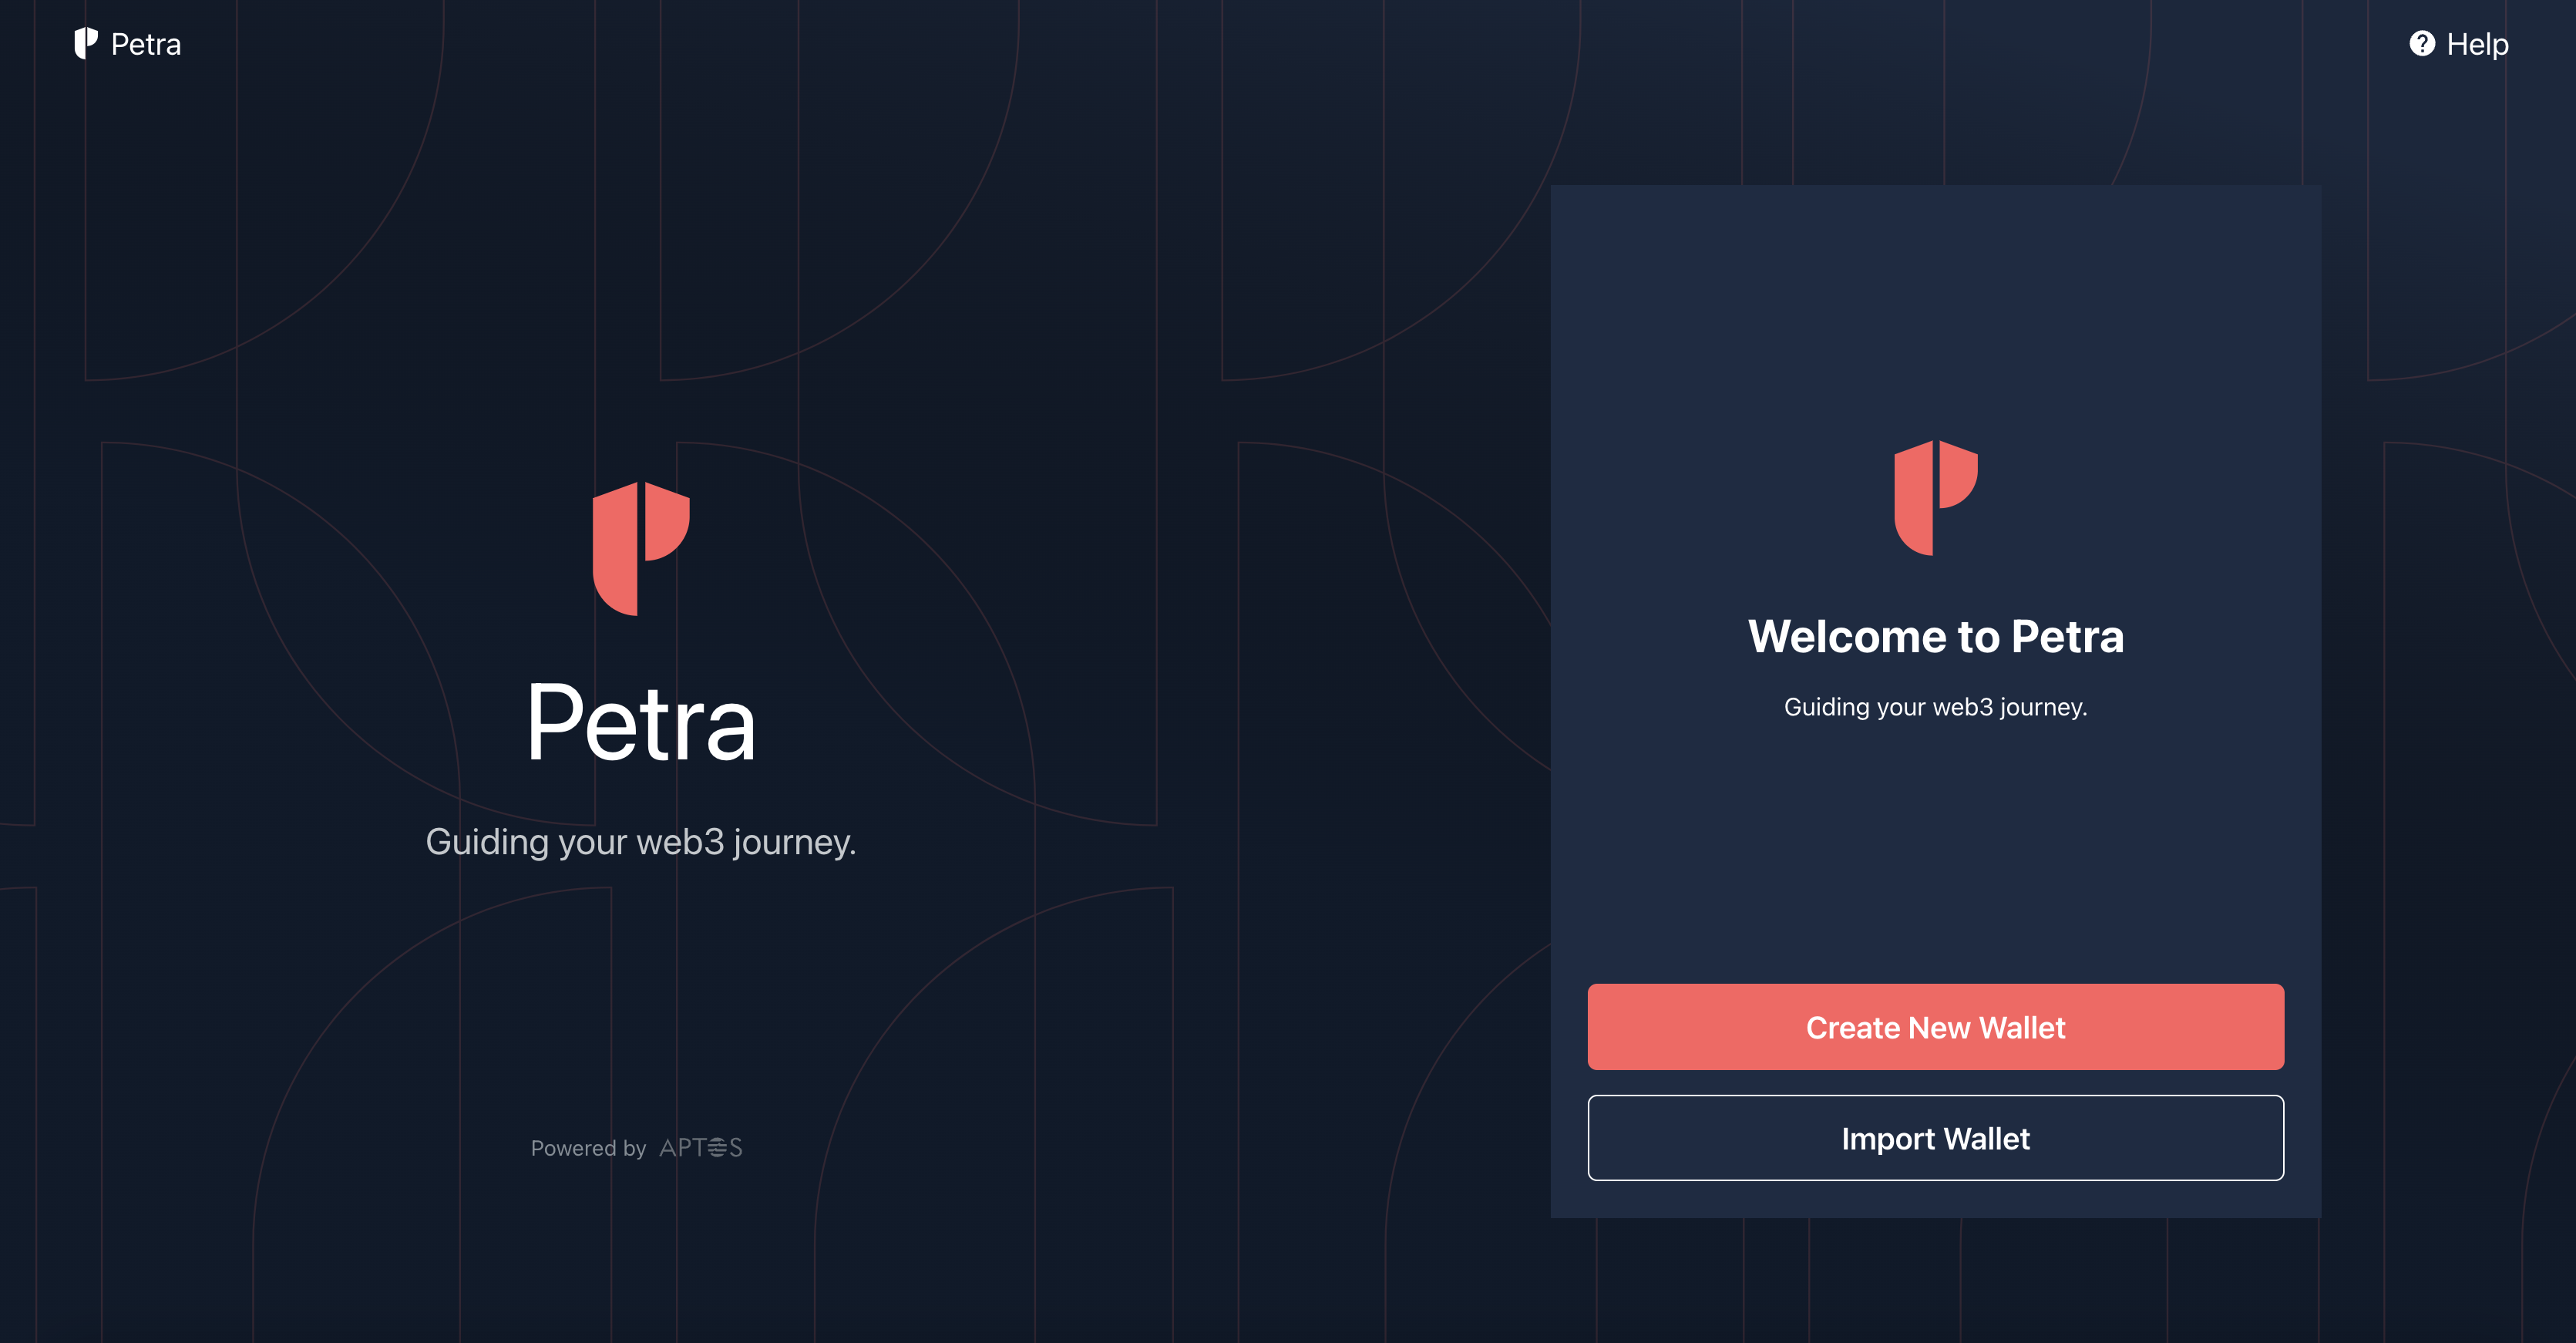
Click on 'Create a wallet'.

<figure><img src="/files/RZteoVxCDiQbvPUMrYH9" alt=""><figcaption></figcaption></figure>

Set your password.

<figure><img src="/files/WxLXsLTTh03Cx0WsHtiz" alt=""><figcaption></figcaption></figure>

Please back up your wallet in the right place.

<figure><img src="/files/RdgV9QuTZupCJ85G3e7J" alt=""><figcaption></figcaption></figure>

Congratulations, you've created your Petra wallet!&#x20;

<figure><img src="/files/nPPaCUbjtRSdMxhDZK69" alt=""><figcaption></figcaption></figure>

For more information on how to use Petra, please visit the official [Documention](https://petra.app/docs/petra-intro).


# Lilico

Flow login

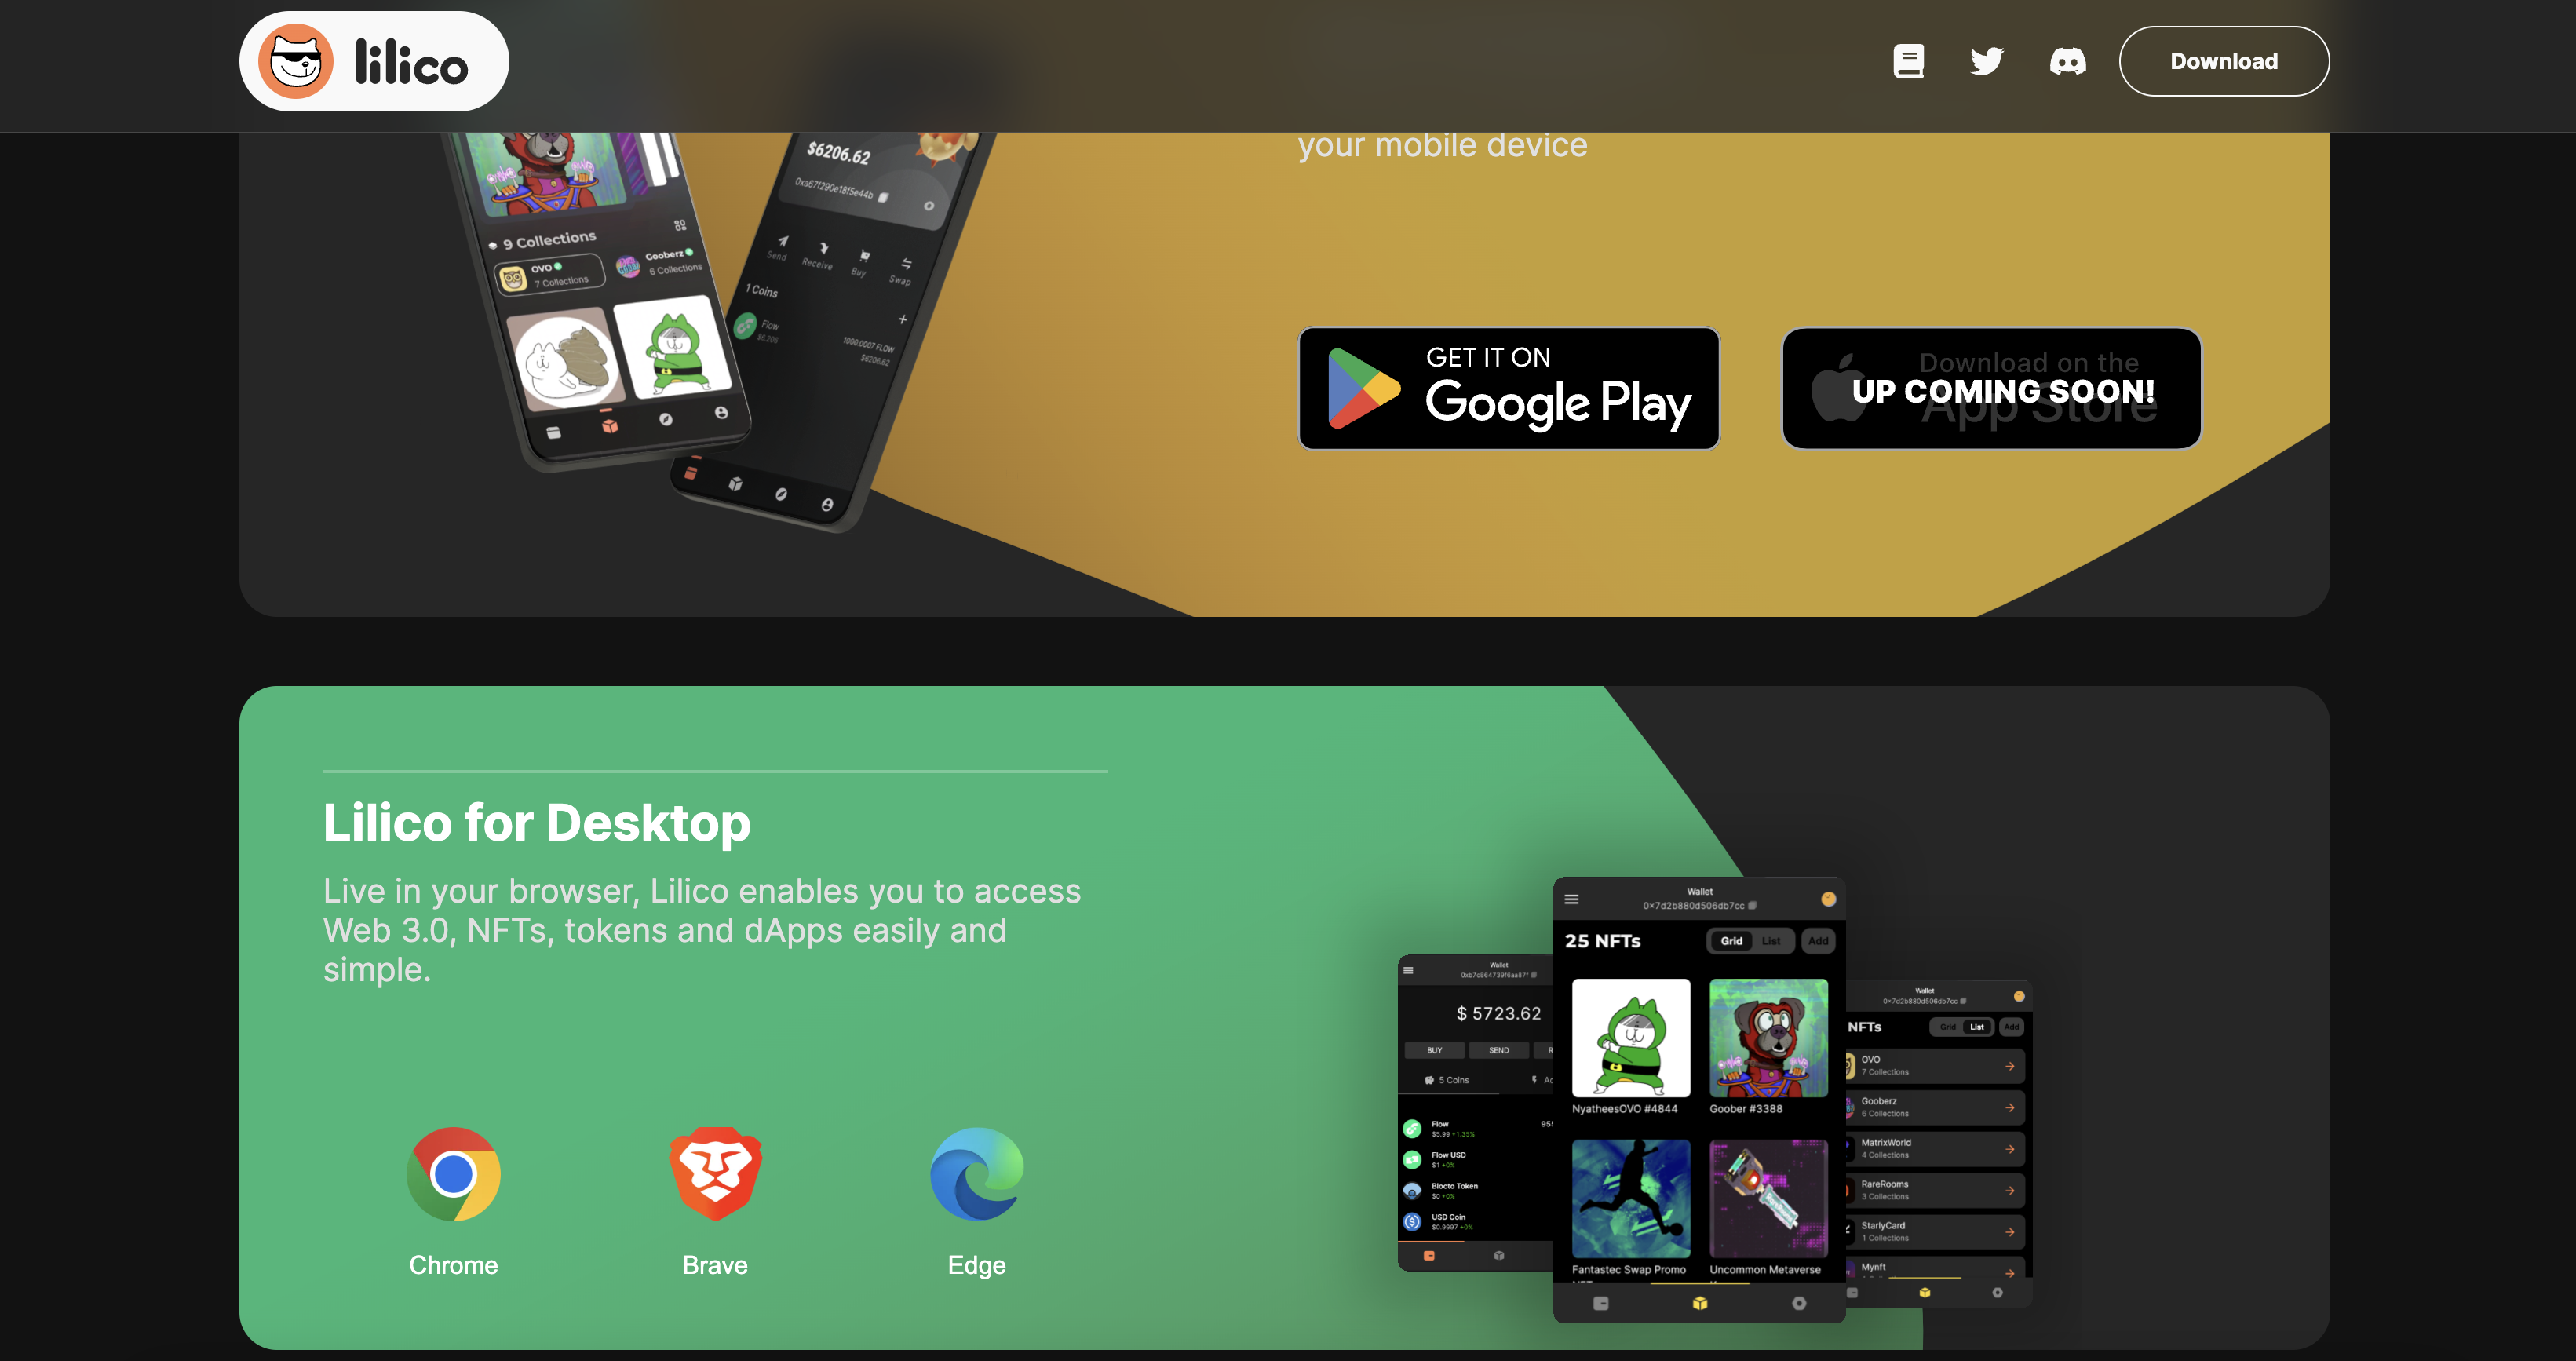
[Lilico](https://lilico.app/) is bringing a transcendent experience to your crypto assets on web3.

<figure><img src="/files/CRezYD7gRBWTR3dfGpmv" alt=""><figcaption></figcaption></figure>

Similar, select the platform you want to install and download the program. if you choose to install on Chrome, the website will direct you to the Chrome Web Store.

<figure><img src="/files/MN5xThA9bCWx3BpcqDsv" alt=""><figcaption></figcaption></figure>

Click to 'Add to Chrome'.

<figure><img src="/files/dF4N798XNdmGkPYr4etZ" alt=""><figcaption></figcaption></figure>

Click on 'Create A New Wallet'.

<figure><img src="/files/llMf9hyhg1uCSIR8mkp5" alt=""><figcaption></figcaption></figure>

Pick a Username.

<figure><img src="/files/6NZ98CVW4oYj1felDAB1" alt=""><figcaption></figcaption></figure>

Record and back up any random keys that appear, it's the only proof you have to retrieve your wallet!

<figure><img src="/files/IYdtygwmNlAgQypTun5s" alt=""><figcaption></figcaption></figure>

Enter the password to access the wallet and click 'Register'.

<figure><img src="/files/qgwKzKigYdYqtwQc2Hod" alt=""><figcaption></figcaption></figure>

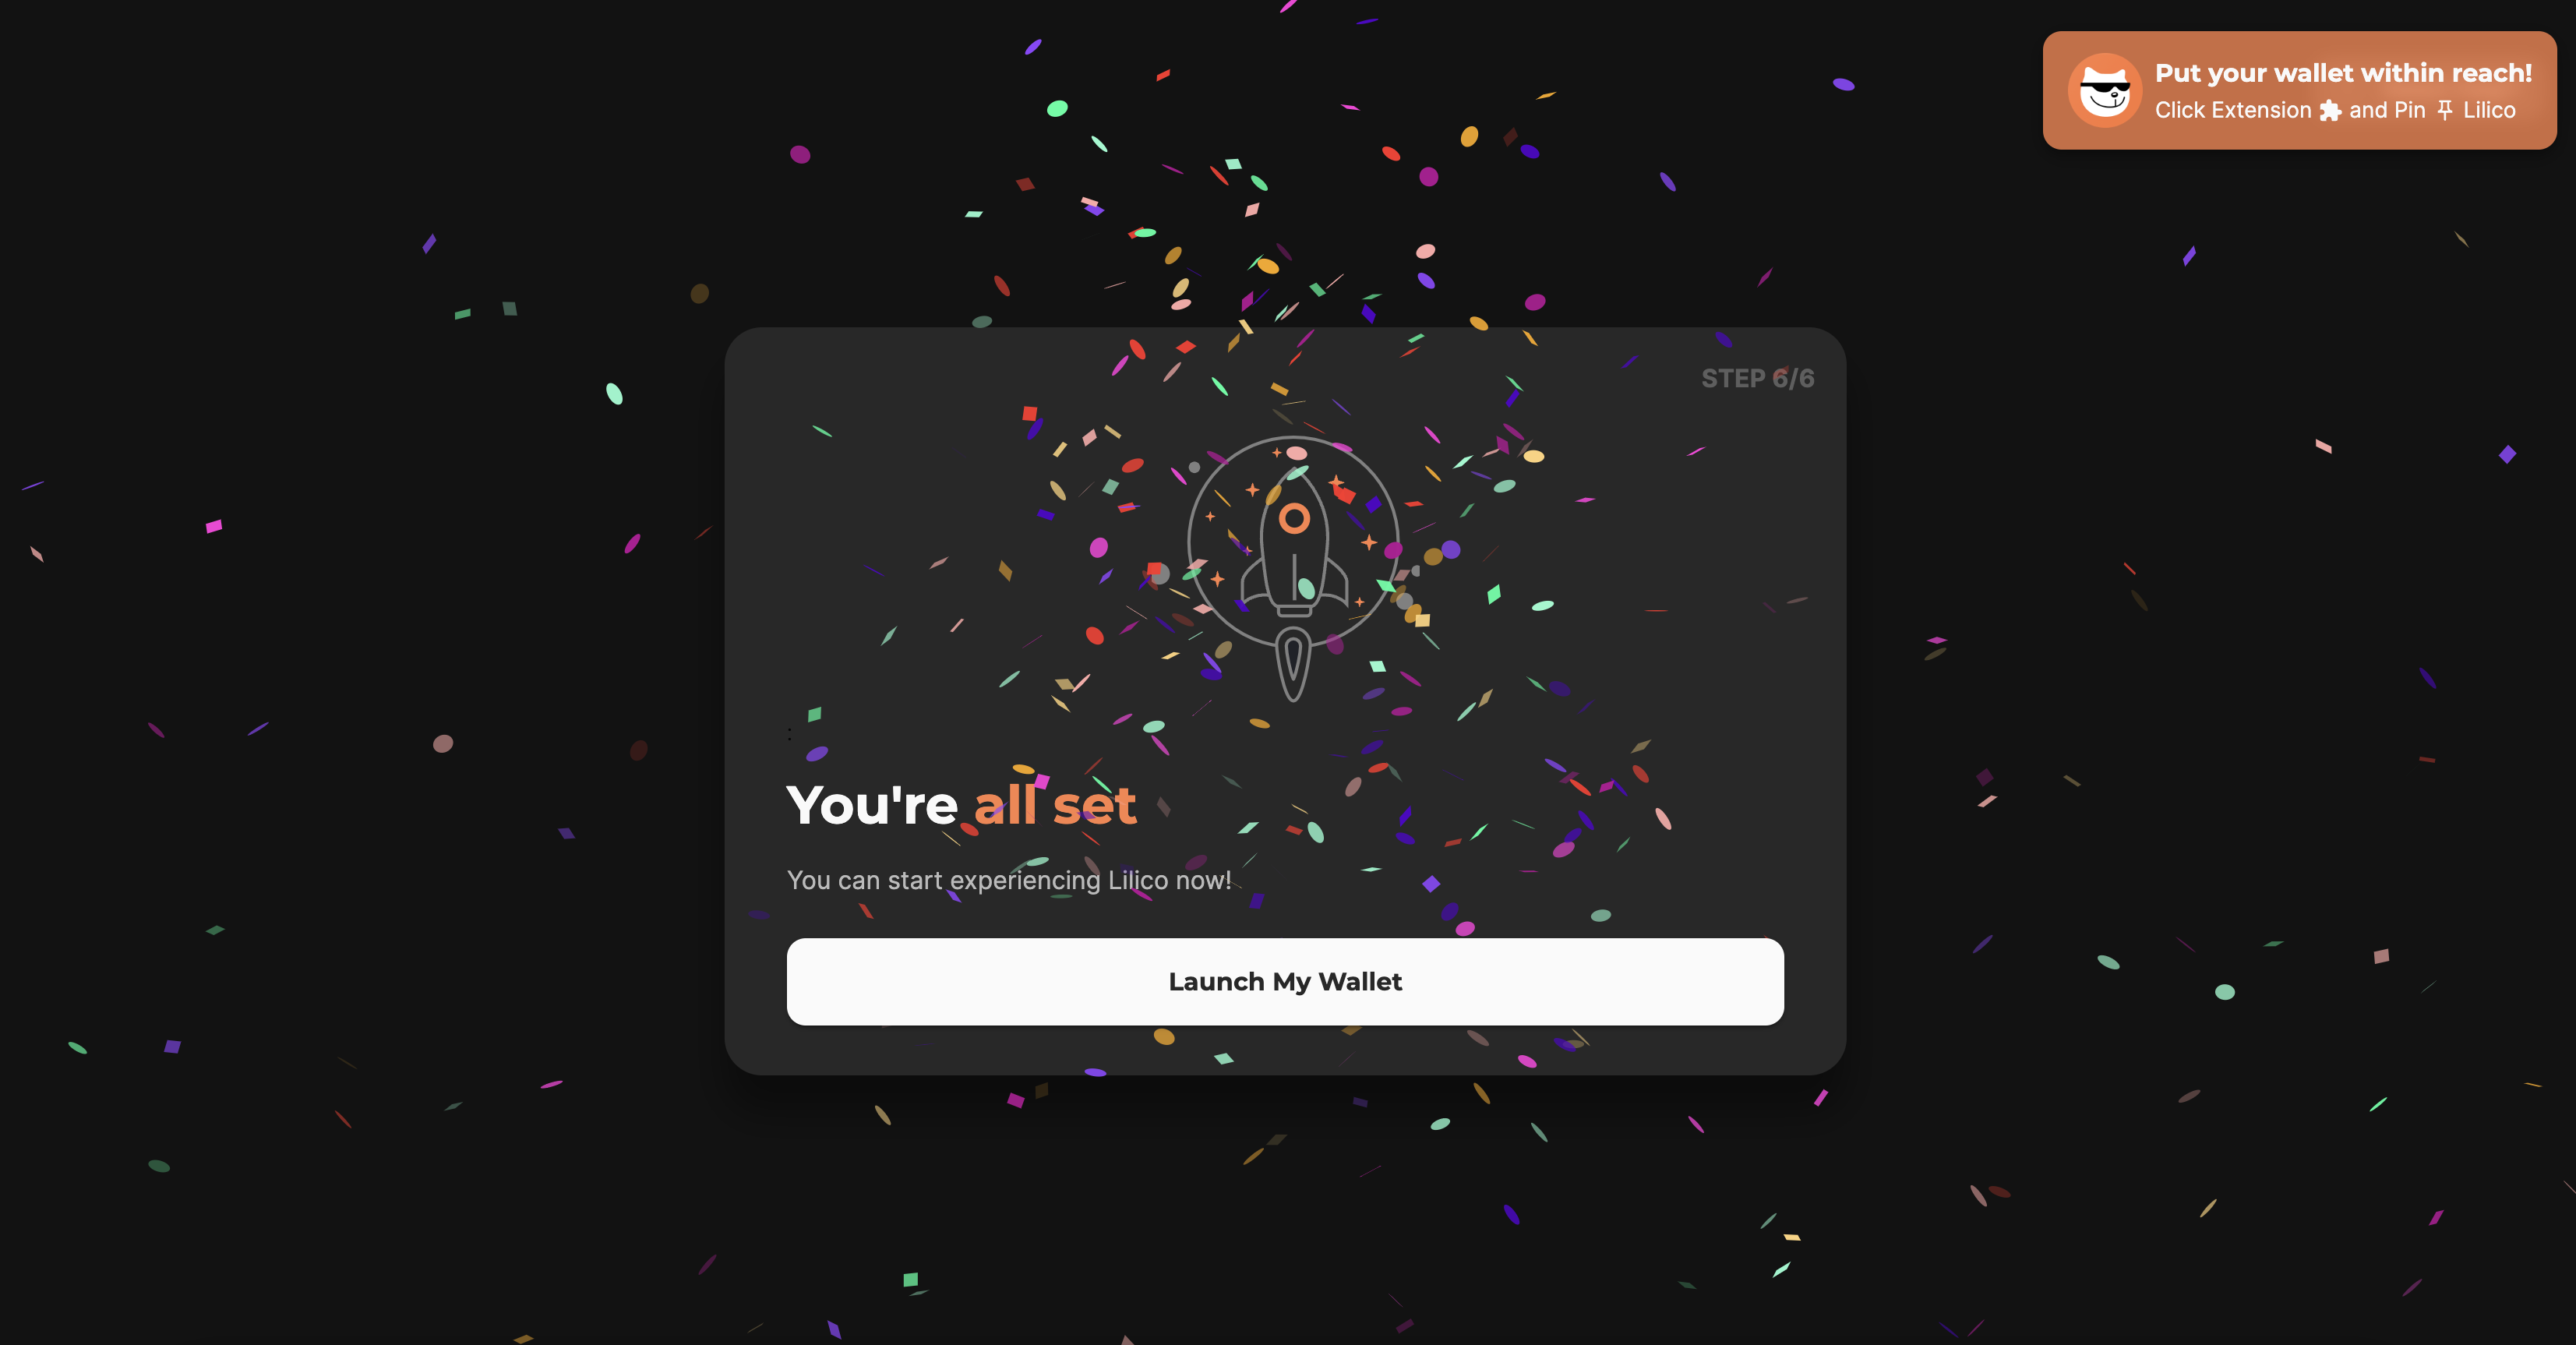
Congratulations, you've created your Lilico wallet! Please note your wallet address as well as your assets.

<figure><img src="/files/w5W1cVZkmxncjitVUQd8" alt=""><figcaption></figcaption></figure>

For more information on how to use Lilico please visit the official [Lilico documention](https://outblock.notion.site/Lilico-Documentation-Index-b97f6c9203384a80994161e8d00ce1b5).


# Usage Introduction

## Overview

For a comprehensive understanding of your usage data, including detailed statistics presentation and in - depth usage instructions, please navigate to the ‘[Dashboard stats](/get-started/quick-start-guide/dashboard-stats)’ section. Here, you can access real - time and historical data related to your activities on 4EVERLAND, enabling you to monitor and manage your resources effectively.

## Core Product Offerings

### Hosting

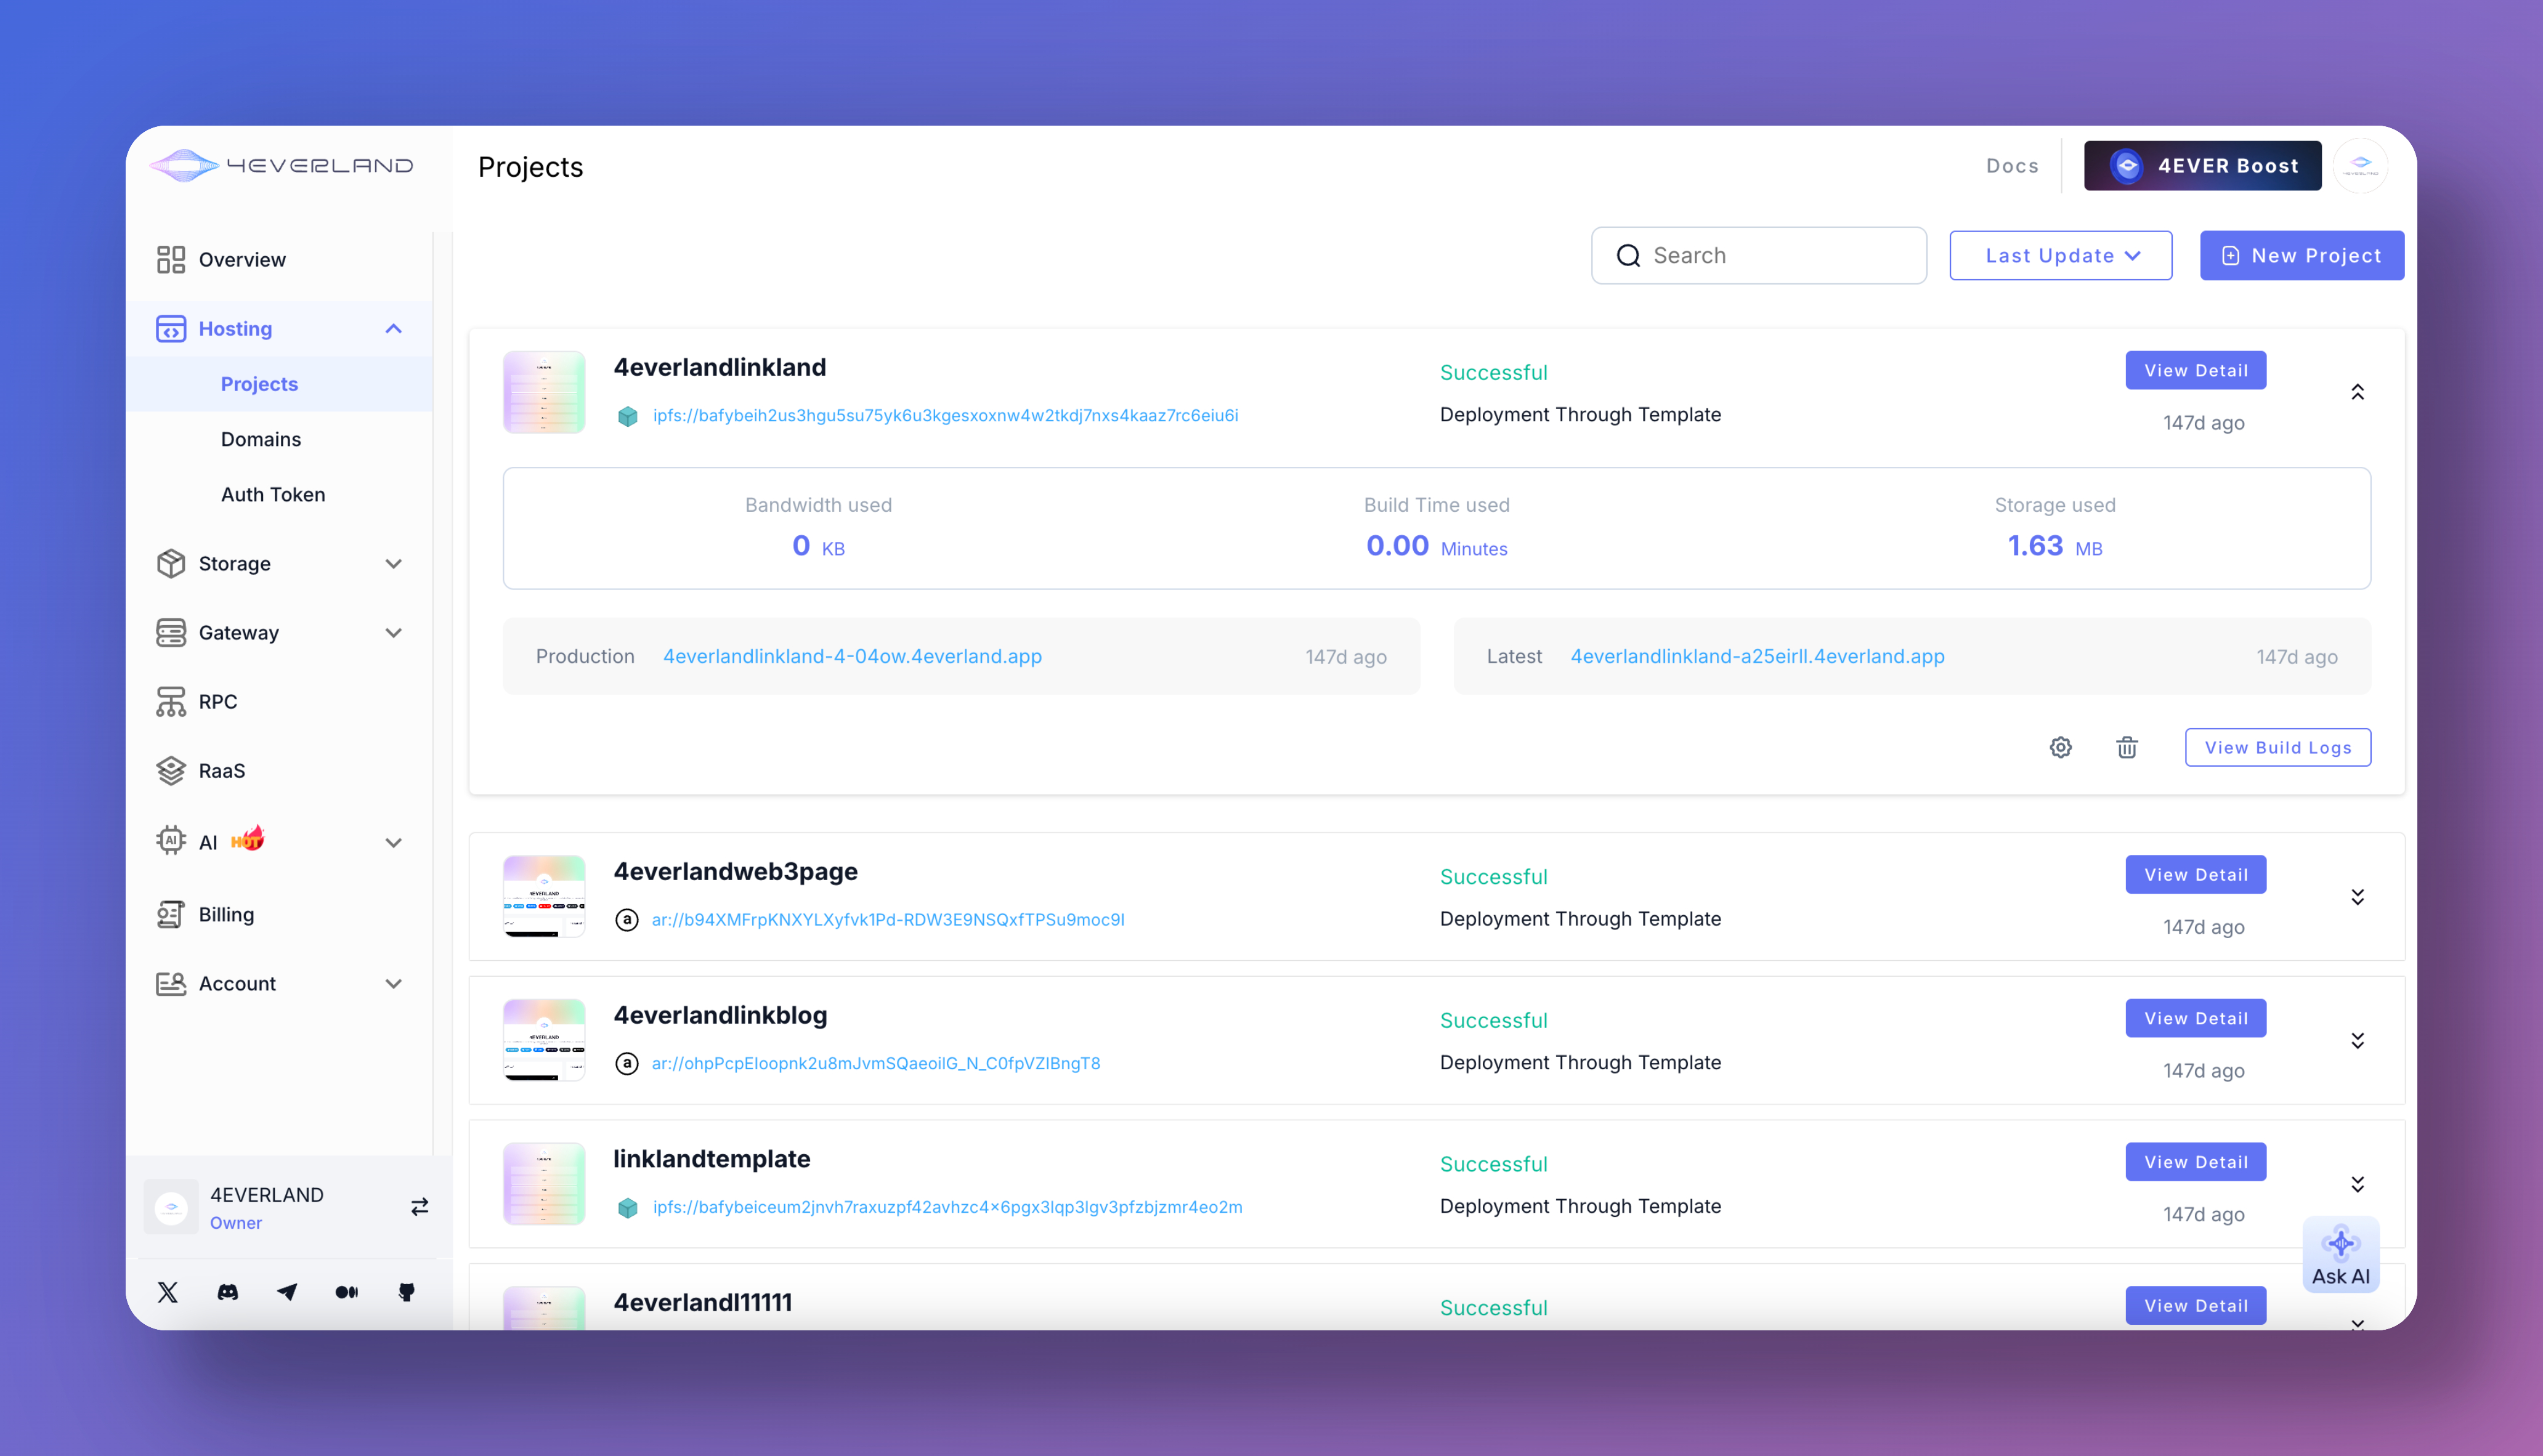
The 4EVER - Hosting service provides a robust platform for deploying your projects. To explore its features, benefits, and step - by - step usage instructions, visit the [**What is Hosting**](/hositng/what-is-hosting) page. Discover how to easily deploy applications, manage domains, and optimize performance for your hosted content.

<figure><img src="/files/QC1MYbntkSa3gulTXZHv" alt=""><figcaption></figcaption></figure>

### Storage

4EVER - Bucket is designed to meet your storage needs with a reliable and efficient distributed storage solution. For more information on its capabilities, such as data uploads, management, and retrieval, please refer to the [**What is Bucket**](/storage/bucket) page. Learn how to store and access your files securely in the decentralized storage network.

<figure><img src="/files/fcOhkpSG2R0HoQzYKb77" alt=""><figcaption></figcaption></figure>

### Gateway

The Gateways on 4EVERLAND act as crucial entry points for accessing distributed content. To understand more about how gateways work, their features, and how to utilize them, visit the [**GATEWAYS**](/gateways/ipfs-gateway) page. Uncover how to leverage gateways for seamless access to IPFS - hosted resources.

<figure><img src="/files/jl4SedTJgA6uQ9l6IuJ3" alt=""><figcaption></figcaption></figure>

### RPC

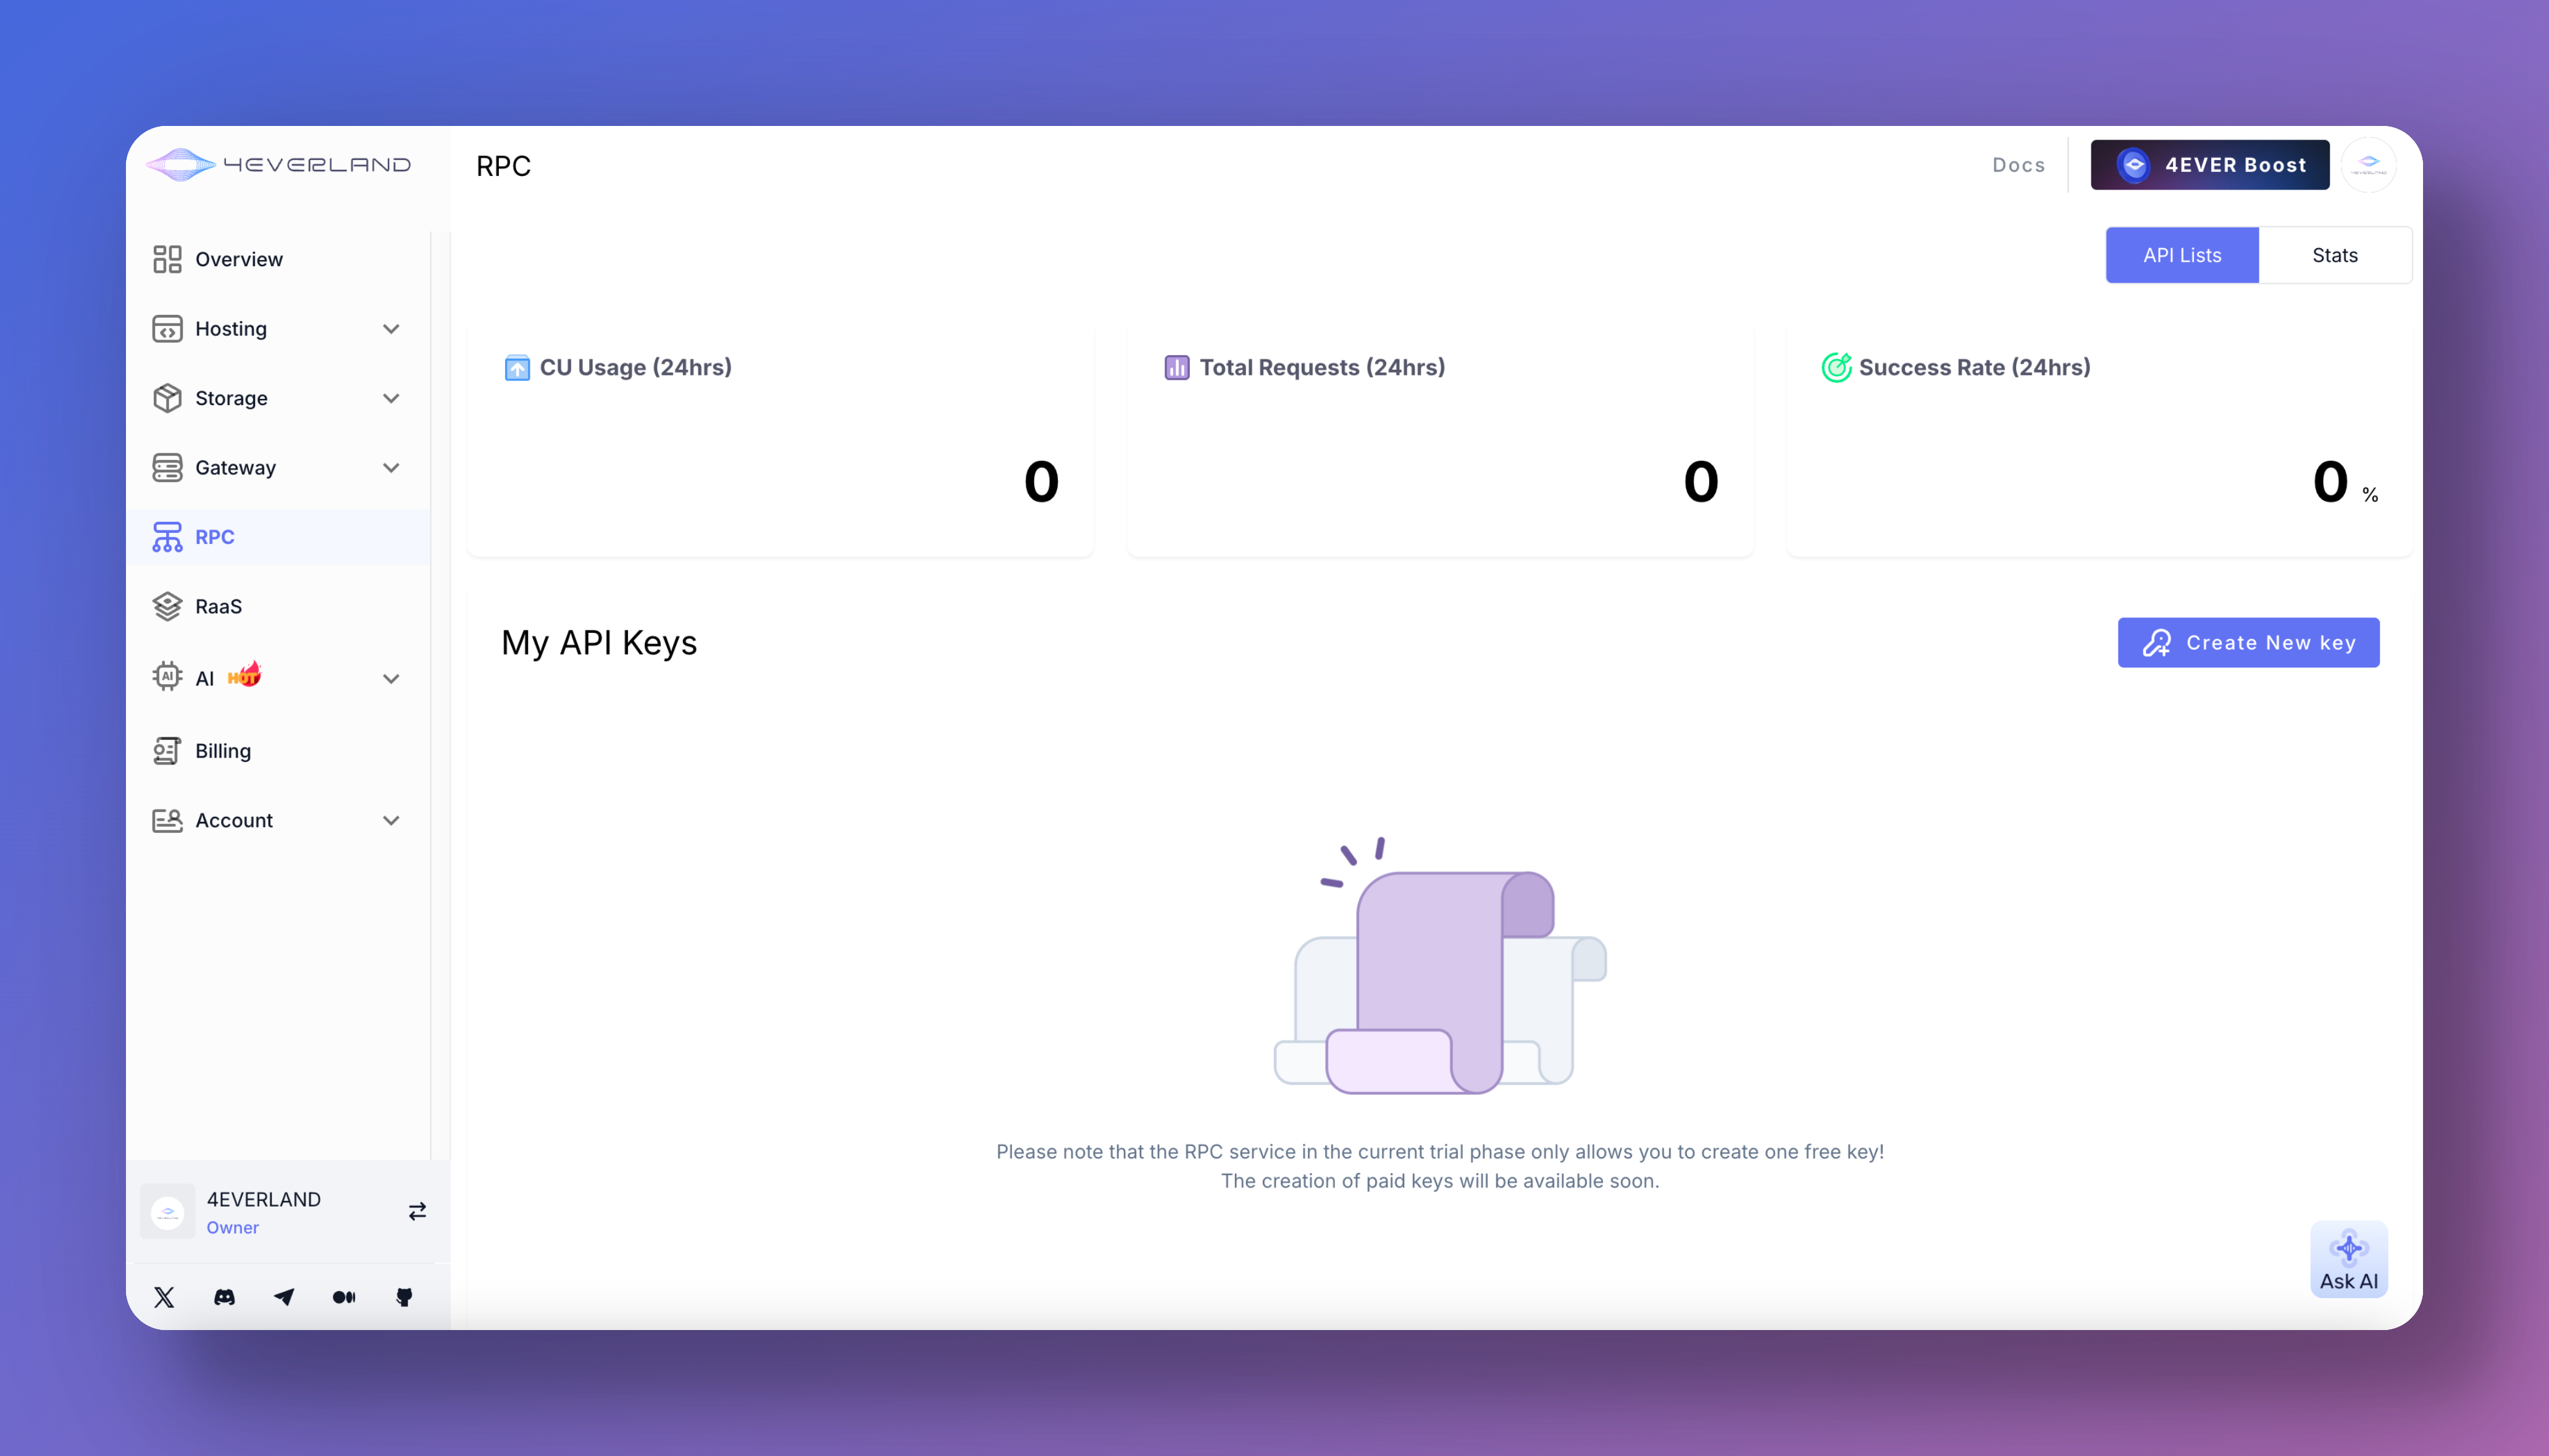
The RPC (Remote Procedure Call) service on 4EVERLAND enables smooth interaction with blockchain networks. For detailed information on its features, usage scenarios, and configuration, please refer to the [**RPC**](/rpc/guides) page. Discover how to use RPC to execute smart contract functions, query blockchain data, and more.

<figure><img src="/files/2e5Y2hRHWMx1kKKrb9dQ" alt=""><figcaption></figcaption></figure>

### RaaS

The RaaS (Render - as - a - Service) feature offers unique rendering capabilities. To explore its details, including how to use it for various rendering tasks, visit the [**RAAS**](/raas-beta/whats-rollups) page. Learn how RaaS can enhance your content creation and delivery processes.

<figure><img src="/files/r7dtkuksBjEKUBQAMd8h" alt=""><figcaption></figcaption></figure>

### AI

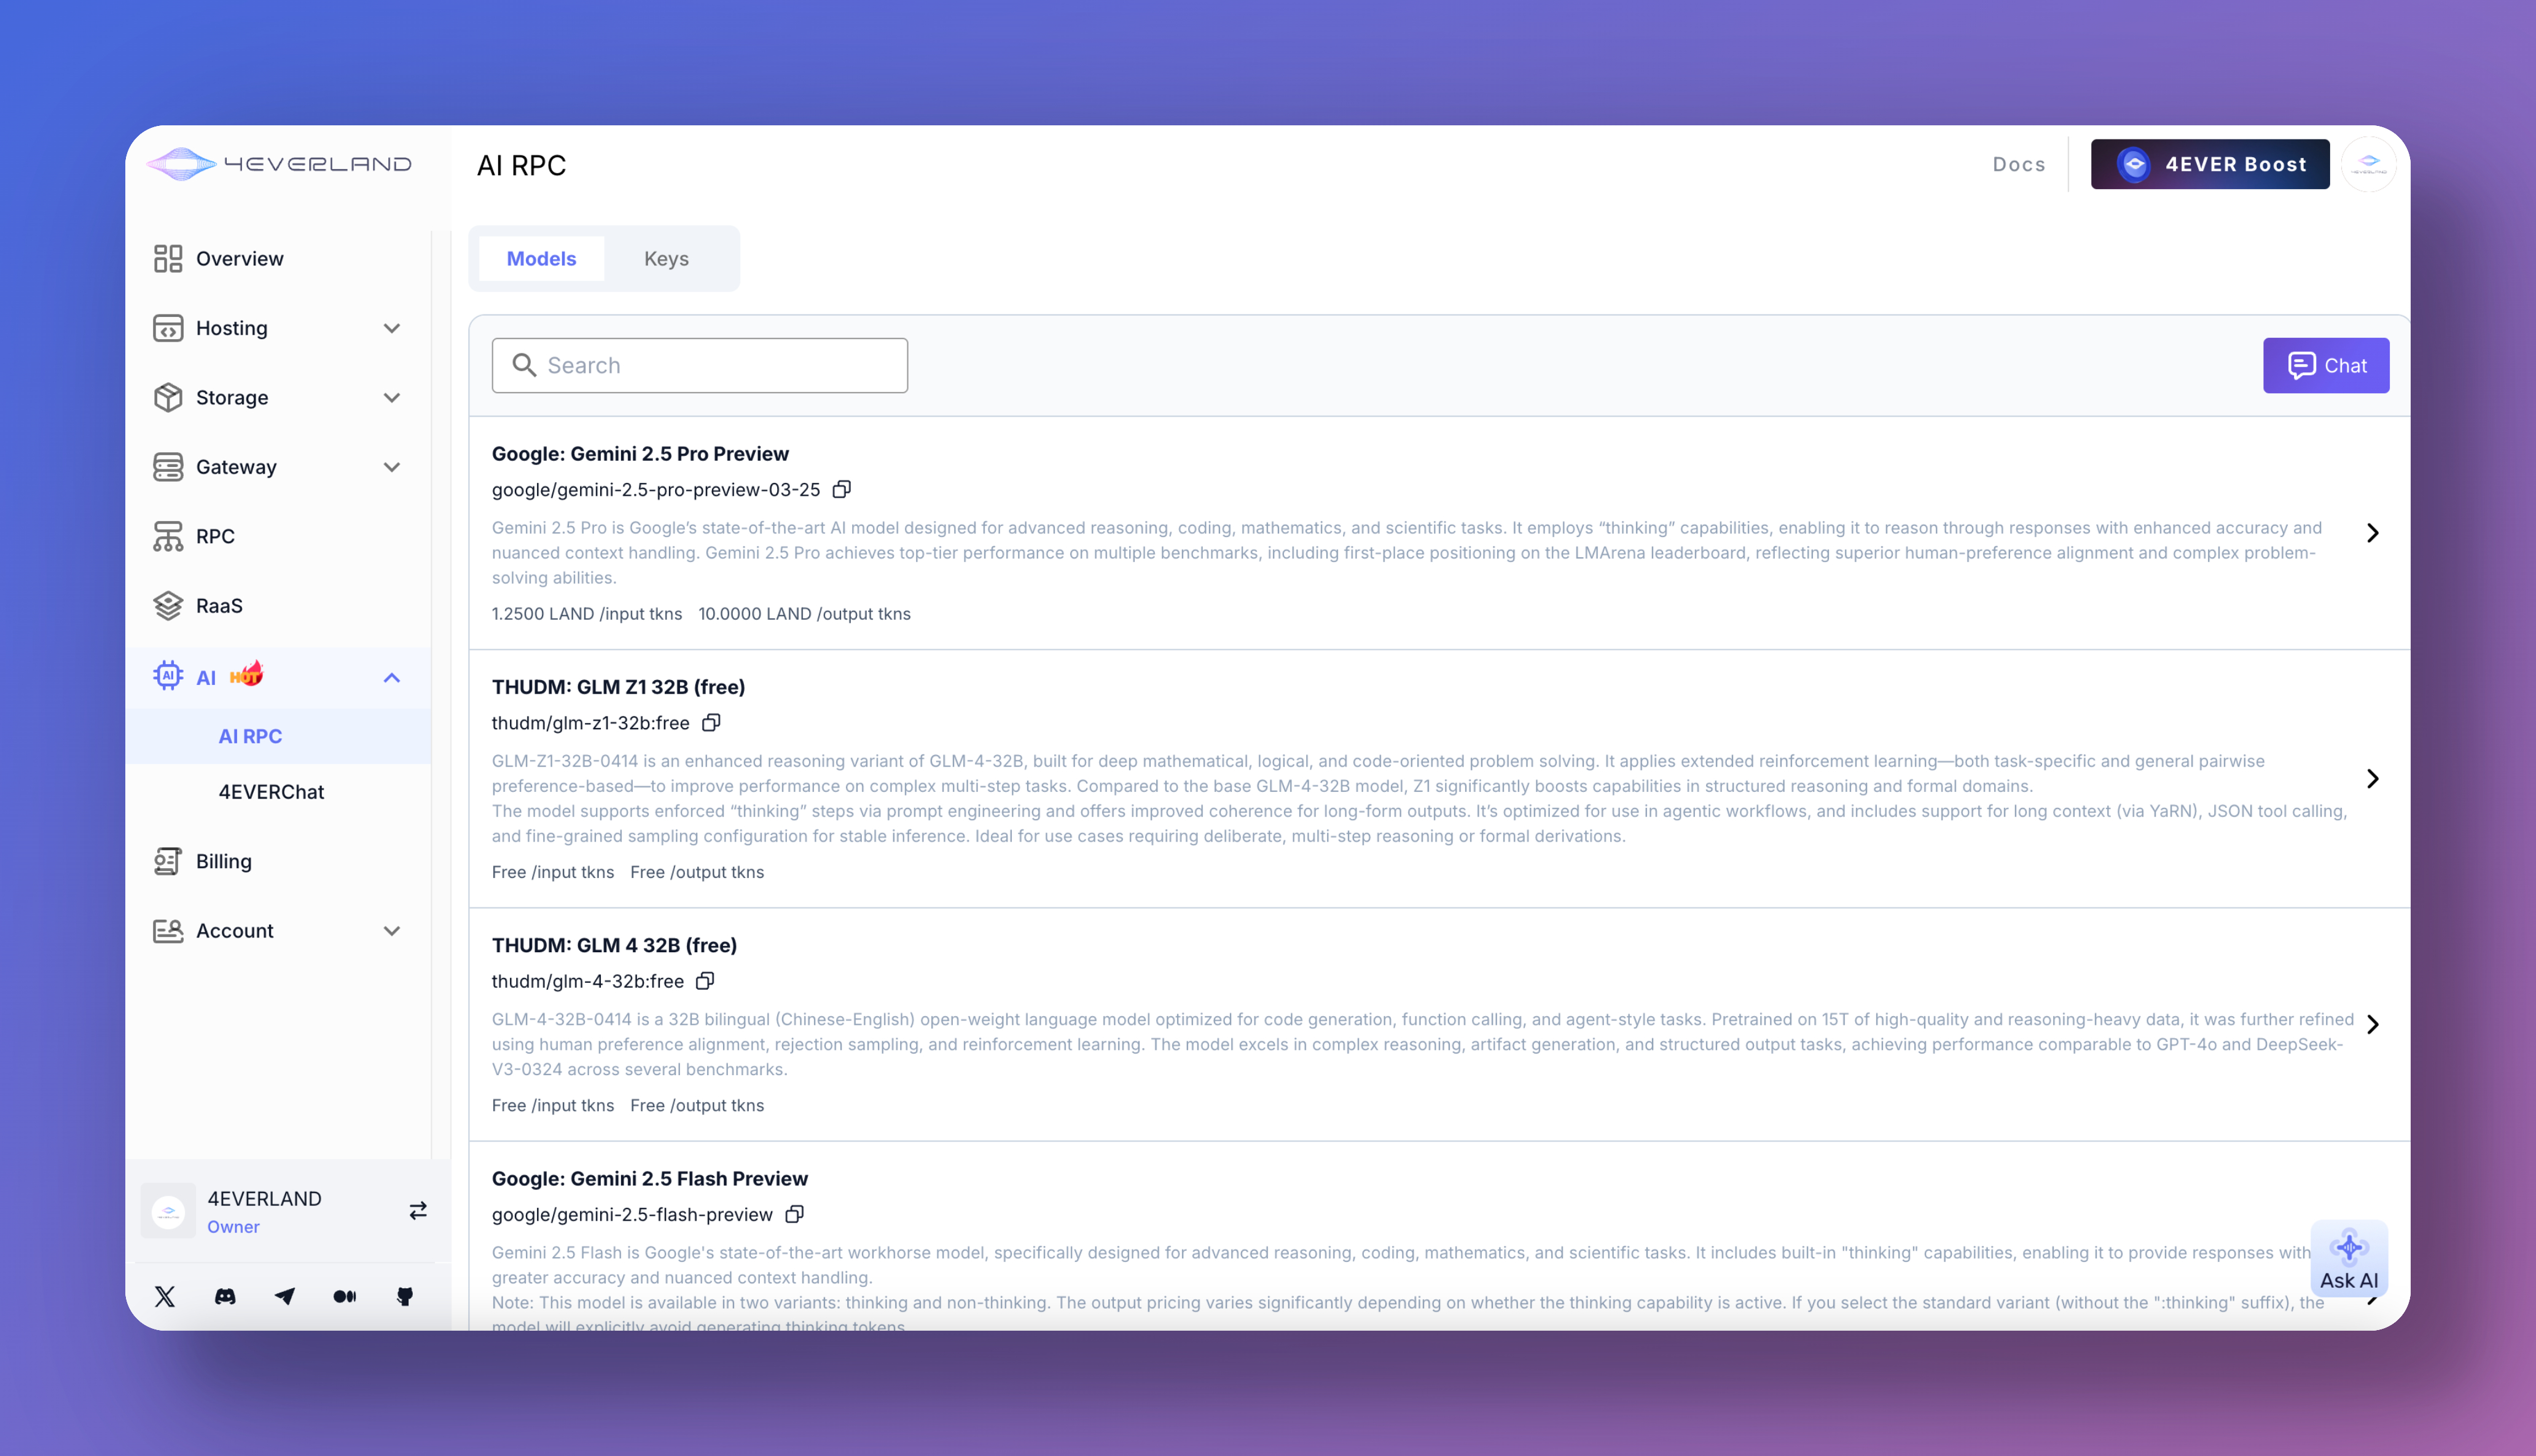
4EVER - AI provides advanced artificial intelligence - related services. For more information on its features, integration, and usage, please navigate to the [**AI RPC**](/ai/ai-rpc) page. Explore how AI can be applied to your projects on 4EVERLAND for enhanced functionality.

<figure><img src="/files/ddXSI5te5ECnB7PiZNWP" alt=""><figcaption></figcaption></figure>

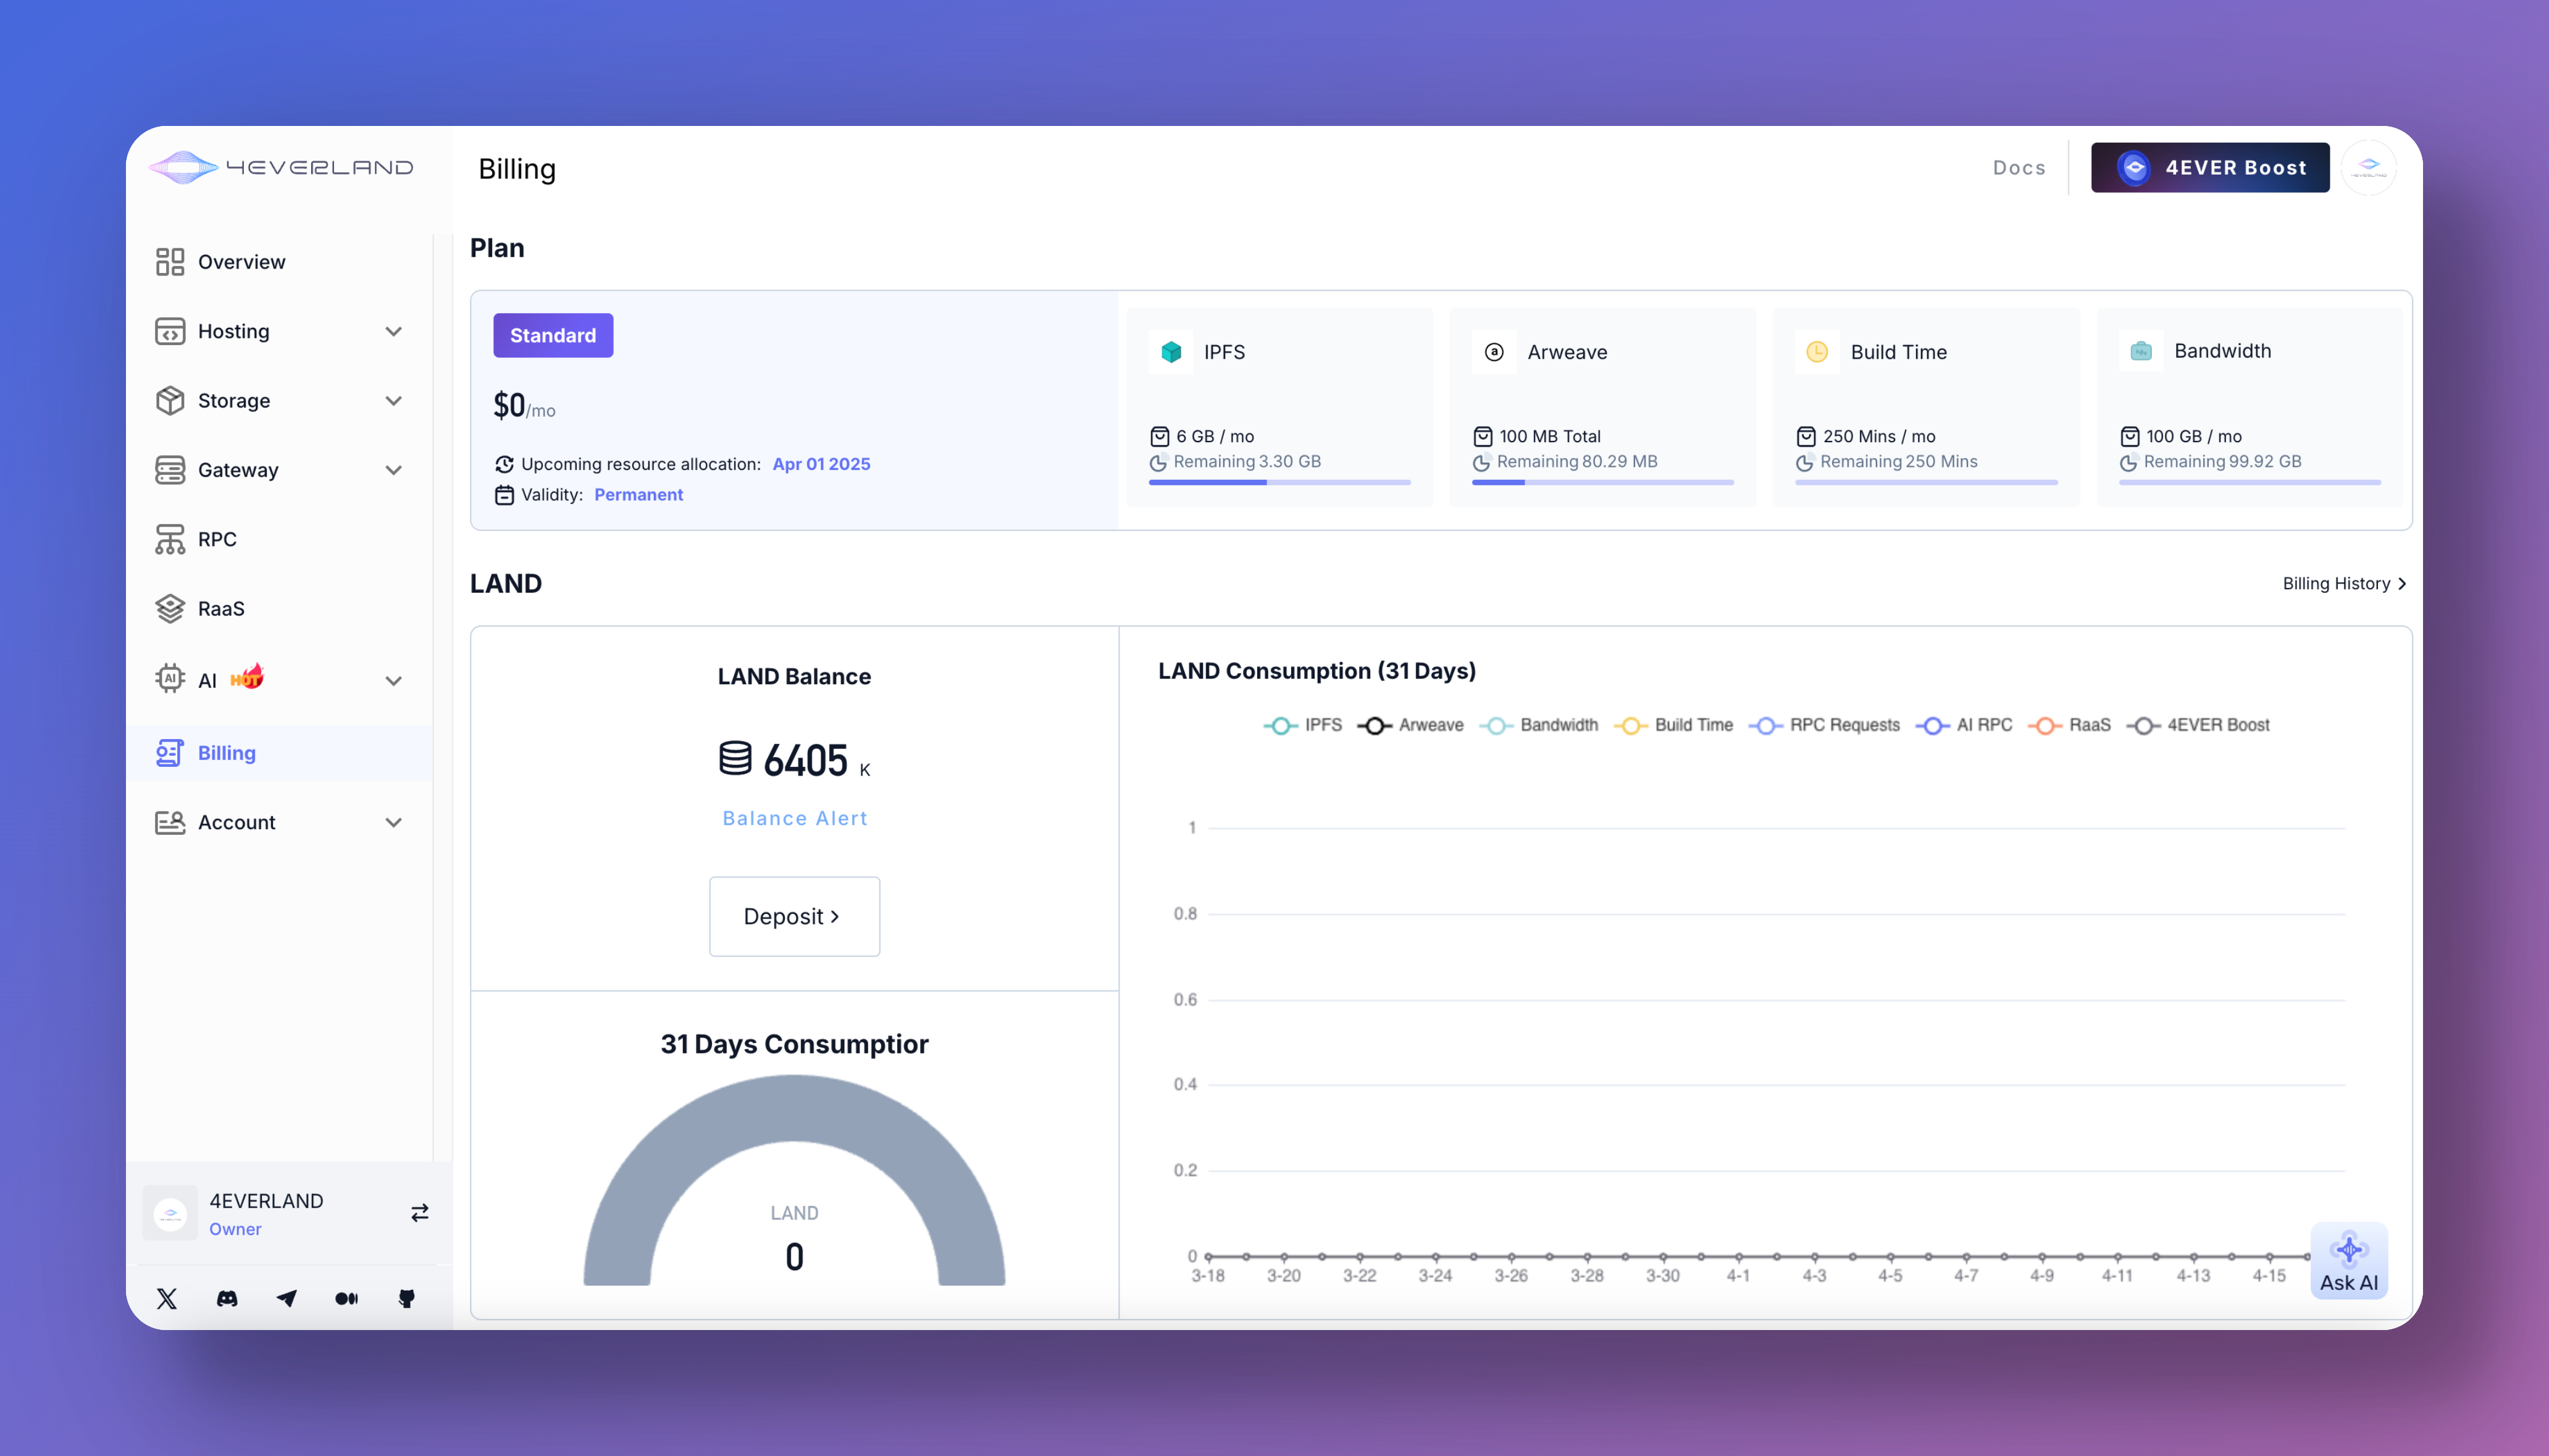
### Billing

Understand your billing information, including costs, payment methods, and invoice management, by accessing the relevant billing section. Keep track of your expenses and manage your financial aspects on 4EVERLAND with ease.

<figure><img src="/files/efQl7szcf48sXGXrCkIL" alt=""><figcaption></figcaption></figure>

## Community and Ecosystem

### Community Info

Join the vibrant 4EVERLAND community to stay updated on the latest news, features, and developments. Engage with other users, share ideas, and get support by participating in community channels. Follow 4EVERLAND on social media platforms to ensure you never miss an important update.

### 4EVER Boost

Take advantage of the [4EVERLAND Node Boost](https://dashboard.4everland.org/boost) program to earn $4EVER rewards. Discover how you can contribute to the network and be rewarded for your efforts, enhancing your experience on 4EVERLAND.


# Dashboard stats

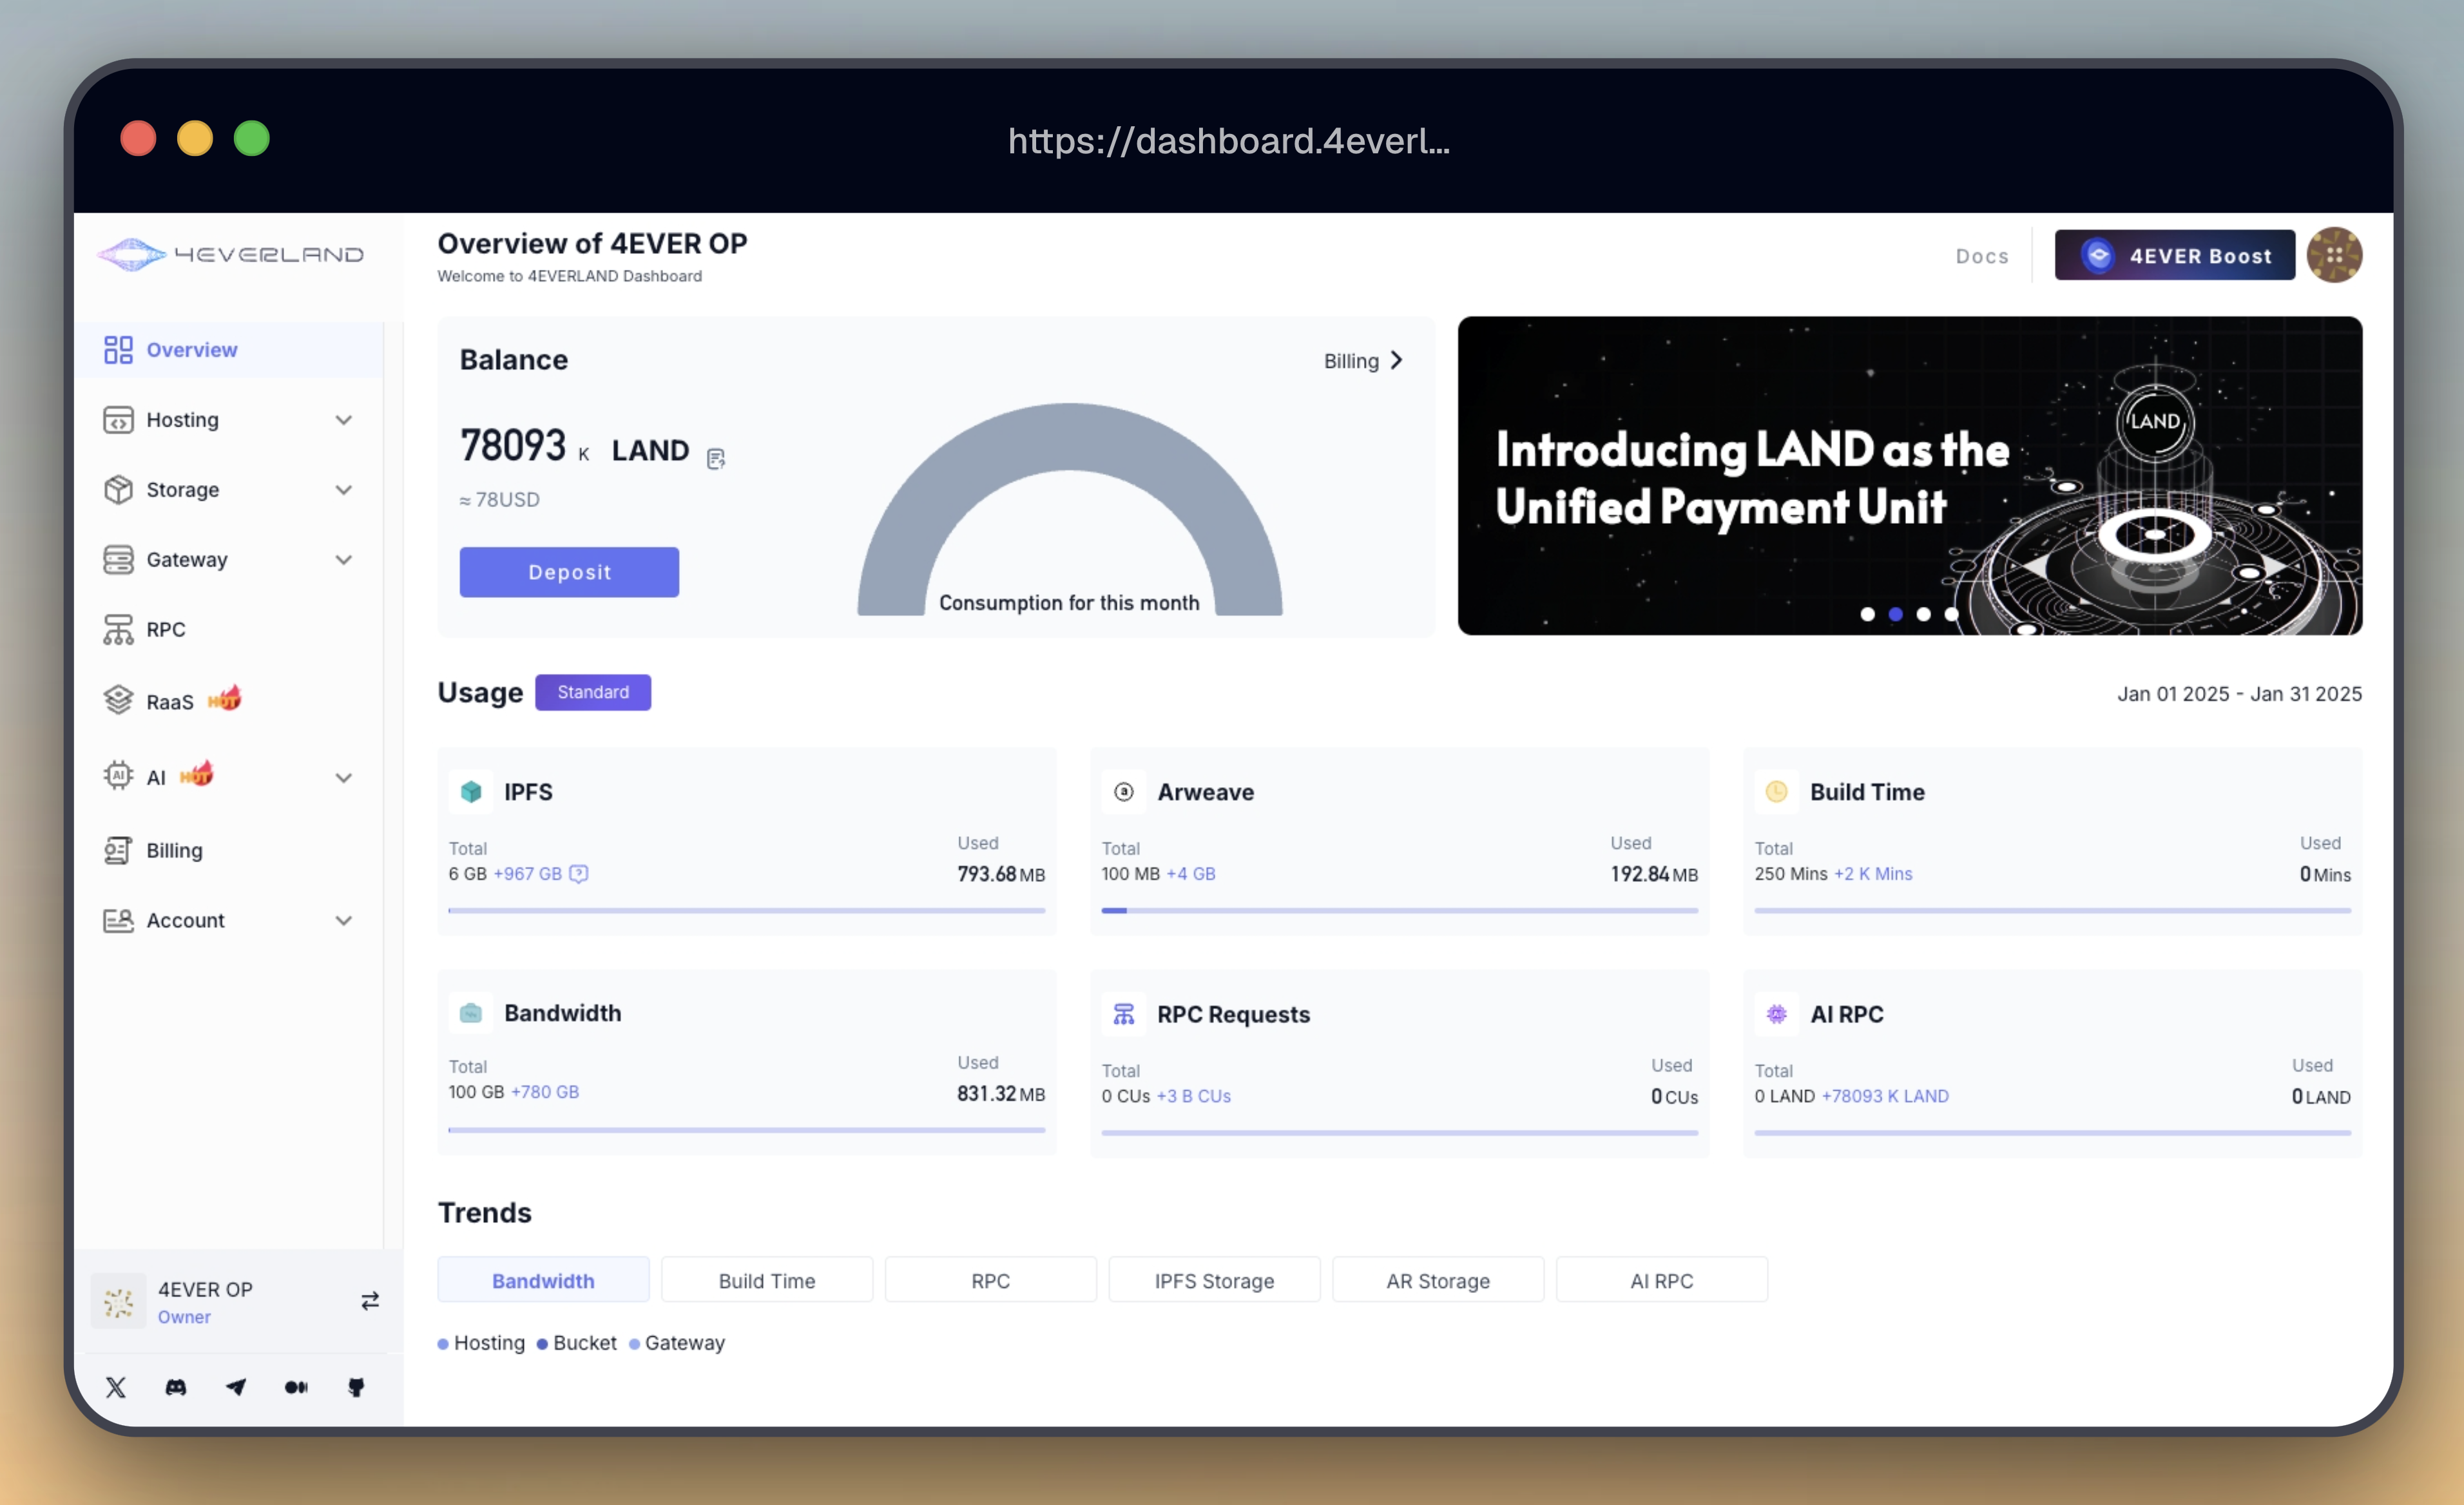
On the 4EVERLAND dashboard stats page, examine the information from all of your projects and Buckets. Go to your dashboard by navigating:

<figure><img src="/files/vsIMivpp0YpszBrAo09Z" alt=""><figcaption></figcaption></figure>

## Balance

<figure><img src="/files/gvzD0EIlTagBKhCgQMaP" alt=""><figcaption></figcaption></figure>

## Usage

<figure><img src="/files/0EZGPVg4bI4zZNCxErSS" alt=""><figcaption></figcaption></figure>

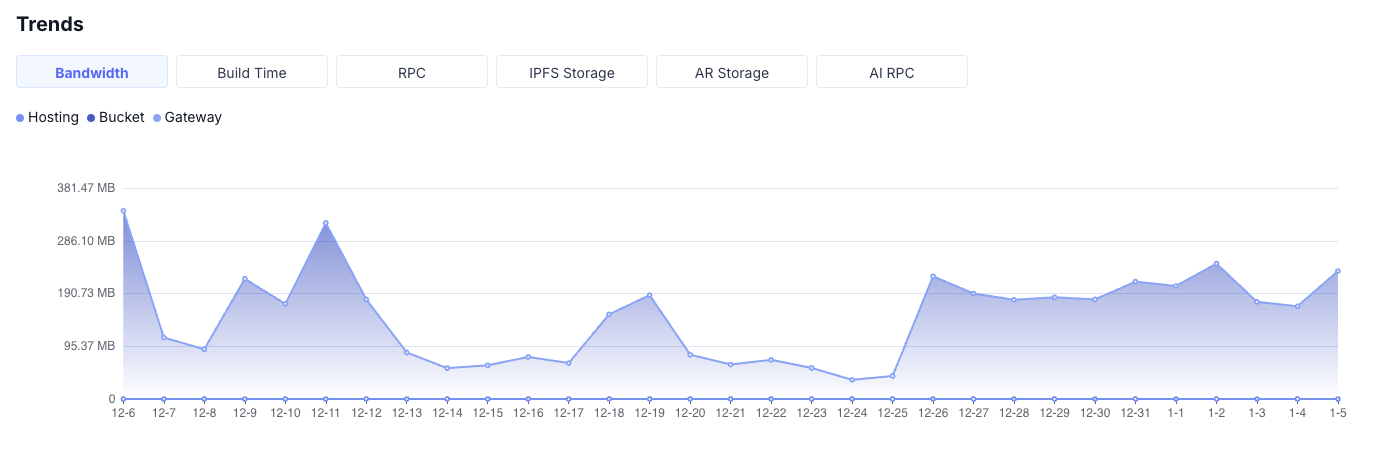
## Trends

<figure><img src="/files/vZSeXql0YJsirHs885bD" alt=""><figcaption></figcaption></figure>

{% hint style="info" %}
The data is usually updated every 15 minutes - 1 hour.
{% endhint %}

{% hint style="success" %}
Already know all the information to start using 4EVERLAND? Let's [Start of development](/get-started/quick-start-guide) now!
{% endhint %}


# Account

Account

## Collaboration

To facilitate collaboration and dashboard management among team members, we have launched the Member feature. This feature allows you to share your account with designated users and assign and manage permissions for shared members, ensuring the security of account usage.

The Member feature on the 4EVERLAND platform allows you to share your account with designated users and assign and manage permissions for shared members. This is a useful tool for facilitating collaboration and dashboard management among team members, while also ensuring the security of account usage.

<figure><img src="/files/mXKoCUFNBngzOhGXNAAO" alt=""><figcaption></figcaption></figure>

### Inviting Members

The 4EVERLAND platform currently offers two types of invitation methods for adding members to a collaboration team: Wallet Invitation and Email Invitation.

For Wallet Invitation, the invited user will receive a notification on the Dashboard Overview page after the invitation is sent. The invited user must already be a registered user of the dashboard to be able to accept the invitation. Once the invitation is accepted, the user can join the inviter's collaboration team and access the dashboard.

For Email Invitation, the invited user will receive an email with an invitation link. The invited user must also be a registered user of the dashboard to accept the invitation. After clicking on the invitation link, the user will be directed to a confirmation page where they can accept the invitation to join the collaboration team.

Both invitation methods require the invited user to be a registered user of the 4EVERLAND dashboard. Once the invitation is accepted, the user can join the collaboration team and access the dashboard. The inviter can then assign permissions to the new member, such as read-only access or the ability to make changes to settings and resources.

{% hint style="info" %}
Currently, a user can invite up to three members to operate and manage their dashboard account, and can join up to three collaboration teams of other users at the same time. If you need to invite more members, please [contact us](https://discord.gg/4everland).
{% endhint %}

### Member Management

#### Roles

Owner: The account owner who has super administrator privileges.&#x20;

Member: A member who shares the account, usually a user who has successfully joined through an invitation.

#### Operations

On the 4EVERLAND platform, collaboration teams can be disbanded by the account owner. When the collaboration team is disbanded, all members will be removed from the team and their access to the dashboard will be revoked.

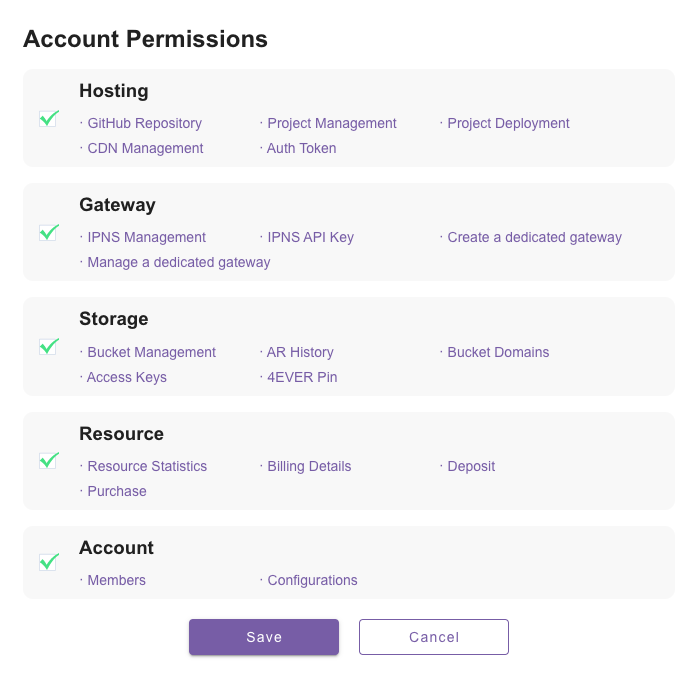
In addition to disbanding the team, the account owner can also edit the permissions of team members. Currently, the owner can edit permissions for Hosting, Gateway, Storage, Resource, and Account. The specific permissions corresponding to these categories can be found in the following chart:

| Permission | Description                                                |
| ---------- | ---------------------------------------------------------- |
| Hosting    | Permissions to create, modify, and delete hosting services |
| Gateway    | Permissions to create, modify, and delete gateway services |
| Storage    | Permissions to create, modify, and delete storage services |
| Resource   | Permissions to purchase and allocate additional resources  |
| Account    | Permissions to manage members and edit account settings    |

Users with Account permissions can manage members on behalf of the owner, including adding new members, removing existing members, and editing member permissions. This allows the owner to delegate some of the responsibilities of managing the collaboration team to other trusted users.

<figure><img src="/files/UfEGPI0EGMUnHFZb8qEo" alt=""><figcaption></figcaption></figure>

On the 4EVERLAND platform, collaboration team members can be removed by the account owner or other members with Account permissions. Removing a member from the team will prevent them from accessing the shared account.

When a member is removed, the account owner or Account permissions user can add a note to their information to provide context for the removal. The note can be helpful for tracking the history of the collaboration team and understanding why certain actions were taken.

In addition to being removed, collaboration team members can also leave the collaboration voluntarily. To do so, they can navigate to Configurations-General and click on the "Exit Collaboration" button. After exiting, they will no longer be able to operate the collaboration account.

It is important to note that removing or leaving a collaboration team can have significant impacts on the team's ability to operate and manage the shared account. Before taking any action, it is recommended that team members communicate and coordinate to ensure that everyone is aware of the potential consequences and is prepared to adapt accordingly.

<figure><img src="/files/aHEmM6nhXd7JEL411JwI" alt=""><figcaption></figcaption></figure>

### Account switching

<figure><img src="/files/TodU7XflMUIraUnuEi09" alt=""><figcaption></figcaption></figure>

When you join a collaborative account on the 4EVERLAND platform, you can easily switch between accounts by clicking on the account switch button located in the lower-left corner of the dashboard. The account switch button allows you to select the account you want to switch to, whether it is your main account (represented by "Owner") or one of the collaborative accounts you have joined (represented by "Member").

By clicking on the account switch button, you can quickly switch between accounts and access the resources and settings for each account. This can be particularly useful if you are managing multiple accounts or collaborating with other users on a shared account.

It is important to note that when you switch between accounts, you will be logged out of your current session and logged in to the new account. This means that any unsaved changes or data in your current session will be lost, so it is recommended that you save your work before switching accounts.

## Operation log

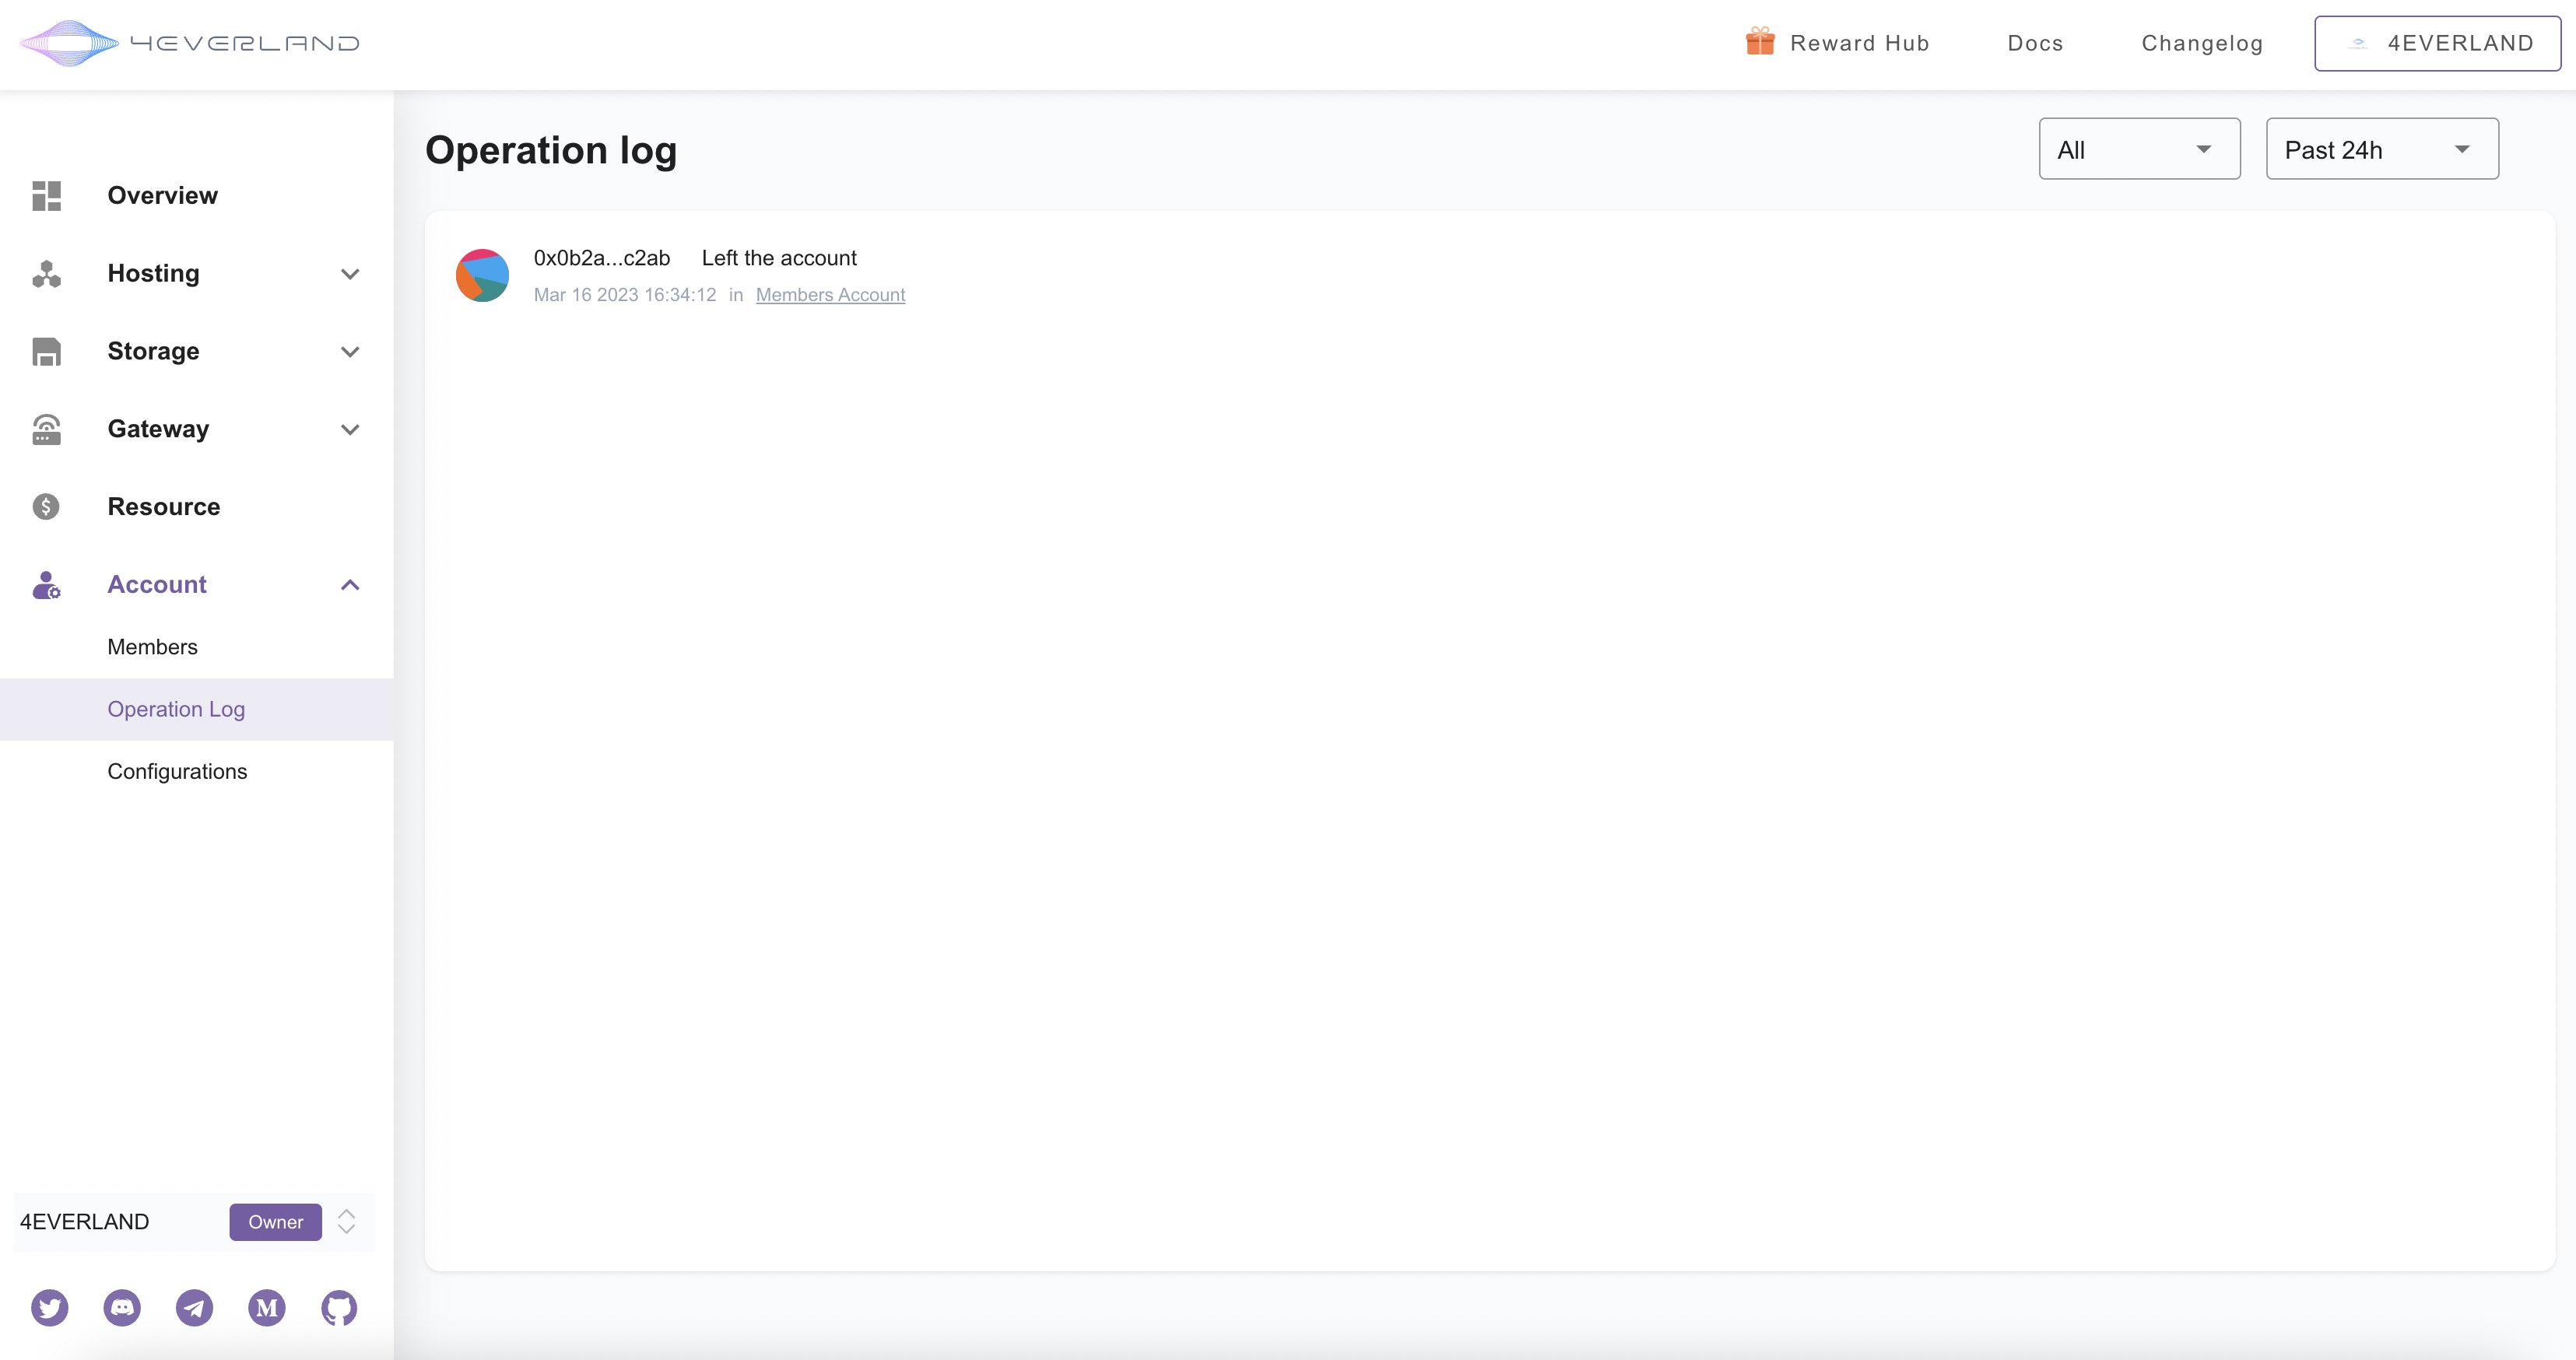
The operation log contains information about the master account and the members.

<figure><img src="/files/MFtoQZwERCcivTf2fIDg" alt=""><figcaption></figcaption></figure>

## Configurations

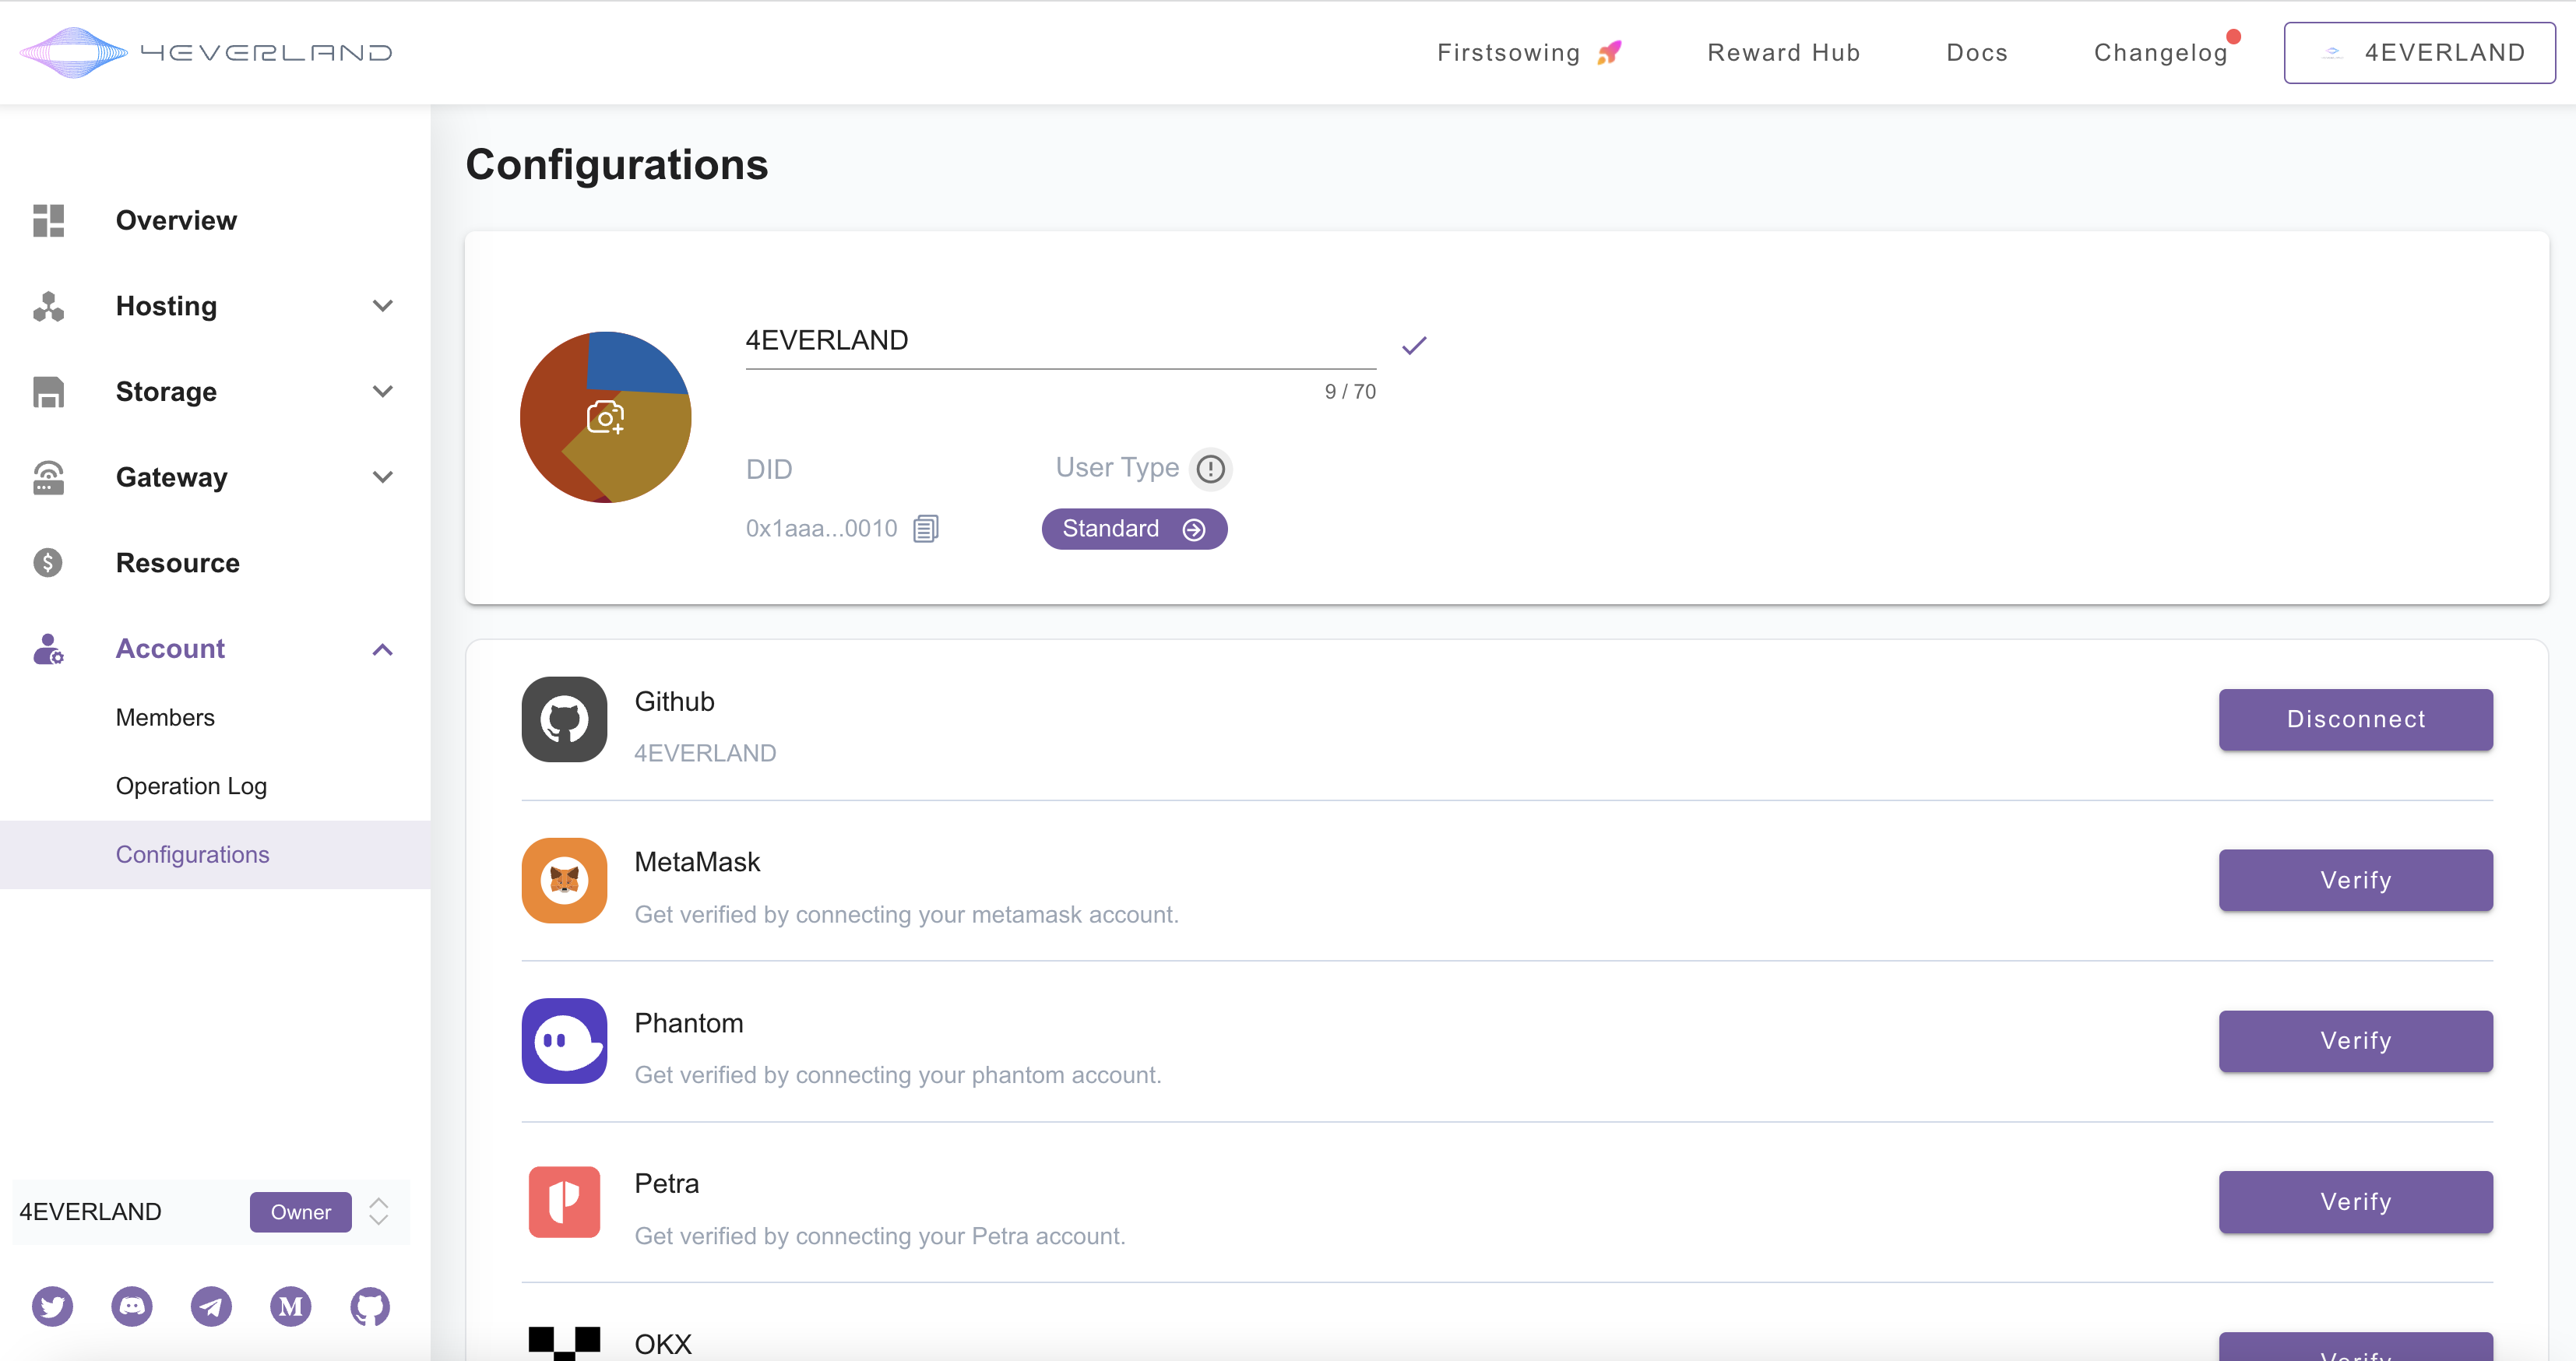
### Profile

Change your account name and account photo on the profile page.

<figure><img src="/files/Z3MsDp94tbk2eB2zV1va" alt=""><figcaption></figcaption></figure>

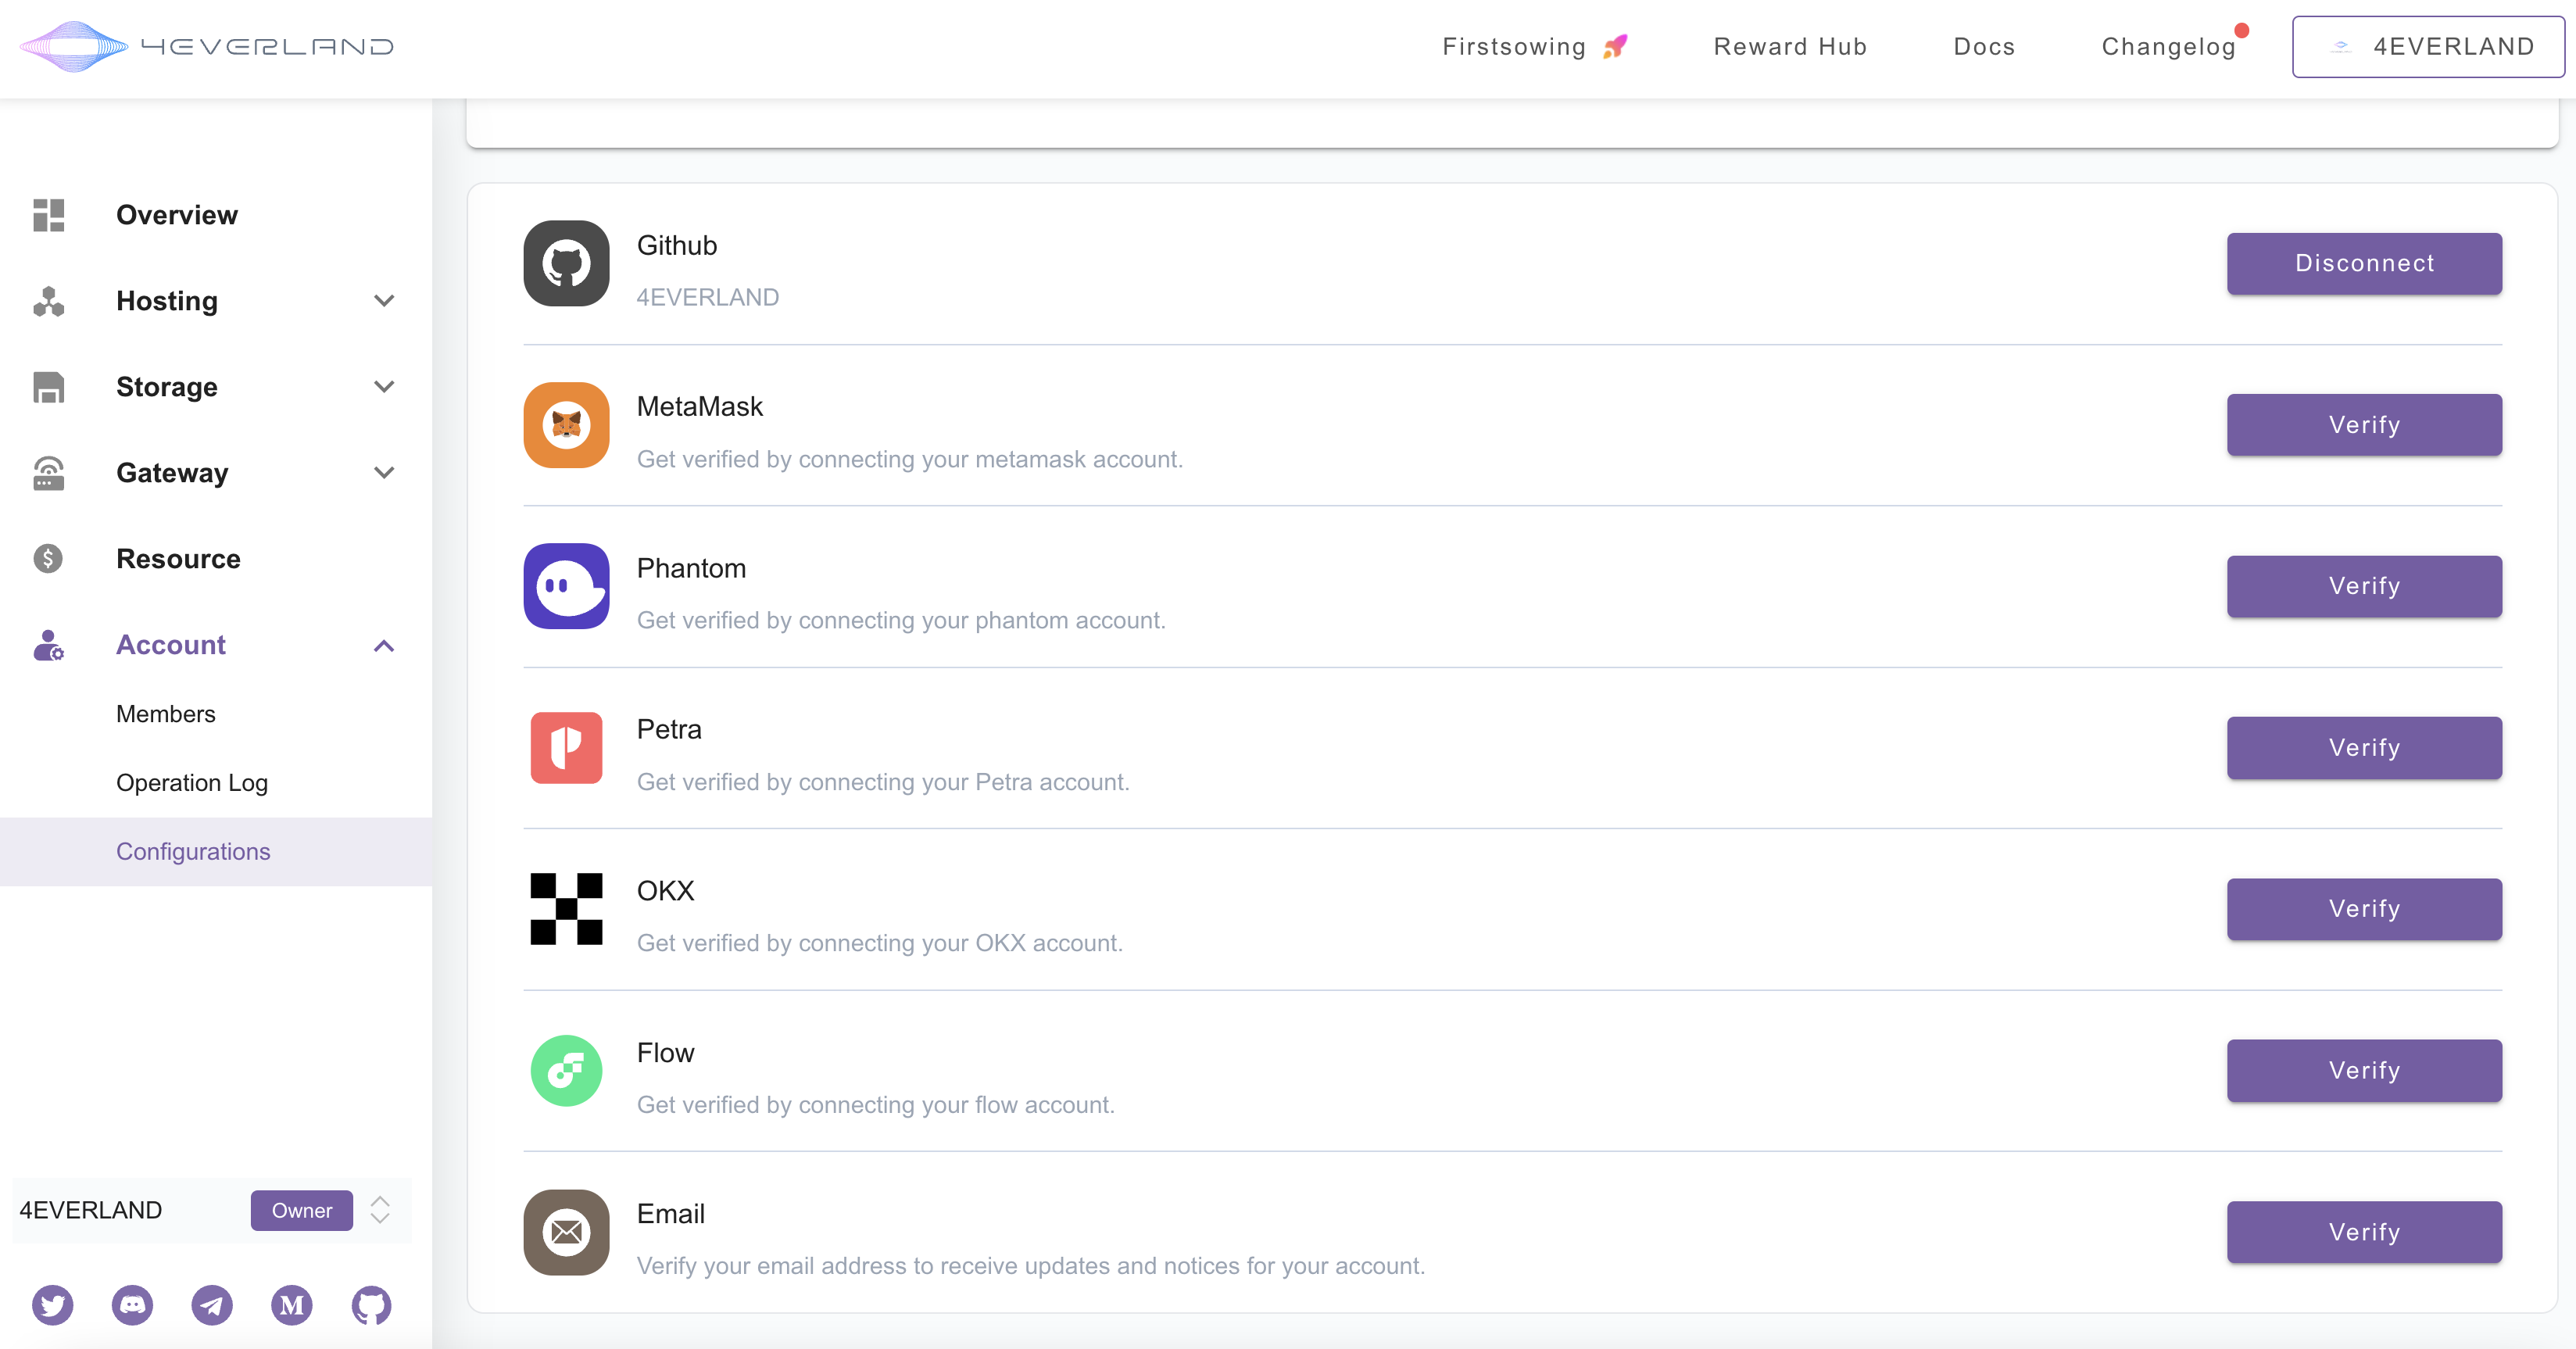
### Account Binding

Bind/Unbind your Github, wallet, Email etc.

<figure><img src="/files/ySMh0NFfYx9a1hL95dIy" alt=""><figcaption></figcaption></figure>

You can delete your account if you wish.

<figure><img src="/files/BwuYcE7K7jyOl5mDCTDt" alt=""><figcaption></figcaption></figure>

{% hint style="info" %}
If you have any questions, please join our [Discord server](https://discord.com/invite/Cun2VpsdjF), or send us an email at <contact@4everland.org>.
{% endhint %}


# Linking Your EVM Wallet to 4EVERLAND Account

Seamless Integration for Reward Distribution

## Why Link Your Wallet?

For users who authenticate with 4EVERLAND via Telegram or GitHub, wallet linking is essential to:

* **Securely Receive Rewards**: Directly credit aggregator mining rewards, airdrops, and other incentives to your EVM-compatible wallet.
* **Enable On-Chain Actions**: Facilitate token transfers, contract interactions, and other Web3 operations without manual address input.
* **Enhance Account Security**: Leverage wallet's private key encryption for transaction signing, reducing the risk of unauthorized access.

## Step-by-Step Linking Guide

### Step 1: Access the 4EVERLAND Dashboard

1. **Navigate to the Dashboard**:
   * Open [4EVERLAND Dashboard](https://dashboard.4everland.org/) in your browser.
2. **Login via Telegram or GitHub**:
   * Click **Connect via Telegram** or **Connect via GitHub** button.
   * *Note*: Ensure your Telegram/GitHub account is already registered with 4EVERLAND.

<figure><img src="/files/f2zTrOlsiSkBiEODEPnm" alt=""><figcaption><p><strong>Login via Telegram or GitHub</strong></p></figcaption></figure>

### Step 2: Authorize Your Account

1. **Complete Authorization**:
   * After clicking the login button, an authorization page will appear.
   * For Telegram:
     * Select **Login as \[Your Telegram Username]** → click **Allow** to grant access permissions.
   * For GitHub:
     * Review requested permissions → click **Authorize 4EVERLAND** to proceed.

<figure><img src="/files/QKpwS13upjyW8em18rPo" alt=""><figcaption></figcaption></figure>

### Step 3: Initiate Wallet Verification

1. **Access Account Settings**:
   * Once logged in, click on **Account** (bottom-left dropdown) → select **Configurations**.
2. **Locate Wallet Verification**:
   * Under the **Wallets** section, find the **Verify EVM Wallet** option.
3. **Select Your Wallet**:
   * Choose from supported wallets:
     * **MetaMask**: Browser extension (Chrome/Firefox)
     * **Binance Wallet**: Mobile/desktop app
     * **OKX Wallet**: Mobile/desktop app
     * **Others**: e.g., Bitget Wallet, Token Pocket&#x20;
   * Click **Verify** to start the linking process.

<figure><img src="/files/nYUGliTBf3VAm3KLjyTp" alt=""><figcaption></figcaption></figure>

### Step 4: Complete Wallet Linking

**MetaMask Example:**

1. **Sign the Message**:
   * A MetaMask popup will appear, requesting you to sign a verification message.
   * Review the message details (including your wallet address and a unique nonce).
   * Click **Sign** to authenticate your wallet ownership.

**Error Handling**:

* **"Wallet already in use"**: If the selected wallet is already linked to another 4EVERLAND account, you must:
  1. Unlink it from the associated account (if accessible).
  2. Or, use a new wallet address to complete the process.

<figure><img src="/files/OEWp2MTPTX4fnlS2xODg" alt=""><figcaption></figcaption></figure>

### **Step 5: You're All Set!**

1. Once verified, your EVM wallet is successfully linked to your Telegram account.
2. All rewards from aggregator mining will be sent directly to this wallet by mining projects.

<figure><img src="/files/tTr2Wktfu484rPzAhFbf" alt=""><figcaption></figcaption></figure>

## Troubleshooting

| Issue                         | Solution                                                                                     |
| ----------------------------- | -------------------------------------------------------------------------------------------- |
| MetaMask popup doesn't appear | <p>1. Ensure MetaMask extension is enabled and unlocked<br>2. Refresh the 4EVERLAND page</p> |
| "Signature failed" error      | Clear MetaMask cache → Re-sign the verification message                                      |
| Wallet not recognized         | Confirm your wallet is EVM-compatible (supports Ethereum Virtual Machine)                    |
| Rewards not received          | Check wallet transaction history → Contact [4EVERLAND Support](mailto:contact@4everland.org) |

{% hint style="info" %}

### 📞 Support Resources

* **Live Chat**: Join [Discord server](https://discord.com/invite/Cun2VpsdjF) → #Open a ticket
* **Email**: <contact@4everland.org> (include your 4EVERLAND username and wallet address in the subject)
  {% endhint %}


# Balance Alert

Balance Alert Function Guide: Email and Telegram Notifications

4EVERLAND provides a **multi-channel balance alert system** that uses **email** and **Telegram** to keep you updated on your LAND balance status in real time. This ensures you stay informed about balance changes and avoid service interruptions due to insufficient funds.&#x20;

Key scenarios include:

* Alerts when your balance falls below a set threshold (LAND Balance Alert).
* Urgent notifications when your balance is fully exhausted (LAND Depletion Alert).
* Notifications for important actions (e.g., deposit confirmations, successful deployments).

All alerts follow **intelligent frequency control** (e.g., reminders every 7 days if unresolved, with a maximum of 3 reminders) to balance timeliness and user experience.

## Setup Guide: Enable Balance Alerts & Set Threshold

**Path**: 4EVERLAND Dashboard → **Billing** → LAND Balance Section

<figure><img src="/files/Zv1S13yvhLNgqRB5ueFS" alt=""><figcaption><p><strong>4EVERLAND</strong> <strong>Balance Alert</strong></p></figcaption></figure>

Click the **Balance Alert** button:

* A modal opens. Toggle **Enable Balance Alert** to **ON**.
* Select **Notification Channels**: Connect both **Email** and **Telegram**.
* Enter your **Alert Threshold** (e.g., `2000000 LAND`; minimum `1 LAND`).

<figure><img src="/files/4D2SOhFIdl3djXnoxDWw" alt=""><figcaption><p>Turn ON the Alert</p></figcaption></figure>

## Troubleshooting Common Issues

#### 1. Not Receiving Emails?

* **Check Email Verification**: Ensure your email is marked "Verified" in the Security Center.
* **Check Spam Folder**: Some emails may be filtered; add `noreply@4everland.org` to your whitelist.
* **Verify Alert Settings**: Ensure "LAND Balance Alert" are enabled.

#### &#x20;2. Not Receiving Telegram Messages?

* **Confirm Bot Binding**: Check that your Telegram username (including `@`) are correct; resend a test message.
* **Unblock the Bot**: Search for your bot in Telegram and ensure "Block Messages" is not enabled.

#### 3. Frequent Repeat Notifications?

* **System Design**: Alerts repeat every 7 days if unresolved. Notifications stop automatically once the balance is restored.
* **Adjust Thresholds**: Increase the alert threshold in **Balance Alert Settings**.

#### 4. How to Disable Specific Notifications?

* Go to **Billing > Balance Alert** and toggle off the alert.

{% hint style="info" %}
With dual-channel alerts via email and Telegram, you can fully monitor your account status and ensure continuous 4EVERLAND service.&#x20;

We recommend binding both channels and setting a reasonable threshold (recommended: 2,000,000 LAND to avoid minor fluctuations).&#x20;

For questions, contact us via email *<contact@4everland.org>*.
{% endhint %}


# Billing and Pricing


# What is LAND?

LAND is the only Gas in the 4EVERLAND ecosystem, used to track the usage of various ecosystem resources. The price of LAND is stable and pegged to the US dollar, with 1 USD equaling 1,000,000 LAND.

The 4EVERLAND ecosystem provides a variety of resources such as storage, network, and computation. Users' consumption of each type of resource incurs costs corresponding to the usage. All resources are valued in LAND, with each type of resource having its own distinct LAND price. When resources are utilized, the corresponding amount of LAND is consumed.&#x20;

LAND can be obtained through the exchange with other assets and will also be supported for acquisition through the consumption or staking of "4EVER" Tokens in the future.

## We need LAND for the following reasons:

1. Stable pricing: The cost of storage, network, and computing resources is relatively stable and requires a pricing method that is not impacted by token price fluctuations or network congestion.
2. User habits and cost control: A stable pricing method is more in line with user habits and helps developers and project owners control the actual operating costs of applications.
3. Unified pricing unit: The 4EVERLAND ecosystem contains various resources, each with its own individual pricing method. LAND, as a unified pricing unit, helps track the usage of various ecosystem resources.
4. Multi-asset connectivity: Users hold diverse assets, and LAND can connect various public chain ecosystems and assets. This enables users to exchange any asset from any chain into LAND and conveniently access all resources within the 4EVERLAND ecosystem.

## How does LAND work

LAND serves as the "Gas" of the 4EVERLAND ecosystem and is used to pay for various resource consumptions. Currently, 4EVERLAND provides a variety of resources such as IPFS storage, Arweave storage, RPC CUs, Bandwidth, Build Minutes, etc. Any use of these resources requires the corresponding consumption of LAND.&#x20;

For developers or individuals using 4EVERLAND services, it is essential to ensure that there is a sufficient amount of LAND in their accounts. You can exchange various assets from multiple chains for LAND, and LAND can be used to pay for resource consumption.

For example, imagine you own a car, and the air conditioning, battery, engine, and lights in the car all require sufficient gasoline to keep running. As you use these devices, the gasoline level decreases continuously, so you need to regularly visit a gas station to refuel the car to ensure it continues to run smoothly. Using 4EVERLAND services is similar, as it requires ensuring that there is enough LAND in the account to pay for the communication, computation, and storage costs, to maintain the account's normal operation.

To learn more about obtaining LAND, please refer to:

{% content-ref url="/pages/lJWto0dbOfzQMyOgPpiT" %}
[How to Obtain LAND?](/get-started/billing-and-pricing/how-to-obtain-land)
{% endcontent-ref %}

## Cost of Resources

LAND reflects the actual operational costs of applications using 4EVERLAND services, including storage, computing, network, and other resources. All resources are priced in LAND.

Users of 4EVERLAND services must be able to fully pay for the execution of these services. The platform sets periodic/usage limits on the resource consumption of these service users to prevent malicious code from consuming resources.

Over time, the costs associated with communication, computation, and storage are more likely to decrease rather than increase. For example, the cost of decentralized protocol storage is decreasing, and hardware is becoming more efficient. 4EVERLAND will also continuously improve over time to better utilize resources.

For specific resource pricing models and costs, please refer to:

{% content-ref url="/pages/ulzpibRAeiNR5JnSrkQs" %}
[Pricing Model](/get-started/billing-and-pricing/pricing-model)
{% endcontent-ref %}

{% hint style="info" %}
If you have any questions, please join our [Discord server](https://discord.com/invite/Cun2VpsdjF), or send us an email at <contact@4everland.org>.
{% endhint %}


# How to Obtain LAND?

LAND is the sole pricing asset in the 4EVERLAND ecosystem, with all ecosystem resources priced in LAND. When consuming resources, the corresponding amount of LAND needs to be consumed.&#x20;

The price of LAND is pegged to the US dollar, with 1 USD equaling 1,000,000 LAND. For more information about LAND, please refer to:

{% content-ref url="/pages/UixlUqaYsna41So3fQAO" %}
[What is LAND?](/get-started/billing-and-pricing/what-is-land)
{% endcontent-ref %}

Currently, LAND can be obtained through exchange with the following chains and assets:

| **Chains** | **Assets**                   |
| ---------- | ---------------------------- |
| Polygon    | DAI, USDT, USDC, USDC.e      |
| Ethereum   | 4EVER, DAI, ETH, USDT, USDC  |
| BSC        | 4EVER, USD1, DAI, USDT, USDC |
| opBNB      | BNB                          |
| zkSync Era | DAI, USDT, USDC              |
| Arbitrum   | DAI, USDT, USDC              |
| Optimism   | DAI, ETH, USDT, USDC         |
| Scroll     | DAI, ETH, USDT, USDC         |
| everPay    | DAI, USDT, USDC              |
| Blast      | ETH                          |

{% hint style="danger" %}
Please note: LAND does not support transfers and does not support reverse exchanges.
{% endhint %}

## Obtaining LAND

You can exchange LAND by following these steps:

1. Open and log in to the 4EVERLAND Dashboard.
2. Click on "Billing" on the left-hand side and choose "Deposit".

<div align="right" data-full-width="false"><figure><img src="/files/1dA6u7kEixjSMjn4kyHj" alt=""><figcaption></figcaption></figure></div>

3. Enter the amount of LAND you wish to deposit, select the chain (Polygon/Ethereum/BSC/zkSync Era/etc) and the payment asset (USDT/USDC/DAI). \
   \
   **1 USD = 1 million LAND**<br>
4. Click "confirm" to complete the deposit.

<figure><img src="/files/OAoH6DMfzIS6o37XkjFL" alt=""><figcaption></figcaption></figure>

## Checking the balance

On the 'Overview' page, you can quickly view the current account's resource usage and LAND balance.&#x20;

<figure><img src="/files/3w9jLhsaHY0SPbpU5umz" alt=""><figcaption></figcaption></figure>

{% hint style="info" %}
Please ensure that your account has enough LAND to pay for the required service resources. When free resources are exhausted, the system will automatically start deducting LAND to maintain the operation of the service.
{% endhint %}

## How to deposit LAND for other accounts

**Select a Payment Chain**: First select a chain for payment and open the corresponding contract address:

| **Chains**    | **Contract**                                                                                                                     | **4EVER**                                  | **USD1**                                   | **USDC**                                   | **USDT**                                   | **DAI**                                    | **USDC.e**                                 | **wETH**                                   |
| ------------- | -------------------------------------------------------------------------------------------------------------------------------- | ------------------------------------------ | ------------------------------------------ | ------------------------------------------ | ------------------------------------------ | ------------------------------------------ | ------------------------------------------ | ------------------------------------------ |
| Polygon       | [0x9b6f144A0aAd126a1AA97EeE2061277B39b8B9d8](https://polygonscan.com/address/0x9b6f144A0aAd126a1AA97EeE2061277B39b8B9d8)         | -                                          | -                                          | 0x2791Bca1f2de4661ED88A30C99A7a9449Aa84174 | 0xc2132D05D31c914a87C6611C10748AEb04B58e8F | 0x8f3Cf7ad23Cd3CaDbD9735AFf958023239c6A063 | 0x2791Bca1f2de4661ED88A30C99A7a9449Aa84174 | -                                          |
| Ethereum      | [0xE663E0E3f9b034E9911d4746760efE00115D11E5](https://etherscan.io/address/0xE663E0E3f9b034E9911d4746760efE00115D11E5)            | 0xe355De6a6043b0580Ff5A26b46051A4809B12793 | -                                          | 0xA0b86991c6218b36c1d19D4a2e9Eb0cE3606eB48 | 0xdAC17F958D2ee523a2206206994597C13D831ec7 | 0x6B175474E89094C44Da98b954EedeAC495271d0F | -                                          | -                                          |
| BSC           | [0xE663E0E3f9b034E9911d4746760efE00115D11E5](https://bscscan.com/address/0xE663E0E3f9b034E9911d4746760efE00115D11E5)             | 0x63eC886286f30AD392749b9e8f24f67F5b8Ac394 | 0x8d0D000Ee44948FC98c9B98A4FA4921476f08B0d | 0x8AC76a51cc950d9822D68b83fE1Ad97B32Cd580d | 0x55d398326f99059fF775485246999027B3197955 | 0x1AF3F329e8BE154074D8769D1FFa4eE058B1DBc3 | -                                          | -                                          |
| opBNB         | [0xfE99cdC31A0D588AB940aB7143533242AEf5276d](https://opbnbscan.com/address/0xfE99cdC31A0D588AB940aB7143533242AEf5276d)           | -                                          | -                                          | -                                          | -                                          | -                                          | -                                          | -                                          |
| zkSync Era    | [0x2a16d86FA136e096c32B1cF0D3E9D678A537CecD](https://explorer.zksync.io/address/0x2a16d86FA136e096c32B1cF0D3E9D678A537CecD)      | -                                          | -                                          | 0x3355df6D4c9C3035724Fd0e3914dE96A5a83aaf4 | 0x493257fD37EDB34451f62EDf8D2a0C418852bA4C | 0x4B9eb6c0b6ea15176BBF62841C6B2A8a398cb656 | -                                          | -                                          |
| Arbitrum      | [0x12bCabE468A0CDF439750154d77216Dbb4653fd9](https://arbiscan.io/address/0x12bCabE468A0CDF439750154d77216Dbb4653fd9)             | -                                          | -                                          | 0xaf88d065e77c8cC2239327C5EDb3A432268e5831 | 0xFd086bC7CD5C481DCC9C85ebE478A1C0b69FCbb9 | 0xDA10009cBd5D07dd0CeCc66161FC93D7c9000da1 | -                                          | -                                          |
| Optimism      | [0xE663E0E3f9b034E9911d4746760efE00115D11E5](https://optimistic.etherscan.io/address/0xE663E0E3f9b034E9911d4746760efE00115D11E5) | -                                          | -                                          | 0x0b2C639c533813f4Aa9D7837CAf62653d097Ff85 | 0x94b008aA00579c1307B0EF2c499aD98a8ce58e58 | 0xDA10009cBd5D07dd0CeCc66161FC93D7c9000da1 | -                                          | 0x4200000000000000000000000000000000000006 |
| Scroll        | [0xfE99cdC31A0D588AB940aB7143533242AEf5276d](https://scrollscan.com/address/0xfE99cdC31A0D588AB940aB7143533242AEf5276d)          | -                                          | -                                          | 0x06eFdBFf2a14a7c8E15944D1F4A48F9F95F663A4 | 0xf55BEC9cafDbE8730f096Aa55dad6D22d44099Df | 0xcA77eB3fEFe3725Dc33bccB54eDEFc3D9f764f97 | -                                          | 0x5300000000000000000000000000000000000004 |
| everPay       | [0xb7B4360F7F6298dE2e7a11009270F35F189Bd77E](https://scan.everpay.io/account/0xb7B4360F7F6298dE2e7a11009270F35F189Bd77E)         | -                                          | -                                          | 0x2791Bca1f2de4661ED88A30C99A7a9449Aa84174 | 0xc2132D05D31c914a87C6611C10748AEb04B58e8F | 0x8f3Cf7ad23Cd3CaDbD9735AFf958023239c6A063 | 0x2791Bca1f2de4661ED88A30C99A7a9449Aa84174 | -                                          |
| Blast         | [0x8873759fC064fB23651A0739a95Bdc9e00d3F00a](https://blastscan.io/address/0x8873759fc064fb23651a0739a95bdc9e00d3f00a)            | -                                          | -                                          | -                                          | -                                          | -                                          | -                                          |                                            |
| Linea         | [0xfE99cdC31A0D588AB940aB7143533242AEf5276d](https://lineascan.build/address/0xfE99cdC31A0D588AB940aB7143533242AEf5276d)         | -                                          | -                                          | 0x176211869cA2b568f2A7D4EE941E073a821EE1ff | 0xA219439258ca9da29E9Cc4cE5596924745e12B93 | 0x4AF15ec2A0BD43Db75dd04E62FAA3B8EF36b00d5 | -                                          | -                                          |
| polygon zkevm | [0xE663E0E3f9b034E9911d4746760efE00115D11E5](https://zkevm.polygonscan.com/address/0xE663E0E3f9b034E9911d4746760efE00115D11E5)   | -                                          | -                                          | 0xA8CE8aee21bC2A48a5EF670afCc9274C7bbbC035 | 0x1E4a5963aBFD975d8c9021ce480b42188849D41d | 0xC5015b9d9161Dca7e18e32f6f25C4aD850731Fd4 | -                                          | -                                          |

**Access Contract Interface**: Open the contract address and click on "Write as Proxy", then find the "mint" method.

<figure><img src="/files/RPjiYV8WzGG7trmFNMGW" alt=""><figcaption></figcaption></figure>

If you don't have the "Write" as Proxy option, you need to set up the proxy first, take bsc as an example, the steps are as follows:

<figure><img src="/files/0T9xZZUiAVP8CxWEu0W9" alt=""><figcaption></figcaption></figure>

Click "verify" and sign.

<figure><img src="/files/GB0izxWSns1vaM6Y7qgI" alt=""><figcaption></figcaption></figure>

**Fill in Parameters**:

* **Coin**: Enter the token address (default: USDC `0x3c499c542cEF5E3811e1192ce70d8cC03d5c3359`).
* **Account**: Input the recipient’s **euid** (256-bit address).
* **Amount**: Specify the token amount in its base unit.
  * *Example*: To deposit **20 USD**, input `20000000` (20 × 1,000,000).
  * *Reason*: USDC uses **6 decimal places**, so 1 USD = 1,000,000 units.

<figure><img src="/files/GPXi3nf5SaxNhXOV7Bhf" alt=""><figcaption></figcaption></figure>

### How to find the UID?&#x20;

Open the dashboard, expand the “Account” module, click “Configurations” and copy the DID.

<figure><img src="/files/P9qweoFlWOMUMa2jPDkf" alt=""><figcaption></figcaption></figure>

After filling in the information, click on the "Write" button, sign and send the transaction. A successful transaction indicates the completion of the deposit.


# Pricing Model

4EVERLAND offers two free basic packages, Trial and Standard, to allow users to quickly experience all services on the platform. When resource consumption exceeds the limits of the free packages, charges are based on the actual excess resource consumption.

All resources are priced in LAND, with the price of LAND anchored to the US dollar at a rate of 1 USD = 1,000,000 LAND.&#x20;

For more information about LAND, please refer to:

{% content-ref url="/pages/lJWto0dbOfzQMyOgPpiT" %}
[How to Obtain LAND?](/get-started/billing-and-pricing/how-to-obtain-land)
{% endcontent-ref %}

## Free Packages

<table data-header-hidden><thead><tr><th width="390"></th><th></th></tr></thead><tbody><tr><td><strong>Trial: Free for 7-days</strong></td><td><strong>Standard: Free resources every month</strong></td></tr><tr><td>✅ Unconditional</td><td>✅ Requires <a href="/pages/n2mW3bFGpHcyKGxSH0b0">on-chain identity registration</a> and account activation</td></tr><tr><td>✅ IPFS Storage: 1 GB</td><td>✅ IPFS Storage: 6 GB/month</td></tr><tr><td>✅ Arweave Storage: 10 MB</td><td>✅ Arweave Storage: Total 100 MB</td></tr><tr><td>✅ Build Time: 50 minutes</td><td>✅ Build Time: 250 minutes/month</td></tr><tr><td>✅ Bandwidth: 1 GB</td><td>✅ Bandwidth: 10 GB/month</td></tr><tr><td>❌ RPC: Not supported</td><td>✅ RPC: 100,000,000 CUs/month (Rate Limit: 300 CUPS)</td></tr><tr><td>Valid for 7 days, expires if unused</td><td>Resets on the 1st of each month</td></tr></tbody></table>

## Pay As You Go

| **Resources**   | **Price**            | **Conversion in US dollars** |
| --------------- | -------------------- | ---------------------------- |
| Bandwidth       | 100,000 LAND/GB      | $0.1/GB                      |
| Build Time      | 30,000 LAND/minutes  | $3/100 minutes               |
| RPC             | 0.2 LAND/CU          | $1/5,000,000 CUs             |
| IPFS Storage    | 800,00 LAND/GB/month | $0.08/GB/month               |
| Arweave Storage | Dynamic pricing      | Dynamic pricing              |

## Billing Explanation

### IPFS Storage

IPFS adopts a space-time pricing method, and the specific calculation formula is as follows: `ipfs_fee = X * unit_price * Time`

* `X` is the IPFS storage occupation size, in Bytes
* `unit_price` is the minimum billing unit, currently valued at: 0.000000000029 LAND/Byte/s
* `Time` is the space occupation time, in seconds\
  The following is an example of the cost of storing a 1GB file for 1 day: 0.000000000029 \* 1024\*1024 \* 1024 \* 60 \* 60 \*24 = 2690.3675 LAND

The following is an example calculation of the cost required for storing a 1GB file for 1 day: 0.000000000029 \* 1024\*1024 \* 1024 \* 60 \* 60 \*24 = 2690.3675 LAND

### Arweave Storage

The Arweave storage cost is dynamic and depends on several parameters, the specific calculation formula is as follows: `arweave_fee = X * arweave_cost *global_multiplier`

* `X` is the Arweave storage occupation size, in Bytes.
* `arweave_cost` is the price for storing 1GB of Arweave storage converted into a unit price for 1 Byte (`arweave_cost` ignores the minimum block size impact of Arweave tiered pricing). For example, if `arweave_cost` (1GB) = $10 = 10,000,000 LAND, then `arweave_cost` = 0.9313 LAND. `arweave_cost`(1GB) is determined by the Arweave Network, specific real-time information is available at [Arweave fees](https://arfees.4everland.site/)​.
* `global_multiplier` is the transaction multiplier considering financial management costs and asset volatility, currently set at 1.

### Build Time

Build Time billing is as follows: `buildtime_fee = unit_price * Time`

* `unit_price` is the minimum billing unit, currently valued at 0.5 LAND/ms.
* `Time` is the actual construction duration consumed, in milliseconds (ms).

### Bandwidth

Bandwidth billing is as follows: `bandwidth_fee = unit_price * consume_bandwidth`

* `unit_price` is the minimum billing unit, currently valued at 0.0001 LAND/Byte.
* `consume_bandwidth` is the actual consumed traffic, in Bytes.

### RPC

RPC billing is as follows: `rpc_fee = unit_price * consume_cu`

* `unit_price` is the minimum billing unit, currently valued at 0.2 LAND/CU.
* `consume_cu` is the actual number of CUs consumed.
* For the number of CUs consumed by each request, please refer to the documentation at:

{% content-ref url="/pages/DT9rY6lvmuHnqTWiptAW" %}
[What's CUs/CUPS](/rpc/whats-cus-cups)
{% endcontent-ref %}


# Q\&As

1. **What is LAND?**

\- LAND is the sole gas within the 4EVERLAND ecosystem, utilized for tracking the usage of various ecosystem resources. Its value is pegged to the US dollar, with 1 USD equating 1,000,000 LAND.<br>

2. **Who is LAND designed for?**

\- LAND functions as the "Gas" of the 4EVERLAND ecosystem and is employed to pay for a variety of resource consumption. All users and developers wishing to use 4EVERLAND services are required to have sufficient LAND to cover resource usage.<br>

3. **What fees are involved in purchasing services using LAND?**

\- When recharging LAND using different chains, there will be a gas consumption fee. However, subsequent usage will automatically deduct LAND from the account without incurring further charges.<br>

4. **From which chains can LAND be recharged?**

\- LAND deposit is currently available on Polygon, BSC, zkSync Era, and Arbitrum. 4EVERLAND also intends to continue adding support for additional chains.<br>

5. **Can LAND be used for transfer transactions?**

\- Currently, LAND can only be used to purchase product services within 4EVERLAND and can only be acquired using USDC/USDT/DAI, and cannot be transferred.<br>

6. **How can existing users migrate or withdraw?**

\- Resources obtained through purchase or airdrop that have not been fully utilized automatically convert to equivalent LAND recharge in the account. For withdrawing existing USDC from the account, visit the following link: <https://dashboard.4everland.org/billing/withdraw>.<br>

7. **How to purchase resources now?**

\- After the resource center upgrade, resource purchases will transition to a LAND-based model. On the "Deposit" page, select the desired resources, which will then be automatically converted to corresponding LAND for recharging.

8. **It seems that I have USDC in my wallet, but the balance is shown as 0 and I'm unable to complete a deposit?**

\- Currently, there are multiple variants of USDC on the Polygon, and 4EVERLAND only supports recharging using the usdc.e variant at the moment (which is typically obtainable through trading on Uniswap). Please note that the USDC traded on centralized exchanges is usually the native variant, which 4EVERLAND will soon support.


# Tokenomics

4EVERLAND is an integrated Web3 cloud computing platform that combines storage, networking, and computational capabilities. Positioned strategically in the DePIN (Decentralized Physical Infrastructure Networks) + AI track, 4EVERLAND aims to empower developers by facilitating a seamless transition from Web2 to Web3, while offering robust infrastructure solutions for millions of Web3 developers and applications globally.

The platform’s economic model has been carefully designed to ensure network stability and security while implementing a sustainable and dynamic incentive mechanism. This framework accelerates the deployment of a resilient network infrastructure and ensures fair distribution of benefits among all stakeholders. It incentivizes participants to work collaboratively towards shared goals that ultimately enhance the value of the ecosystem.

Through its dynamic and efficient economic model, 4EVERLAND achieves multiple strategic objectives: fostering robust network effects, enabling sustainable node operation mechanisms, maintaining competitive usage fees for developers, and facilitating the rapid deployment of globally distributed nodes. This comprehensive approach guarantees the platform’s long-term viability and scalability in an ever-evolving Web3 ecosystem.

## The Dual-Token Design of the 4EVERLAND Ecosystem <a href="#aef6" id="aef6"></a>

The 4EVERLAND economic ecosystem employs a distinct **dual-token economic model**: $4EVER is the core governance token of 4EVERLAND, while $LAND is the resource-accounting token for the network’s ecology. These two tokens serve distinct functions that operate in tandem. This dual-token structure effectively separates resource consumption from ecosystem governance, providing a clear and streamlined operational model.

### $LAND: Stable Points and Resource Measurement Unit <a href="#id-8eb7" id="id-8eb7"></a>

The $LAND token was introduced to offer users a stable and efficient resource payment system within the 4EVERLAND ecosystem. As a stable point, it functions as the primary settlement tool for all user services.

* **Value Peg:** $LAND is pegged at a fixed exchange rate of 1 US Dollar = 1 Million $LAND. This eliminates price volatility, ensuring predictable and stable resource billing.
* **Resource Payment:** $LAND is used to measure and account for all resource consumption on the 4EVERLAND platform, such as bandwidth, build time, computation units, API calls, and node usage.
* **Token Exchange Flexibility:** Users can exchange tokens from most blockchain into $LAND. The exchanged tokens, also referred to as ‘Buy-In Tokens’, are automatically converted into stablecoins and deposited into the Treasury smart contract.
* **Treasury Fund Recycling Mechanism:** Assets deposited into the Treasury are converted to stable coins and allocated in two key ways:\
  \- **Ecosystem Rewards**: Used for $4EVER buybacks and distributed as incentives for Resource Providers and $4EVER holders.\
  \- **Token Buyback & Burn**: Enhances $4EVER scarcity through market-driven buybacks, increasing its value.
* **Non-Circulatory Nature:** $LAND is strictly for resource payments within the 4EVERLAND ecosystem. It cannot be traded on secondary markets.

### $4EVER — Governance and Utility Token <a href="#id-8854" id="id-8854"></a>

As 4EVERLAND’s governance and utility token, $4EVER serves as the central carrier of the ecosystem’s value, addressing use cases that range from resource payment to value capture and decentralized governance. It plays a vital role in driving the system’s long-term sustainability.

**Functions and Benefits of $4EVER**

* **Node Staking and Rewards:** $4EVER powers the Proof-of-Stake (PoS) mechanism and Active Verification Services (AVS). Resource Providers must stake $4EVER to participate in node elections and receive $4EVER as rewards for their contributions.
* **Value Capture & Buyback Mechanism:** The platform’s revenue recycling mechanisms enable $4EVER to capture value from the Treasury pool, enhancing its scarcity and increasing its worth through a buyback-and-burn process.
* **Payment Option:** Users can opt to exchange $4EVER for $LAND and use it to pay for services fees, driving token circulation and demand.
* **Ecosystem Governance:** As the governance token, $4EVER empowers holders to participate in critical decision-making processes, such as proposing and voting on platform upgrades, resource allocation, and shaping the ecosystem’s future.

In essence, $4EVER is the cornerstone of functionality and value capture within the 4EVERLAND ecosystem. It not only supports the day-to-day operational needs of the platform but also promotes transparency and fairness via a decentralized governance system. As the platform continues to expand, $4EVER will increasingly serve a broader audience, including node operators, developers, and community participants, offering sustainable incentives and value returns. Empowered by technological innovation and community collaboration, $4EVER is poised to be a driving force behind the future of decentralized internet.

### How the Dual-Token Model Works

The interaction between $4EVER and $LAND sets the foundation for 4EVERLAND’s efficient network operation and long-term growth. The dual-token system operates as follows:

1. **Fee Payment:** Users can convert assets from most networks into $LAND and use it to pay for storage, networking, and computational resources. The stable nature of $LAND mitigates risks associated with token price volatility, ensuring predictable and accurate fee calculations.
2. **Treasury Fund Recycling:** Assets deposited into the Treasury are transformed into stable coins and utilized for $4EVER buybacks, allowing the token to capture ecosystem value while enabling a sustainable economic cycle.
3. **Resource Provider Staking and Rewards:** Resource Providers (including operators for storage, networking, and computation) must stake $4EVER to qualify for contributions to the network. In return, they are rewarded in $4EVER, encouraging resource efficiency and network scalability.
4. **Economic Incentives:** By facilitating the circulation and usage of both $4EVER and $LAND, 4EVERLAND promotes economic activity, enhances liquidity, boosts user engagement, and drives ecosystem growth.
5. **Governance Participation:** As a governance token, $4EVER allows holders to propose new features, vote on key decisions, and collaboratively shape the network’s trajectory, ensuring the community’s alignment with platform development.

This dual-token model integrates payment, rewards, and governance mechanisms, forming a robust foundation for 4EVERLAND’s sustainable ecosystem.

<figure><img src="/files/83PQfp3UFqgzRO6Ynzq0" alt=""><figcaption></figcaption></figure>

## Token Allocation Model <a href="#a787" id="a787"></a>

The tokenomics of $4EVER are carefully structured to balance long-term stability with growth opportunities:

* **Max Supply**: 10,000,000,000 $4EVER
* **Contract Address**: \
  \- Ethereum: <https://etherscan.io/token/0xe355de6a6043b0580ff5a26b46051a4809b12793>;\
  \- Binance Smart Chain: <https://bscscan.com/token/0x63eC886286f30AD392749b9e8f24f67F5b8Ac394>

<figure><img src="/files/c6zBaCluzElvdlLyl15g" alt=""><figcaption></figcaption></figure>

**Node Rewards: 40%**

* 4 billion tokens allocated to incentivize Resource Providers, distributed linearly over 96 months (8 years) to support stable network operations.

**Operating Funds: 10%**

* 1 billion tokens reserved for marketing, partnerships, and ecosystem operations, with a vesting period of 48 months.

**Community Funds: 15%**

* 1.5 billion tokens allocated for community development, incentivization, and ecosystem growth, released linearly over 48 months.

**User Rewards: 5%**

* 500 million tokens earmarked for airdrops to reward early community contributors.

**Initial Liquidity & MM Fund: 3%**

* 300 million tokens allocated to liquidity pools to ensure smooth secondary market operations, supporting price stability.

**Token Sale: 15%**

* 1.5 billion tokens allocated to early investors, with a 3-month lock-up followed by 24 months of linear release.

**Core Team & Consultants: 12%**

* 1.2 billion tokens distributed to the core team, with a 4-month lock-up followed by 48 months of linear release.

## Airdrop Distribution for Community Rewards <a href="#e080" id="e080"></a>

A total of 500 million $4EVER tokens will be distributed in two rounds of airdrops to reward early community members and contributors:

1. **First Airdrop**: Distributed directly to users who linked their exchange accounts via 4EVER Boost. Tokens will be sent to the linked exchange accounts before $4EVER’s listing, with no fees required.
2. **On-Chain Claims**: After the Token Generation Event (TGE), users can claim airdrops via an on-chain module by linking their respective EVM accounts and paying gas fees. Further details will be announced in subsequent official updates.


# $4EVER Token Bridge Tutorial (ETH ↔ BSC)​

This tutorial guides you through bridging $4EVER tokens from the Ethereum network to Binance Smart Chain (BSC) using the [Portal Bridge](https://portalbridge.com/). Follow the steps below to safely transfer your tokens between networks.

## Step 1: Preparation​

### Wallet Setup​​

**Use a Web3 wallet (e.g., MetaMask) with both networks configured:​**

* Ethereum Mainnet (Default network)​
* BSC (Binance Smart Chain)

**Add $4EVER Token Contracts​**

Manually add the token addresses to your wallet:​

* ETH Contract: [0xe355De6a6043b0580Ff5A26b46051A4809B12793​](https://etherscan.io/token/0xe355De6a6043b0580Ff5A26b46051A4809B12793)
* BSC Contract: [0x63eC886286f30AD392749b9e8f24f67F5b8Ac394​](https://bscscan.com/token/0x63eC886286f30AD392749b9e8f24f67F5b8Ac394)

{% hint style="info" %}
Ensure your wallet has sufficient ETH for gas fees on the Ethereum network and BNB for gas on BSC.​
{% endhint %}

## Step 2: Bridging via Portal Bridge​

<figure><img src="/files/uLdD0HyOkYih3lMi85Z7" alt=""><figcaption></figcaption></figure>

**Access the Bridge​**

* Go to the portal bridge official website: [https://portalbridge.com/​](https://portalbridge.com/)
* Click Connect Wallet and select your Web3 wallet (e.g., MetaMask).​
* Confirm the wallet connection and ensure you are on the Ethereum Mainnet.​

**Configure Transfer​**

From Section:​

* Network: Select Ethereum​
* Token: Search for or select $4EVER​

<figure><img src="/files/AANpHh6KufFkNRbld1DV" alt=""><figcaption></figcaption></figure>

To Section:​

* Network: Select BSC (Binance Smart Chain)​
* Token: $4EVER will auto-detect; confirm the BSC contract address is correct.​

**Execute Bridge Transaction​**

* Enter the amount of $4EVER you wish to bridge (ensure it meets the minimum threshold).​
* Review the transaction details, then click Confirm transaction.​
* Approve the token allowance and bridge transaction in your wallet.​
* Wait for the Ethereum transaction to confirm (check [Etherscan](https://etherscan.io/) for progress).​

<figure><img src="/files/23imbakT4xxhcDBat09m" alt=""><figcaption></figcaption></figure>

## Step 3: Completion and Verification​

**Processing Time​**

* Bridging typically takes \~10-20 minutes, depending on network congestion.​
* You can track the bridge status on the Portal Bridge dashboard or via the transaction hashes.​

<figure><img src="/files/AWGzFGcrhH9YKVERQ4Yb" alt=""><figcaption></figcaption></figure>

**Claim Tokens on BSC​**

* Once the bridge process completes, switch your wallet to the BSC network.​
* If tokens don’t appear automatically, click Claim on the portal bridge (ensure you have BNB for gas).​
* Alternatively, manually add the BSC $4EVER contract to your wallet if tokens are not displayed.

<figure><img src="/files/jh5tyaPGFd4mjM58pM7N" alt=""><figcaption></figcaption></figure>

**Verification​**

* On BSC, confirm your $4EVER balance via [BSCScan](https://bscscan.com/) using your wallet address and the BSC contract address.​

## Troubleshooting​

**Claim Failed**&#x20;

* Ensure you have BNB in your wallet for BSC gas fees.​

**Tokens Not Showing**

1. Manually add the BSC $4EVER contract to your wallet.​
2. Refresh your wallet or try a different browser/extension.​

**Transaction Stuck**

* Check gas fees on [Etherscan](https://etherscan.io/) and consider increasing gas for pending transactions.​
* Retry during periods of low network congestion.​


# What is Hosting?

Overview

<figure><img src="/files/lM0GVKSSk9Q8BbTg6KpB" alt=""><figcaption></figcaption></figure>

Yes, the 4EVERLAND Hosting services are designed to help developers host websites and decentralized applications (DApps) on multiple protocols, including IPFS, Arweave, ICP and Greenfield. These hosting services provide a powerful and flexible platform for deploying and managing Web3.0 applications and websites.

With 4EVERLAND Hosting services, developers can quickly and easily deploy websites to Web3.0 by using Github authorization or a Cli local template build. This makes it easy to get started with hosting and deploying Web3.0 applications and websites, even if you are new to the platform.

In addition to the easy deployment process, the 4EVERLAND Hosting services also provide advanced features and capabilities to help developers optimize and manage their applications and websites. For example, the platform provides advanced caching and content delivery network (CDN) capabilities, as well as automatic SSL certificate management and other security features.

By using the 4EVERLAND Hosting services, developers can take advantage of the power and flexibility of decentralized hosting protocols and Web3.0 technologies to create and deploy high-performance, reliable, and secure applications and websites.

{% content-ref url="/pages/vG95t3CU2yynRDHG4Ec0" %}
[IPFS Hosting](/hositng/what-is-hosting/ipfs-hosting)
{% endcontent-ref %}

{% content-ref url="/pages/VVcwKCWSgMn4OFgShLLd" %}
[Arweave Hosting](/hositng/what-is-hosting/arweave-hosting)
{% endcontent-ref %}

{% content-ref url="/pages/Bd9e7B1HMiSZuo0JBQob" %}
[Internet Computer Hosting](/hositng/what-is-hosting/internet-computer-hosting)
{% endcontent-ref %}

{% content-ref url="/pages/nPgwuTwNlZgvbxBkZ3lU" %}
[Greenfield Hosting](/hositng/what-is-hosting/greenfield-hosting)
{% endcontent-ref %}

## Decentralize your first application now!

<table data-view="cards"><thead><tr><th></th><th></th><th data-hidden></th></tr></thead><tbody><tr><td><mark style="color:purple;"><strong>Guides</strong></mark></td><td><a href="/pages/rhOeB0aeOWBFkY9WRob1">Guides of deploying a decentralized website</a></td><td></td></tr><tr><td><mark style="color:purple;"><strong>Hosting Templates Centre</strong></mark></td><td><a href="/pages/zZjTUqf3baPQQRlTcgec">One-click template deployment/upload for your created templates</a></td><td></td></tr><tr><td><mark style="color:purple;"><strong>Quick Addition</strong></mark></td><td><a href="/pages/0Iul0WkFA7oIL5OD4OBw">Some additional features</a></td><td></td></tr><tr><td><mark style="color:purple;"><strong>Hosting API</strong></mark></td><td><a href="/pages/x6ZyLiWc0gP0w0DHpgXX">IPNS Update API</a></td><td><mark style="color:purple;"><strong>Hosting API</strong></mark></td></tr><tr><td><a href="/pages/cOfL6pZQhY1jUDGT4uf9"><mark style="color:purple;"><strong>Hosting CLI</strong></mark></a></td><td></td><td><mark style="color:purple;"><strong>Hosting CLI</strong></mark></td></tr></tbody></table>


# IPFS Hosting

## What is IPFS？

Interplanetary File System, also known as IPFS, is a decentralized peer-to-peer protocol for storing and retrieving files or websites.

{% hint style="success" %}
Since IPFS is a peer-to-peer network protocol, each client (also known as a peer or node) is connected to every other peer, enabling it to function as both the client and the server at the same time, as opposed to each client being connected to a host server as in the client-server paradigm.
{% endhint %}

With this configuration, any peer can serve any requested file or website and be a productive member of the network to provide high availability, reliability, and resiliency to network outages or disruptions.&#x20;

With IPFS, peers are able to pool their resources such as storage space or internet bandwidth to ensure that files are always available, resilient to outages, and most importantly, decentralized.

## 4EVERLAND IPFS Hosting

4EVERLAND's IPFS hosting service allows you to easily deploy your site to the InterPlanetary File System (IPFS), a distributed file storage system that offers high performance, reliability, and security. When you deploy your site to 4EVERLAND, it will have an IPFS hash that you can use to access and share your site.

In addition to the IPFS hash, 4EVERLAND's IPFS hosting service also includes a Content Delivery Network (CDN), a free SSL certificate, and a sample URL from 4EVERLAND. This makes it easy to get started with hosting and deploying your site to IPFS, even if you are new to the platform.

Furthermore, you can add ENS/SNS domains, add custom domains, and set deploy previews to customize and manage your site on 4EVERLAND. This provides additional flexibility and functionality for your site, helping you to optimize and manage your content more effectively.

Overall, 4EVERLAND's IPFS hosting service provides a powerful and flexible platform for hosting and deploying your site to IPFS, offering high performance, reliability, and security.

**Getting Started**

Getting Started with 4EVERLAND by deploying your first website. The quickest way to begin is by connecting your website's GitHub repository to deploy directly from there and allow for continuous deployment. If you so choose, you can also deploy by uploading the full code base for you website.

{% content-ref url="/pages/WYf5aVEM7FA2SbijTTBo" %}
[Creating a Deployment](/hositng/guides/creating-a-deployment)
{% endcontent-ref %}

{% content-ref url="/pages/tX4VsEnrXnymGvX3mIQH" %}
[Domain Management](/hositng/guides/domain-management)
{% endcontent-ref %}

{% content-ref url="/pages/yFtxERovVlcDzBjgQbBV" %}
[Project Setting](/hositng/guides/project-setting)
{% endcontent-ref %}

{% content-ref url="/pages/EMvMrlGhXc4dPRLqFFbK" %}
[Troubleshooting](/hositng/guides/troubleshooting)
{% endcontent-ref %}

{% content-ref url="/pages/ruuxBzpF5xI1rpX0jP8l" %}
[Common Frameworks](/hositng/guides/common-frameworks)
{% endcontent-ref %}

{% content-ref url="/pages/i8rmt3c2WnnnB0hUSt6l" %}
[Tutorials](/more/tutorials)
{% endcontent-ref %}


# Arweave Hosting

## What is Arweave？

Arweave is a new type of technology that uses a form of database to store data that cannot be deleted or changed, and uses economics to incentive people to store the data for long periods of time for the first time ever. This combination makes either public or private data permanent.

{% hint style="success" %}
Arweave is one of a disruptive types of innovation. It makes a fundamental change in how data is stored, or more precisely how data is stored over the long term.
{% endhint %}

## 4EVERLAND AR Hosting

4EVERLAND's AR Hosting service allows you to deploy front-end sites on Arweave, a blockchain-based data storage network that offers immutability and decentralization. Arweave is designed to provide a permanent, decentralized, and tamper-proof data storage solution, which means that front-end sites deployed on Arweave will exist permanently and without any single point of failure.

Unlike traditional hosting services that rely on centralized servers and controlled nodes, Arweave uses a decentralized network infrastructure that puts power back into the hands of users. This means that front-end sites deployed on Arweave are open, transparent, and cannot be censored or controlled by any single authority.

With 4EVERLAND's AR Hosting service, you can take advantage of the benefits of Arweave's decentralized network infrastructure to host and deploy your front-end sites, ensuring that they are always available, secure, and tamper-proof. This provides a powerful and flexible platform for hosting and managing your front-end sites, helping you to create and deploy high-performance, reliable, and secure applications and websites.

{% hint style="info" %}
4EVERLAND implements one-click Arweave deployment in the smoothest way possible, we have made this possible at a much lower cost by integrating Arseeding’s capabilities.
{% endhint %}

**Getting Started**

Getting Started with 4EVERLAND by deploying your first website. The quickest way to begin is by connecting your website's GitHub repository to deploy directly from there and allow for continuous deployment. If you so choose, you can also deploy by uploading the full code base for you website.

{% content-ref url="/pages/WYf5aVEM7FA2SbijTTBo" %}
[Creating a Deployment](/hositng/guides/creating-a-deployment)
{% endcontent-ref %}

{% content-ref url="/pages/tX4VsEnrXnymGvX3mIQH" %}
[Domain Management](/hositng/guides/domain-management)
{% endcontent-ref %}

{% content-ref url="/pages/yFtxERovVlcDzBjgQbBV" %}
[Project Setting](/hositng/guides/project-setting)
{% endcontent-ref %}

{% content-ref url="/pages/EMvMrlGhXc4dPRLqFFbK" %}
[Troubleshooting](/hositng/guides/troubleshooting)
{% endcontent-ref %}

{% content-ref url="/pages/ruuxBzpF5xI1rpX0jP8l" %}
[Common Frameworks](/hositng/guides/common-frameworks)
{% endcontent-ref %}

{% content-ref url="/pages/i8rmt3c2WnnnB0hUSt6l" %}
[Tutorials](/more/tutorials)
{% endcontent-ref %}


# Auto-Generation of Manifest

4EVERLAND is a straightforward and efficient platform for all your deployment needs. It’s key to mention that 4EVERLAND employs Manifests in its Arweave deployment process, ensuring it’s in full alignment with industry best practices.

Initiate the Process & Account Linking: Begin by navigating to the ‘Hosting’ section. Once there, proceed to ‘Projects’, then connect your 4EVERLAND account with GitHub. This integration will allow for seamless project deployment.

<figure><img src="/files/VdLFaGeeEit5M2MDxSWF" alt=""><figcaption></figcaption></figure>

Import Your Repository: Once your account is connected, you will have the option to import the repository you wish to deploy. Select the desired repo.

<figure><img src="/files/l5n1CWodySHtZCJbrRIL" alt=""><figcaption></figcaption></figure>

**Configuration Settings**

* Move on to ‘Step 2’.
* Adjust the necessary configurations as per your requirements.
* Ensure you select ‘Arweave’ as your hosting platform.

**Deployment**

* Once all settings are in place, click on the ‘Deploy’ button. After a successful deployment, your project will be live on Arweave.

<figure><img src="/files/iVXOXPxNo0d5xeJmSKzJ" alt=""><figcaption></figcaption></figure>

**Review and Access**

* To view the status of your project, click on ‘Project Details’.
* If you wish to directly visit your deployed project, simply click on the ‘Visit’ button or link.

<figure><img src="/files/bHRJhH19bE7VBfkntJEd" alt=""><figcaption></figcaption></figure>

<figure><img src="/files/RQVVvhkByZ7170ICUxNp" alt=""><figcaption></figcaption></figure>

Here is the demonstration of the deployed project

<figure><img src="/files/kOvAIV3mLtWMESf78Gpw" alt=""><figcaption></figcaption></figure>

*You can also access the deployed project using the following URL path format:* [*https://arweave.net/FxmMc7CUkurIELUU8icITK51alXOVpD0mBrmaxPL4sU/index.html*](https://arweave.net/FxmMc7CUkurIELUU8icITK51alXOVpD0mBrmaxPL4sU/index.html)

This is what a completed deployment folder directory looks like

<figure><img src="/files/iLbzNyJVjst0QYKsYT0p" alt=""><figcaption></figcaption></figure>

Automatically Generated Manifest File Showcase

<figure><img src="/files/sr3ok1XoXYuZcL4z4DJI" alt=""><figcaption></figcaption></figure>

As we wrap up this tutorial, it’s essential to note that there’s more than one way to achieve your Arweave deployment goals.&#x20;

Aside from using automated hosting services, you have the option to manually create your website and generate a Manifest file. Once the Manifest is prepared, you can use 4EVERLAND’s bucket feature to deploy it to Arweave. The end result is essentially the same.

For more details about Path Manifest:

{% content-ref url="/pages/Iy3w305heWhBdPVcNvNt" %}
[Path Manifests](/storage/bucket/arweave-bucket/path-manifests)
{% endcontent-ref %}

{% hint style="info" %}
If you have any questions, please join our [Discord server](https://discord.com/invite/Cun2VpsdjF), or send us an email at <contact@4everland.org>.
{% endhint %}


# Internet Computer Hosting

## What is Internet Computer？

Internet Computer (ICP) is a set of protocols that allow independent data centers around the world to band together and offer a decentralized alternative to the current centralized internet cloud providers.&#x20;

{% hint style="info" %}
The Internet Computer attempts to offer a fundamental alternative so that developers can build, host, and serve applications in a more decentralized way — allowing websites to be deployed directly onto the public internet. Further, the Internet Computer would incentivize open source and transparent software development.
{% endhint %}

## 4EVERLAND IC Hosting

4EVERLAND's IC Hosting service allows you to build and deploy fast decentralized sites on the Internet Computer (IC) open infrastructure with just a few clicks. The entire deployment process, from front-end canister creation to cycle management, is abstracted and automated, making it easy for developers to host their sites on the IC.

To minimize the complexity of creating [canister smart contracts](https://wiki.internetcomputer.org/wiki/Canisters_\(dapps/smart_contracts\)) and updating content, 4EVERLAND will first create a new canister for the project on the IC containing the project's content, code, and files during the first deployment of the site. This canister is then used to manage and update the site going forward, simplifying the deployment process and reducing the amount of manual work required.

Once the canister is created, 4EVERLAND will complete the first deployment follow-up setup and go live with the site. This makes it easy to get started with hosting and deploying your site on the IC, even if you are new to the platform.

Overall, 4EVERLAND's IC Hosting service provides a powerful and flexible platform for hosting and deploying fast decentralized sites on the Internet Computer, offering high performance, reliability, and security.

{% hint style="info" %}
When you deploy a static site to the Internet Computer via 4EVERLAND, everything is deployed to our CDN as a performance front, with free SSL certificate and preview URL. Currently, we support custom DNS domains on IC projects but ENS and SNS will be added in the future.
{% endhint %}

**Getting Started**

Getting Started with 4EVERLAND by deploying your first website. The quickest way to begin is by connecting your website's GitHub repository to deploy directly from there and allow for continuous deployment. If you so choose, you can also deploy by uploading the full code base for you website.

{% content-ref url="/pages/WYf5aVEM7FA2SbijTTBo" %}
[Creating a Deployment](/hositng/guides/creating-a-deployment)
{% endcontent-ref %}

{% content-ref url="/pages/tX4VsEnrXnymGvX3mIQH" %}
[Domain Management](/hositng/guides/domain-management)
{% endcontent-ref %}

{% content-ref url="/pages/yFtxERovVlcDzBjgQbBV" %}
[Project Setting](/hositng/guides/project-setting)
{% endcontent-ref %}

{% content-ref url="/pages/EMvMrlGhXc4dPRLqFFbK" %}
[Troubleshooting](/hositng/guides/troubleshooting)
{% endcontent-ref %}

{% content-ref url="/pages/ruuxBzpF5xI1rpX0jP8l" %}
[Common Frameworks](/hositng/guides/common-frameworks)
{% endcontent-ref %}

{% content-ref url="/pages/i8rmt3c2WnnnB0hUSt6l" %}
[Tutorials](/more/tutorials)
{% endcontent-ref %}


# Greenfield Hosting

## What is Greenfield

Powered by blockchain technology, BNB Greenfield is a decentralized ecosystem that allows users and decentralized apps (dApps) to produce, store, and share data with full ownership, control, and financial rewards. It leverages smart contracts for data access and monetization, and utilizes the Proof-of-Stake (PoS) consensus mechanism for a more environment-friendly and decentralized solution for data storage.&#x20;

BNB Greenfield opts for advanced encryption protocols, like Zero Knowledge Proof (ZKP) and a decentralized network of nodes, to provide optimum security, privacy, and control over data access.

## 4EVERLAND Greenfield Hosting

4EVERLAND's Greenfield Hosting service allows you to build and deploy websites on the Greenfield with just a few clicks, providing a more scalable and secure option for developing and hosting decentralized applications (dApps).

This integration enables project teams to easily and affordably leverage 4EVERLAND’s cutting-edge technology and expertise in decentralized hosting, unlocking endless possibilities for the creation of innovative dApps. By utilizing 4EVERLAND’s infrastructure and services, including decentralizing deploy servers, distributed storage, and global gateways, projects can build and deploy dApps on the BNB Greenfield with ease, scaling to meet the demands of a rapidly growing ecosystem.&#x20;

With this 4EVERLAND Greenfield  Hosting, BNB Greenfield and 4EVERLAND are empowering developers to explore new possibilities and push the boundaries of what’s possible in the world of decentralized applications.

**Getting Started**

Getting Started with 4EVERLAND by deploying your first website. The quickest way to begin is by connecting your website's GitHub repository to deploy directly from there and allow for continuous deployment. If you so choose, you can also deploy by uploading the full code base for you website.

{% content-ref url="/pages/WYf5aVEM7FA2SbijTTBo" %}
[Creating a Deployment](/hositng/guides/creating-a-deployment)
{% endcontent-ref %}

{% content-ref url="/pages/tX4VsEnrXnymGvX3mIQH" %}
[Domain Management](/hositng/guides/domain-management)
{% endcontent-ref %}

{% content-ref url="/pages/yFtxERovVlcDzBjgQbBV" %}
[Project Setting](/hositng/guides/project-setting)
{% endcontent-ref %}

{% content-ref url="/pages/EMvMrlGhXc4dPRLqFFbK" %}
[Troubleshooting](/hositng/guides/troubleshooting)
{% endcontent-ref %}

{% content-ref url="/pages/ruuxBzpF5xI1rpX0jP8l" %}
[Common Frameworks](/hositng/guides/common-frameworks)
{% endcontent-ref %}

{% content-ref url="/pages/i8rmt3c2WnnnB0hUSt6l" %}
[Tutorials](/more/tutorials)
{% endcontent-ref %}


# Guides


# Creating a Deployment


# With Git

## Creating a Deployment With Git <a href="#creating-a-deployment" id="creating-a-deployment"></a>

Set the public directory of your project to your GitHub repository and define the build command. 4EVERLAND will automatically run the build command and deploy the resulting changes every time you push to your Git repository.

Select the Github account that needs to be linked

<figure><img src="/files/B2WFNC3qcKTSa4lcgA4k" alt=""><figcaption></figcaption></figure>

Finally, import the GitHub repository to be deployed

<figure><img src="/files/I6g1khqqcVbZMNf4otTy" alt=""><figcaption></figcaption></figure>

Continuous deployment offers several benefits, including:

* No need to deploy without committing and pushing your changes first
* Convenient collaboration through pull requests
* Ability to fix a typo using your Git provider's web UI, even from your mobile device

After that, you need to select the platform for deployment, then 4EVERLAND will try to auto-detect the web framework and apply the correct build parameters, to complete further deployment, please jump to:

{% content-ref url="/pages/XvHtGH6kxppiwMVvCnih" %}
[Site Deployment](/hositng/guides/site-deployment)
{% endcontent-ref %}


# With IPFS Hash

## Creating a Deployment With IPFS Hash <a href="#creating-a-deployment" id="creating-a-deployment"></a>

Deploy and define build commands with one click using existing IPFS Hash. Each time you update the information directly in the Template Setup Centre, 4EVERLAND automatically runs the build command and deploys the resulting changes.

<figure><img src="/files/kY9kyXCsz7Lt1w0MiCWA" alt=""><figcaption></figcaption></figure>

Determine the project name and select the platform to be deployed, this is the simplest deployment mode

<figure><img src="/files/l3VneBz5qCccnE5dPJnw" alt=""><figcaption></figcaption></figure>

Then 4EVERLAND will try to auto-detect the web framework and apply the correct build parameters, to complete further deployment, please jump to:

{% content-ref url="/pages/XvHtGH6kxppiwMVvCnih" %}
[Site Deployment](/hositng/guides/site-deployment)
{% endcontent-ref %}


# With a Template

## Creating a Deployment With a Template <a href="#creating-a-deployment" id="creating-a-deployment"></a>

Set up templates and define build commands. Each time, simply update the information directly in the template setup centre and 4EVERLAND will automatically run the build command and deploy the resulting changes.

<figure><img src="/files/Lg7FRM4E9kgIGEJdgx0b" alt=""><figcaption></figcaption></figure>

Each template has different Edit Configurations, please enter the relevant parameters as required, then click Deploy and wait for the deployment to complete.

<figure><img src="/files/pq9atsxU8VRJMpNLKhWo" alt=""><figcaption><p>Example: Linkland </p></figcaption></figure>

After that, you need to select the platform for deployment, then 4EVERLAND will try to auto-detect the web framework and apply the correct build parameters, to complete further deployment, please jump to:

{% content-ref url="/pages/XvHtGH6kxppiwMVvCnih" %}
[Site Deployment](/hositng/guides/site-deployment)
{% endcontent-ref %}


# Site Deployment

<mark style="color:blue;">**4EVERLAND Hosting**</mark> deploys every new website atomically, ensuring that there are never any discrepancies when submitting new files or making modifications to existing ones.&#x20;

Once you have [chosen a deployment method](/hositng/guides/creating-a-deployment), you should follow the tutorial below to complete the construction.

### **Edit Configuration** <a href="#configuring-the-deployment" id="configuring-the-deployment"></a>

#### **Hosting Platform** <a href="#build-parameters" id="build-parameters"></a>

4EVERLAND Hosting supports IPFS, Arweave, BNB Greenfield, and Internet Computer automatic deployment, please choose the platform you need to deploy according to your needs, here we take **IPFS** as an example.

<figure><img src="/files/YEgr2kzgAkloXPK7BhU8" alt=""><figcaption></figcaption></figure>

#### **Basic & Build Configuration** <a href="#build-parameters" id="build-parameters"></a>

4EVERLAND Hosting will attempt to automatically detect the site's framework and apply the correct build parameters. However, in some cases you may need to enter the parameters manually during the initial site deployment phase or in the site setup after the site has been deployed.

Here are some build parameters you can modify.

<figure><img src="/files/iIlG66OelxXsefLZVWMT" alt=""><figcaption></figcaption></figure>

* `Framework Preset`: Select the framework of your choice. This selection will be used for all deployments within your Project. However, if no framework is detected, "Other" will be selected.
* `Build Command`: The commands to execute to build the site. Eg: `npm install && npm run build`. If your frondend does not require a build, leave this field empty.
* `Output Directory`: The directory in which your compiled frontend will be located. If you want to serve everything instead of a sub directory, leave this field empty.
* `Environment variables`: The values of your environment variables. Eg: `Game_2048`.

### Deploy Overview <a href="#deploy-summaries" id="deploy-summaries"></a>

<figure><img src="/files/3slo1xSovADbnwbWOEzR" alt=""><figcaption></figcaption></figure>

You can find a deploy overview on the detail page of any successful deploy, right above the Building log. It allows you to quickly identify your deploy status and refer to the details in the log based on different types of information.

#### Sync to IPFS <a href="#deploy-logs" id="deploy-logs"></a>

Contains the Hash of the page on the IPFS.

#### Assigning Domains

4EVERLAND Hosting will assign two free domains to each deployment, they are `name.4everland.app` & `name-4everlandorg.4everland.app`.

### Visit your deployment <a href="#previewing-a-deployment" id="previewing-a-deployment"></a>

You can access directly through the domains assigned by 4EVERLAND Hosting or through the way `IPFS Gateway + CID`.

Here we recommend using the 4EVERLAND Public IPFS Gateway for the best experience:

{% hint style="success" %}
The 4EVERLAND public IPFS gateway is:

`https://ipfs.4everland.io/ipfs/<CID>`
{% endhint %}

{% hint style="info" %}
For more information about 4EVERLAND gateways please check [GATEWAYS](/gateways/ipfs-gateway).
{% endhint %}

### Deleting a deployment

#### Deleting a Site

{% hint style="danger" %}
Deleting a site is an irreversible action so proceed with caution.
{% endhint %}

There are lots of ways to delete your project in 4EVERLAND. Click the Delete button:

<figure><img src="/files/QOmFEe6t3UXMKr8GcKPy" alt=""><figcaption></figcaption></figure>

Or go to the settings and navigate to Advanced > Delete Project. A modal will then appear with a warning and instructions to remove the site.

{% hint style="info" %}
If you have any questions, please join our [Discord server](https://discord.com/invite/Cun2VpsdjF), or send us an email at <contact@4everland.org>.
{% endhint %}


# Domain Management

{% hint style="info" %}
After creating a site, 4EVERLAND will automatically assign domains based on the platform your site is hosted on.
{% endhint %}

Projects deployed on 4EVERLAND are automatically assigned a default domain name for the project, along with a unique version-specific domain name for each deployed version. The project domain automatically points to the latest deployed version, while version-specific domains remain permanently linked to their corresponding versions.

* If your site is hosted on IPFS, it will be assigned domains like: `name.4everland.app` .
* If your site is hosted on an Internet computer, 4EVERLAND will automatically assign the domains by: `[CANISTER_ID].app`. For example, it may look like this: `https://ihun5-jqaaa-aaaag-aayaa-cai.ic0.app`
* Similarly, sites on Arweave will be automatically assigned a domain name by `name.4everland.app`.&#x20;

You can easily connect your IPFS, Internet computer sites, and Arweave applications to unique domains using 4EVERLAND.&#x20;

To advance your websites into the Open Web by decentralizing their naming, use custom DNS domains or blockchain domains (IPFS only) like Ethereum Name Service(ENS) & Solana Name Service(SNS) on your websites.&#x20;

Additionally, DNSLink can be configured to direct domains to dynamic IPFS file hashes.

#### Getting Started <a href="#getting-started" id="getting-started"></a>

Here are some guides on how to get started, and if you run into any issues along the way, you can always visit our troubleshooting guide, or contact us for help.

{% content-ref url="/pages/GMINFDt23hl00KsPBZrI" %}
[DNS Setup Guide](/hositng/guides/domain-management/dns-setup-guide)
{% endcontent-ref %}

{% content-ref url="/pages/EWBcWeY3CmDWydSYnM8h" %}
[ENS Setup Guide](/hositng/guides/domain-management/ens-setup-guide)
{% endcontent-ref %}

{% content-ref url="/pages/Or79sgdUDlKHDhG8bYW3" %}
[SNS Setup Guide](/hositng/guides/domain-management/sns-setup-guide)
{% endcontent-ref %}

{% content-ref url="/pages/EMvMrlGhXc4dPRLqFFbK" %}
[Troubleshooting](/hositng/guides/troubleshooting)
{% endcontent-ref %}


# DNS Setup Guide

Custom Domain Setup Guide for 4EVERLAND Deployments

## Prerequisites

Before you begin:

1. **Domain Ownership**: You must control the domain's DNS settings (via registrar/Cloudflare etc.)
2. **Deployed Project**: Have a live 4EVERLAND project (IPFS/IC/Arweave) ready for custom domain mapping
3. **DNS Knowledge**: Basic understanding of CNAME/TXT records (we provide copy-paste values)

## &#x20;Step 1: Add Custom Domain in 4EVERLAND

**Path**: Dashboard → Projects → \[Select Project] → View Detail → **Domains** → **Add Custom Domain**

1. **Domain Selection**
   * Enter your domain (e.g., `yourproject.com` or `www.yourproject.com`)
   * Click the "Add" button&#x20;
2. **Add Domains**
   * Check Add `www.yourproject.com` and redirect `yourproject.com` to it / Add `yourproject.com` and redirect  `www.yourproject.com` to it
   * Click **OK** → 4EVERLAND generates unique DNS records for verification

<figure><img src="/files/qUIBdrwAlwLC5qJQLbEy" alt=""><figcaption><p>Add Custom Domian in 4EVERLAN</p></figcaption></figure>

## Step 2: Configure DNS Records (Critical Step)

### DNS Provider Setup (Example: Cloudflare)

* Login to your DNS provider (Cloudflare/GoDaddy/Namecheap etc.)
* Add records:

| Record Type | Name     | Value                                | TTL |
| ----------- | -------- | ------------------------------------ | --- |
| CNAME       | @ or www | `your-project-id.cname.ddnsweb3.com` | 1h  |
| TXT         | @        | `dns.verify=your-project-id`         | 1h  |

<figure><img src="/files/uQahLZypVCZxfGVG5omk" alt=""><figcaption></figcaption></figure>

## Step 3: Verify Domain Propagation

1. **Check Propagation**
   * Wait 5-30 minutes (DNS propagation time varies by provider)
   * Test with: `dig +short CNAME yourdomain.com` (should return 4EVERLAND target)
   * Use [DNS Checker](https://dnschecker.org/) for global propagation status
2. **Confirm in 4EVERLAND**
   * Return to the domain modal → Click **Refresh**
   * *Success*: Status changes to **Verified ✅**; project auto-deploys to custom domain
   * *Failed?*:
     * ❌ CNAME mismatch → Recheck record values
     * ❌ TXT missing → Ensure subdomain exists
     * ⏱️ Wait 10 more minutes (propagation delays common with new domains)

<figure><img src="/files/oCyTT61etXOS3Fq49fiu" alt=""><figcaption></figcaption></figure>

## SSL Certificate Management

4EVERLAND ensures secure HTTPS access for all custom domains with fully automated SSL/TLS certificate management. Below is a detailed breakdown of our certificate system, designed for seamless integration and zero manual configuration—mirroring industry standards set by leaders like Vercel and Cloudflare.

## Troubleshooting Common Issues

| Issue                  | Solution                                                                        |
| ---------------------- | ------------------------------------------------------------------------------- |
| Domain shows "Pending" | Double-check CNAME/TXT records, ensure that the proxy is disabled on Cloudflare |

{% hint style="info" %}

### 📞 Support Resources

* **Live Chat**: Join [Discord server](https://discord.com/invite/Cun2VpsdjF) → #Open a ticket
* **Email**: <contact@4everland.org> (include domain name & project ID in subject)
  {% endhint %}


# ENS Setup Guide

ENS Domain Setup Guide for 4EVERLAND IPFS Deployments
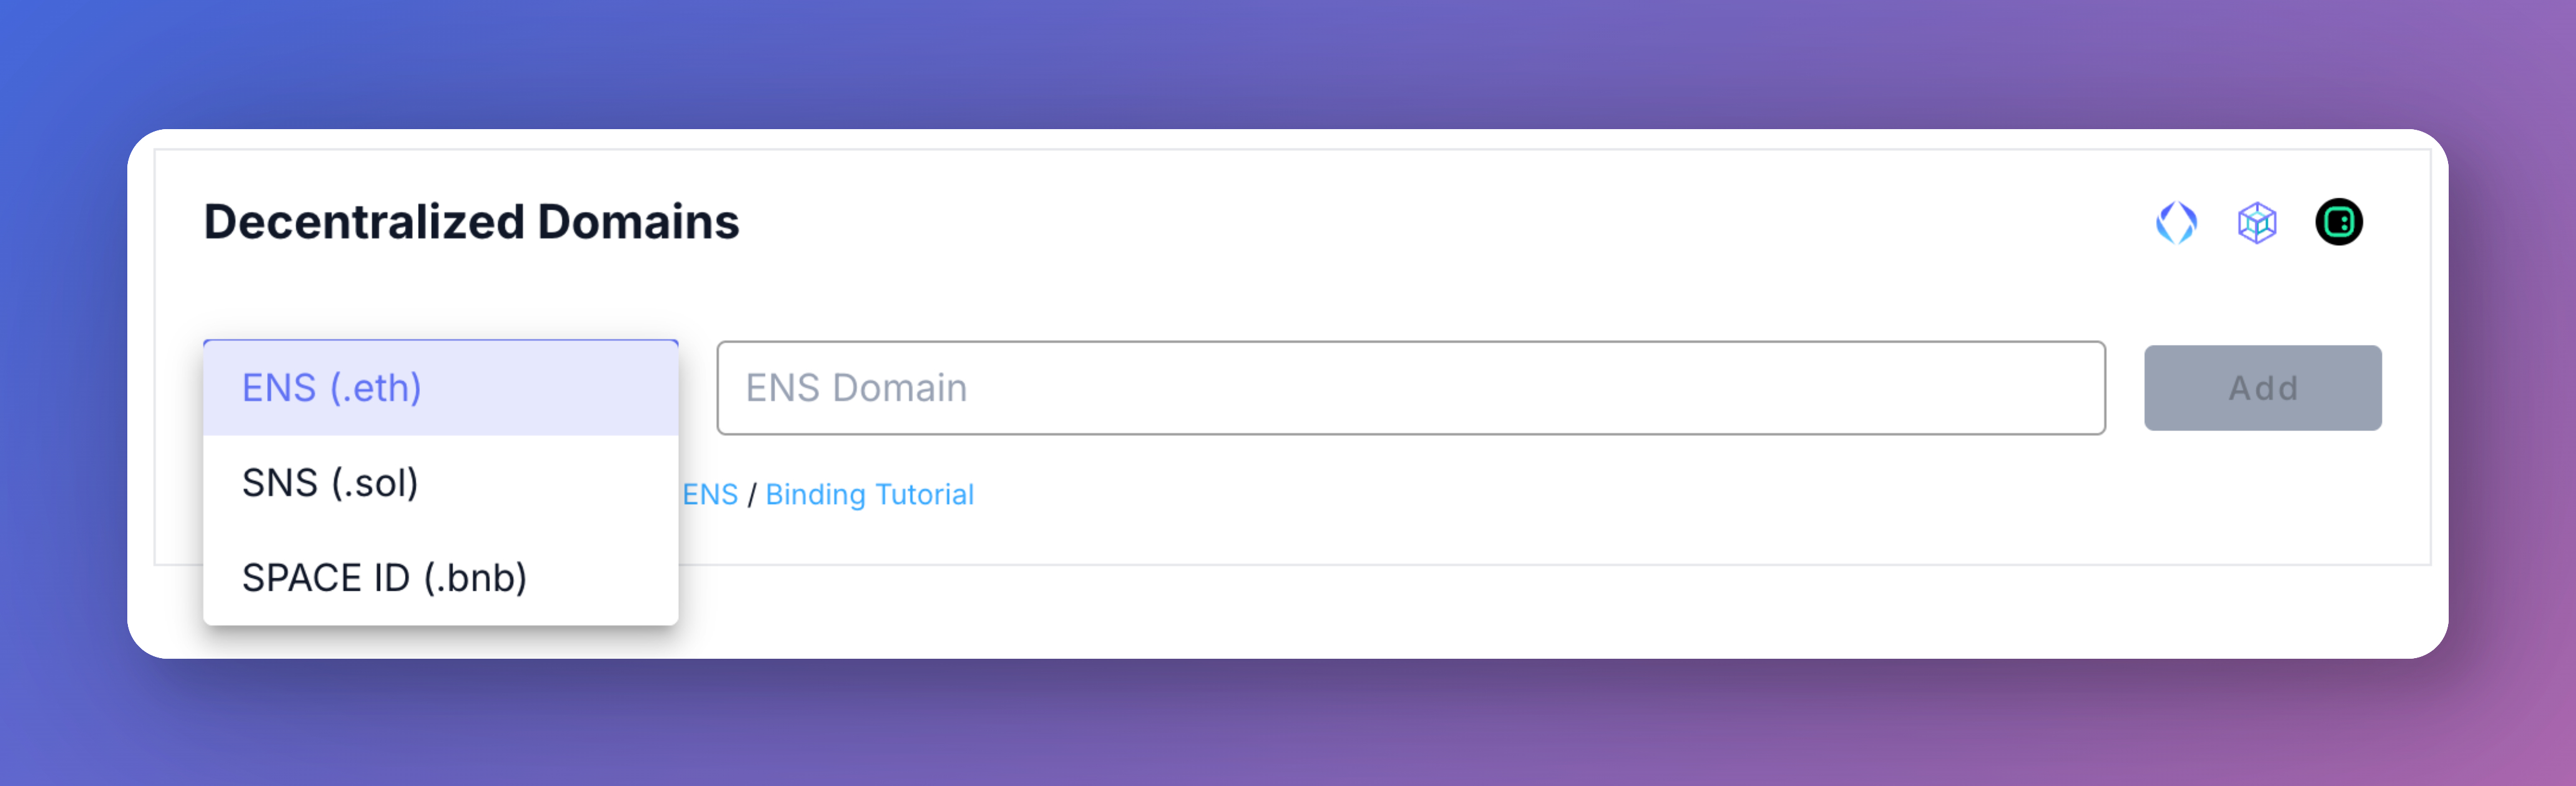
<figure><img src="/files/uw1JEgQeKfzJ3cZ8Yaav" alt=""><figcaption><p>ENS Domain Setup Guide for 4EVERLAND IPFS Deployments</p></figcaption></figure>

## Introduction to ENS Integration

4EVERLAND supports [**Ethereum Name Service**](https://ens.domains/) **(ENS)** domains for decentralized, censorship-resistant access to your IPFS projects. Unlike traditional DNS, ENS domains:<br>

* Are owned via Ethereum private keys (no registrars)
* Use smart contracts for censorship-resistant resolution
* Auto-update content hashes via IPNS (InterPlanetary Name System)
* Work with Web3 browsers/wallets (MetaMask, Brave, Opera Crypto)

{% hint style="info" %}
**Current Support**: IPFS projects only | **Future Plans**: IC/Arweave ENS support.
{% endhint %}

## Prerequisites

1. **Owned ENS Domain**:
   * Purchase via [ENS Registrar](https://app.ens.domains/) (e.g., `yourproject.eth`)
   * Ensure you control the Ethereum private key (MetaMask/ledger etc.)
2. **Deployed IPFS Project**:
   * Live on 4EVERLAND (Dashboard → Projects → \[Project] → Details)
3. **Web3 Wallet Setup**:
   * Install MetaMask (Chrome/Firefox) with Ethereum Mainnet/Rinkeby configured
   * Sufficient ETH for transaction fees (≈ $0.5–$2 USD for mainnet)

## Step 1: Add ENS Domain in 4EVERLAND

<figure><img src="/files/VtEjuAROPDPeObGOMBMr" alt=""><figcaption><p>Add ENS Domain in 4EVERLAND</p></figcaption></figure>

**Path**: Dashboard → Projects → \[IPFS Project] → **Domains** → **Decentralized Domains** → **ENS**&#x20;

1. **Domain Input**
   * Enter your ENS domain (e.g., `yourproject.eth` )
2. **Ownership Verification**
   * Click **Add** → 4EVERLAND will ask you to 'Verify Configuration'&#x20;

## Step 2: Configure Content Hash (IPNS Integration)

### 2.1 Automatic Setup (Recommended)

* 4EVERLAND auto-detects your project's IPNS hash (`k51qzi5uqu5...`)
* Click **Set Content Hash** → Sign transaction to:
  1. Update ENS `contenthash` record to your IPNS CID
  2. Click "Bind" to link IPNS to 4EVERLAND's auto-update service
  3. MetaMask popup appears:
     * Sign the message to prove domain control
     * Transaction cost: \~50k gas (≈ $0.3 on Ethereum mainnet)
  4. *Success*: Domain status changes to **" ✅"** (takes 1–3 minutes)

<figure><img src="/files/gzgqqrOsABpilNmxLvJY" alt=""><figcaption></figcaption></figure>

### 2.2 Manual Setup (Advanced)

* Copy your 4EVERLAND project's IPNS hash (`k51qzi5uqu5...`)
* Go to [ENS App](https://app.ens.domains/) → Manage `yourproject.eth`
  * Add `contenthash` record:
    * Value: `{IPNS_HASH}` (IPNS prefix format)
    * Click **Save** → Sign transaction (cost: \~80k gas)
* *Success*: Domain status changes to **" ✅"** (takes 1–3 minutes)

## Step 3: Confirm Transaction & Resolution

1. **Track Transaction**
   * Etherscan: Search your wallet address for ENS `SetContentHash` event
   * 4EVERLAND Status:
     * **Invalid Configuration**: Waiting for blockchain confirmation (10–30 minutes)
     * **Active ✅**: Domain resolves to your IPFS project
2. **Test Resolution**
   * Web3 Browser: Visit `yourproject.eth` (Brave/MetaMask Browser)
   * Non-Web3 Browser: Use [eth.limo](https://eth.limo/) `yourproject.eth.limo`

## Troubleshooting Common Issues

| Issue                   | Technical Solution                                                                   |
| ----------------------- | ------------------------------------------------------------------------------------ |
| "Invalid Configuration" | <p>1. Check ENS <code>contenthash</code> format<br>2. Resign ownership challenge</p> |
| Transaction Stuck       | Add gas to speed up or cancel the tx                                                 |
| Domain Not Resolving    | Clear MetaMask cache → Settings → Advanced → Clear site data for `app.ens.domains`   |

{% hint style="info" %}

### 📞 Support Resources

* **Live Chat**: Join [Discord server](https://discord.com/invite/Cun2VpsdjF) → #Open a ticket
* **Email**: <contact@4everland.org> (include domain name & project ID in subject)
  {% endhint %}

###


# SNS Setup Guide

Solana Name Service (SNS) Domain Setup Guide for 4EVERLAND IPFS Deployments

<figure><img src="/files/6Bg1vMgihxxt1vnLyfHw" alt=""><figcaption><p>Solana Name Service (SNS) Domain Setup Guide for 4EVERLAND IPFS Deployments</p></figcaption></figure>

## Introduction to SNS Integration

4EVERLAND supports **Solana Name Service (SNS)** domains, enabling seamless mapping of `.sol` names to your IPFS projects. SNS domains offer:<br>

* **Decentralized Ownership**: Controlled via Solana private keys (no central registrars)
* **On-Chain Resolution**: Map domains to IPFS CIDs, Solana addresses, or custom data
* **Cost Efficiency**: Low registration fees (≈ $5–$10/year) and minimal gas costs on Solana
* **Web3 Native**: Works with Solana wallets (Phantom, Slope, Trust Wallet) and dApp browsers

{% hint style="info" %}
**Current Support**: IPFS projects only | **Roadmap**: Arweave/Internet Computer support
{% endhint %}

## Prerequisites

1. **Owned SNS Domain**:
   * Register via [SNS App](https://www.sns.id/?ref=4everland) (e.g., `yourproject.sol`)
   * Ensure ownership by controlling the associated Solana wallet private key
2. **Deployed IPFS Project**:
   * Live on 4EVERLAND (Dashboard → Projects → \[Project] → Details)
3. **Solana Wallet Setup**:
   * Install Phantom/Slope Wallet (Chrome/Firefox) with Solana Mainnet configured
   * Sufficient SOL for transaction fees (≈ 0.001 SOL per transaction)

## Step 1: Add SNS Domain in 4EVERLAND

<figure><img src="/files/dNGDgtN4lAPHb5CERZpe" alt=""><figcaption><p>Add SNS Domain in 4EVERLAND</p></figcaption></figure>

**Path**: Dashboard → Projects → \[IPFS Project] → **Domains** → **Decentralized Domains** → **SNS**&#x20;

1. **Domain Input**
   * Enter your SNS domain (e.g., `yourproject.sol`)
2. **Configure On-Chain Records**
   * Click **Add** → 4EVERLAND will show IPNS & IPFS CID
   * Go to [SNS Domain Management](https://v2.sns.id/) → Edit `yourproject.sol`
   * Add new record:
     * **Value**: `ipns://k51qzi...` or `ipfs://bafybe...`
     * Save changes → Sign transaction (gas fee: \~0.001 SOL)

<figure><img src="/files/OZVKOC4e4YFkfFvUj8X0" alt=""><figcaption></figcaption></figure>

## Step 2: Confirm Resolution & Testing

1. **Transaction Confirmation**
   * Check Solana Explorer: Search your wallet address for `SetRecord` events
2. **Resolution Testing**
   * **Web3 Wallet**: Open `yourproject.sol` in Phantom Browser (auto-resolves to IPFS content)
   * **Non-Web3 Browser**: Use 4EVERLAND Gateway → `https://yourproject.4sol.xyz`

{% hint style="info" %}

### 📞 Support Resources

* **Live Chat**: Join [Discord server](https://discord.com/invite/Cun2VpsdjF) → #Open a ticket
* **Email**: <contact@4everland.org> (include domain name & project ID in subject)
  {% endhint %}


# The gateway: 4sol.xyz

4sol.xyz: The Enterprise-Grade SNS Gateway for Web3 Accessibility

## What is .sol <a href="#what-is-sol" id="what-is-sol"></a>

**.sol** is the decentralized domain naming system built on Solana by [SNS](https://v2.sns.id/)(Solana Name Service), enabling users to map human-readable `.sol` domains (e.g., `project.sol`) to on-chain data via smart contracts. Key features include:

* **On-Chain Resolution**: Store Solana addresses, IPFS CIDs, metadata, and custom records (e.g., `url`, `email`)
* **Cost Efficiency**: $5–$10/year registration (Solana's low gas fees)
* **Decentralized Ownership**: Controlled via Solana private keys (no central authority)
* **Interoperability**: Works with Phantom, Slope, and Solana dApp browsers

## What is 4sol.xyz <a href="#what-is-4sol-xyz" id="what-is-4sol-xyz"></a>

**4sol.xyz** is the **first privacy-focused SNS gateway** designed for universal Web2/3 access, maintained by the 4EVERLAND infrastructure team. As a reverse proxy layer, it:<br>

* **Resolves .sol Domains**: Auto-detects SNS `url`/`weburl` records (IPFS/IPNS content)
* **Accelerates Global Access**: Leverages 4EVERLAND’s edge nodes for sub-100ms latency
* **Enables Web2 Compatibility**: Transforms `.sol` into `*.4sol.xyz` for standard browser access
* **Prioritizes Privacy**: No user tracking, zero logs, and end-to-end HTTPS encryption

## How to use 4sol.xyz <a href="#how-to-use-4sol-xyz" id="how-to-use-4sol-xyz"></a>

Any user can use the "mydomain.4sol.xyz" format to load the corresponding SNS resolved content directly into their browser.&#x20;

For example, if you have the SNS called "4everdao.sol", you can load <https://4everdao.4sol.xyz> directly into your browser to access the corresponding content. 4sol.xyz supports https return content and provides global acceleration.

## Why do we need 4sol.xyz <a href="#why-do-we-need-4sol-xyz" id="why-do-we-need-4sol-xyz"></a>

As .sol is not a registered DNS top-level domain, it is usually unaccessible directly from DNS, which means that existing internet infrastructure is not compatible with the access. Also, most browsers cannot access SNS/IPFS/IPNS natively, which prevents most end users from using it.&#x20;

For dApp developers, this means a significant loss of users as well as revenue. 4sol.xyz provides a solution that is compatible with Web2 access, satisfying most end-users' usage habits while relying on the powerful edge node network provided by 4EVERLAND to offer a highly available and stable gateway service, facilitating developers to achieve a smooth transition from Web2.0 to Web3.0.

## How does 4sol.xyz work? <a href="#how-does-4sol-xyz-work" id="how-does-4sol-xyz-work"></a>

4sol.xyz operates as a reverse proxy for SNS names and IPFS content. Much like eth.link/eth.limo, 4sol.xyz uses the wildcard character DNS record \*.4sol.xyz to dynamically capture all requests for SNS domains.&#x20;

4sol.xyz service automatically resolves the IPFS/IPNS of the requested SNS record and returns the corresponding static content via https. At the same time, 4sol.xyz relies on globally distributed edge nodes provided by 4EVERLAND to offer globally accelerated network access.&#x20;

As most browsers lack native IPFS/IPNS parsing capabilities, 4sol.xyz acts as a bridge between Web2 and Web3, providing a no-cost Web2-compatible access solution for all users.

## Further reading <a href="#further-reading" id="further-reading"></a>

SNS Documentation: <https://docs.sns.id/collection>

Deploy Your SNS+IPFS Website in 3 Minutes: <https://medium.com/4everland/deploy-your-sns-ipfs-website-on-4everland-in-3-minutes-cb828cf8ca4>


# SPACE ID Setup Guide

SPACE ID Domain Setup Guide for 4EVERLAND IPFS Deployments

<figure><img src="/files/VesQ3MRevzJw9KnEHQsA" alt=""><figcaption><p>SPACE ID Domain Setup Guide for 4EVERLAND IPFS Deployments</p></figcaption></figure>

## Introduction to SPACE ID Integration

4EVERLAND now supports [SPACE ID domains](https://www.space.id/) (`.bnb`), enabling developers to map human-readable BNB Chain-native domains to IPFS projects.&#x20;

* **Decentralized Ownership**: Domains like `yourproject.bnb` are controlled via BNB Chain private keys.
* **Multi-Record Support**: Map to wallet addresses (BNB/BEP-20), IPFS CIDs, or custom metadata.
* **Cost Efficiency**: Low registration fees (≈ $5–$15/year) and minimal BNB gas fees.
* **Web3-Native Access**: Works with MetaMask, Binance Web3 Wallet, and BNB Chain dApp browsers.

{% hint style="info" %}
**Current Support**: IPFS projects only | **Future Plans**: IC/Arweave SPACE ID support.
{% endhint %}

## Prerequisites

1. **Owned SPACE ID Domain**:
   * Register via [SPACE ID App](https://www.space.id/) or [bnb.me](https://bnb.me/) (e.g., `yourproject.bnb`).
   * Ensure ownership by controlling the associated BNB Chain wallet (private key).
2. **Deployed IPFS Project**:
   * Live on 4EVERLAND (Dashboard → Projects → \[Project] → Details).
3. **Wallet Setup**:
   * Install MetaMask/Binance Web3 Wallet with BNB Chain (Smart Chain) configured.
   * Sufficient BNB for transaction fees (≈ 0.001 BNB per transaction).

## Step 1: Add SPACE ID Domain in 4EVERLAND

<figure><img src="/files/oL3hgqOqiqnqg4un4jhx" alt=""><figcaption><p>Add .bnb Domain in 4EVERLAND</p></figcaption></figure>

**Path**: Dashboard → Projects → \[IPFS Project] → **Domains** → **Decentralized Domains** → **SPACE ID**

1. **Domain Input**:

* Enter your SPACE ID domain (e.g., `yourproject.bnb` ).

<figure><img src="/files/IGODneItKVac0mO6uJgs" alt=""><figcaption></figcaption></figure>

2. **Configure On-Chain Records**

* Click **Add** → 4EVERLAND will show IPNS & IPFS CID(bnb.me only supports the activation of IPFS CIDs)
* Go to [bnb.me](https://bnb.me/flow/ipfs) ([What is bnb.me?](https://bnbdotme.medium.com/introducing-bnb-me-49e2e0914b5))→ Resolver `Change Resolver`
* Update the IPFS hash to the resolver:
  * IPFS CID:  `ipfs://bafybe...`
  * Activate → Sign transaction (gas fee: \~0.001 BNB)

<figure><img src="/files/GOgtHiZ7vvtyFBXrHD4x" alt=""><figcaption></figcaption></figure>

## Step 2: Confirm Resolution & Testing

1. **Transaction Confirmation**:
   * Check BNB Chain Explorer ([BscScan](https://bscscan.com/)): Search your wallet address for `SetRecord` events.
2. **Resolution Testing**:

* **Browser**: Use bnb.me Gateway → `https://yourproject.bnb.me`.

{% hint style="info" %}

### 📞 Support & Resources

* **SPACE ID Documentation**: [SPACE ID Developer Guide](https://docs.space.id/) (official reference).
* **BNB.me Quick Start**: [Getting Started with BNB.me](https://bnbdotme.medium.com/getting-started-with-bnb-me-59538590193b) (step-by-step tutorial).
* **The Collaboration Between Bnb.me, 4Everland and SPACE Id:** [Bridging Web3 Potential on BNB Chain](https://medium.com/4everland/bridging-web3-potential-on-bnb-chain-the-collaboration-between-bnb-me-4everland-and-space-id-d2cbf4dcd0ad) (understand the cooperation and relationship among the three parties).
* **Live Chat**: Join [Discord server](https://discord.com/invite/Cun2VpsdjF) → #Open a ticket
* **Email**: <contact@4everland.org> (include domain name & project ID in subject)
  {% endhint %}


# Project Setting

## General

#### Project Name

Used to identify your Project in the Dashboard, and in the URL of your Deployments.

#### Project ID

Used when interacting with the 4EVERLAND API.

#### Build Configuration

When using a framework of a new project, it will be automatically detected. As a result, several project settings are automatically configured to achieve the best result. You can override them below.

#### Root Directory

The directory within your project, in which your code is located. Leave this field empty if your code is not located in a subdirectory. A new Deployment is required for your changes to take effect.

## Domains:

Domains that are assigned to your Production Deployments.

## Environment Variable

In order to provide your Deployment with Environment Variables at Build and Runtime, you may enter them right here, for the Environment of your choice.

## Advanced

#### Rewrite

If a URL doesn't exist, it will be redirected to the specified target location.

#### Directory Listing

If no index file is present within a directory, the directory contents will be displayed.

#### Your Statistics

DApps statistics are displayed on the 4EVERLAND website. If you don't want to display it, close the button to hide DApps statistics, but all your data is still visible.

#### Delete Project

The project will be deleted permanently including deployments and domains. You can't undo this action.

{% hint style="info" %}
If you have any questions, please join our [Discord server](https://discord.com/invite/Cun2VpsdjF), or send us an email at <contact@4everland.org>.
{% endhint %}


# Git

## Connected Git Repository

Seamlessly create Deployments for any commits pushed to your Git repository.

## Production Branch

This is a presentation and record of your project's branches as they are deployed, with a switch option for `Deploy Hook`.

`Deploy Hook` is an automatic update deployment service. When there are commit updates to your Github code, `Deploy Hook` will perform the latest code deployment to ensure your project is up to date. When the switch is turned off, the automatic sync update deployment will not take effect, this setting also appears in your first deployment.

{% hint style="info" %}
By default,every commit pushed to the `main` branch will trigger a Production Deployment instead of the usual Preview Deployment.&#x20;

You can switch to a different branch here.
{% endhint %}

<figure><img src="/files/rw90gRRx8zBNlpbFKUeU" alt=""><figcaption></figcaption></figure>

## Git Web Hooks

Git Web hooks are Http post url requests that are used to manually trigger a redeployment process. These URLs are generated by you and correspond to your project's repository and branches, so you don't need to use any authentication to trigger a deployment. This feature can be used in scenarios such as scheduled deployments, assigning deployment permissions to team members, etc.

#### Steps to create a Git web Hooks:

Open Settings > Git > Git Web Hooks

<figure><img src="/files/M1MKNUr3gQUx8l2D1dwi" alt=""><figcaption></figcaption></figure>

Set a Hook name and click on 'Create Hook'

<figure><img src="/files/17Kb40BMDPux8wbkr5ie" alt=""><figcaption></figcaption></figure>


# Troubleshooting

### Build Tips

If your build fails, the first thing you should check is whether you can build your files locally in your development environment.

If building locally is successful, then you should check that the dependencies installed by 4EVERLAND are the same as those used locally. For example, you may need to specify the Node.js version.

### Command not found

If your build fails and the `command is not found`, then your dependencies are not installed. To install your dependencies, upload a configuration file for your NodeJS application, such as `package.json`, listing all required dependencies.

### Always on deployment?

Sites with large numbers of HTML files often take a lot of time to deploy.

### 404 error

If no file is found, IPFS will search for a file named ipfs-404.html in the path of the request. This file can be used to display 404 errors or redirects.

### Custom DNS Domain issues <a href="#custom-dns-domain-stopped-working" id="custom-dns-domain-stopped-working"></a>

You need to first check that your site is visible on the "Verify on IPFS" link on the 4EVERLAND dashboard.

#### To use a custom domain, what type of records do I need to set with my DNS provider?&#x20;

You would need to set ANAME/ALIAS records for the root domain, and CNAME records for your subdomains (such as www or any other subdomain). If you have activated DNSLINK, it will also require you to configure CNAME records.

ANAME and ALIAS are interchangeable terms, and in either case, you may encounter a platform name record. It will work in both scenarios.

#### Can I use an IP address to set up a custom domain?&#x20;

No, we no longer support configuring custom domains using IP addresses. We only use ANAME/ALIAS and CNAME records.&#x20;

#### Can I use an A record instead of ANAME/ALIAS?&#x20;

No, an A record is different from ANAME/ALIAS, and attempting to use either one to configure your DNS domain will result in the verification process failing in 4EVERLAND.

#### What should I do if my provider does not support ANAME/ALIAS records?&#x20;

Some providers, such as Google Domains and GoDaddy, do not support ANAME/ALIAS records. You have two choices to address this issue.

1. Transfer your domain to a compatible provider. \
   If your domain registrar/DNS provider does not support ANAME/ALIAS records, you can transfer your domain to another platform that supports them. Some services facilitate this, such as [Namecheap](https://www.namecheap.com/domains/transfer/transfer-from-godaddy). However, the transfer process may vary and could require some time.
2. Change the domain's name servers to Cloudflare. \
   This is the solution we recommend. In addition to initiating the domain transfer process, you can also change the domain's name servers to point to Cloudflare and manage your DNS settings within Cloudflare.\
   Cloudflare supports ANAME/ALIAS records. They need to be set up as CNAME in Cloudflare, but they will be automatically detected and function properly. This does not require you to transfer your domain and is faster and free.

#### I am using Google Domains and do not want to use Cloudflare.&#x20;

For those using Google Domains who do not want to use Cloudflare, there is a workaround. This trick may apply to other providers that offer domain forwarding from the top-level domain to subdomains.

Here is a detailed guide explaining how to perform this operation. The idea is that Google Domains does not support ANAME/ALIAS records for the top-level domain (domain.com). However, what you can do on **Google Domains** is forward the top level domain to a subdomain ([www.domain.com](http://www.domain.com)).

In 4EVERLAND, subdomains use CNAME records, so you can validate it through this trick to make [www.your](http://www.your) website's main entry point.

### Can't access your ENS domain through any browser?

Your browser may not natively support parsing ENS domains. Install the MetaMask wallet browser extension to add support for ENS to any browser.

### Exit status 128 error <a href="#build-fails-with-exit-status-128" id="build-fails-with-exit-status-128"></a>

If your build fails with an exit status of 128, this may mean that we no longer have access to your GitHub repository. Make sure your repository is public, or that you grant us access through your GitHub login when you provide the link to the repository.

### Three possible scenarios causing "No Results Found" during github connecting

Scenario 1: Your account is new on GitHub, and you do not have any repositories.

Scenario 2: Hosting is unlinked from your GitHub account. To resolve this, go to the project details, then navigate to settings and click on "Connect to GitHub" to install the Git organization app. However, make sure not to install the Git app. After completing these steps, when you deploy the project, your Git account should display the repositories.

Scenario 3: The user has hidden their personal information in GitHub's settings under "Public File - Contributions & Activity." Due to this, the dashboard cannot access the repository information. Solution: To resolve this, go to the settings on GitHub, open the respective switch, and refresh the dashboard interface. After doing this, the hosting connection to GitHub should display the user's projects in the repositories section.

{% hint style="info" %}
Don't See Your Question Answered? Please join our [Discord server](https://discord.com/invite/Cun2VpsdjF), or send us an email at <contact@4everland.org>.
{% endhint %}


# Common Frameworks

You will also have to define the correct publish directory. Here's a list of default configurations for popular frameworks:

|     Framework    |            Build Command            |    Output Directory   |
| :--------------: | :---------------------------------: | :-------------------: |
| Create React App |    `npm run build or yarn build`    |         build         |
|      Gatsby      |            `gatsby build`           |         public        |
|       Hugo       |            `yarn && hugo`           |         public        |
|      Jeky II     |            `jekyll build`           |         \_site        |
|      Next.js     | `yarn && yarn build && yarn export` |          out          |
|     Gridsome     |         `yarn && yarn build`        |          dist         |
|      Svelte      |         `yarn && yarn build`        |         public        |
|      Sapper      |        `yarn && yarn export`        | \_\_sapper\_\_/export |

{% hint style="info" %}
If you have any questions, please join our [Discord server](https://discord.com/invite/Cun2VpsdjF), or send us an email at <contact@4everland.org>.
{% endhint %}


# Hosting Templates Centre

We believe Hosting Templates is the feature that will revolutionize the way you deploy your website and streamline the entire process, making it easier and more efficient than ever before.Everyone who logs into Hosting now to create a new project will see the Recommend Templates section, and there are some of the exciting features you can expect from the Hosting Templates:

* Decentralize domain deployment

In addition to supporting binding with regular domain names, template deployment supports binding with decentralized domain names, just like all other hosting-deployed projects. This means that you can deploy your website to your decentralize domain with ease, allowing you to easily manage your domain and website in one place.

* Template Submission and GitHub Guidelines

We have also added a template submission portal and GitHub submission guidelines to make it easier for developers to submit their own templates. This allows our users to access a wider range of templates and gives developers the opportunity to showcase their skills and creativity.

* Optimized Hosting Deployment Process

We understand that deploying a website can be a time-consuming and complicated process. With Hosting Templates, we have optimized the deployment process to make it faster and more straightforward. Our intuitive user interface and step-by-step instructions will guide you through the entire process, from selecting a template to deploying your website.

* Editable Project Settings

We have also added the ability to update and edit your project settings directly from the hosted project setting. This means you can make changes to your website settings anytime, anywhere.

## Here are some examples:

* Your own Web3-blog: <https://4everblog.4everland.app/>
* A social media aggregator: Linkland: <https://4everlinkland.4everland.app/>
* Deploy your own GPT website: <https://4everchatgpt.4everland.app/#/>

## How to try deploying one yourself

Click on Hosting, create a new project, choose the template you want to try, and click 'Start'.

<figure><img src="/files/AUzvJtfNeqGCSh50GSAY" alt=""><figcaption></figcaption></figure>

**Explore unlimited possibilities and unleash your creativity**

If you have your own unique template, please upload it to our template repository.

<figure><img src="/files/xWB8KI8KAYHRLtxgahZ8" alt=""><figcaption></figcaption></figure>

Alternatively, you can visit our Github repository at <https://github.com/4everland/Templates>.

4EVERLAND will offer generous rewards for unique contributors! Be sure to follow us on [Twitter](https://twitter.com/4everland_org) for the latest updates.

**Update your information in settings**

After the deployment is complete, if your information needs to be changed, go to Settings > Edit to edit your information and redeploy.

<figure><img src="/files/eFADZB3R4vCgkx1XV6T5" alt=""><figcaption></figcaption></figure>

**Bind your traditional/decentralized domain**

<figure><img src="/files/bpQ4vs9SQF6iyfiAjbBv" alt=""><figcaption></figcaption></figure>

Find more information about domain name binding:&#x20;

{% content-ref url="/pages/tX4VsEnrXnymGvX3mIQH" %}
[Domain Management](/hositng/guides/domain-management)
{% endcontent-ref %}

We are confident that Hosting Templates will transform the way you deploy your website and make the process faster, easier, and more efficient.

Try it out today and experience the ultimate solution for effortless deployment!

{% hint style="info" %}
If you have any questions, please join our [Discord server](https://discord.com/invite/Cun2VpsdjF), or send us an email at <contact@4everland.org>.
{% endhint %}


# Templates Configuration File

Description of the Configuration File: Config.json

## What is a configuration file?

The 4EVERLAND Template Center is a codeless website building tool provided for all users. By simply selecting a desired template from the dashboard and filling in the specified parameters, users can easily construct their own website with the configuration file of the template serving as the defining document for these parameters.

**For example:**

The [web3 page](https://4everblog.4everland.app/) serves as a convenient template for aggregating user's social information. When creating the template, users need only input their social media links, such as Twitter, Medium, YouTube, etc, in order to establish their own customized web3 page website. This website will display the user's activity on these social media platforms.Consequently, the template code submitted by web3 page developers must include a [configuration file](https://security.larksuite.com/link/safety?target=https%3A%2F%2Fgithub.com%2F4everland%2FTemplates%2Fblob%2Fmain%2FTemplates%2Fweb3-blog%2Fpublic%2Fconfig.json%23L2\&scene=ccm\&logParams=%7B%22location%22%3A%22ccm_default%22%7D\&lang=en-GB) that specifies the user's required input social media links, and preserves the user's inputted results for use in the code at the appropriate locations.

## How do I write a configuration file?

In order to write a configuration file that allows users to fill in reserved parameters in a visual form when utilizing the template in the dashboard, it is necessary to refer to the configuration file writing standards provided in this document.Only configuration files that adhere to these standards will be approved for use.

### Standards

#### Naming

The configuration file should be named `config.json`, as follows (we recommend placing it in the root or public directory).

<figure><img src="/files/8hYoSc8pXLiHO9PVO3Dd" alt=""><figcaption></figcaption></figure>

#### Configurable items

All configurable items will be displayed in the dashboard in the order in which they were written in the JSON file. Currently, only three types of configurable items are supported: text input boxes, tables, and sliding selectors.All configuration items are written in sequence in a "config" array in JSON format.

```JSON
{
  "config":[]
}
```

**Text input box**

```JSON
{
   "name": "Name of configuration item",
   "options": [
       {
          "type": "text",
          "key": "",//For locating in code
          "value": "", //User input values
          "placeholder": ""//Default placeholder
        }
      ],
}
```

Example: Configurable item banner

```JSON
 { 
   "config":[ 
   {
      "name": "Banner",
      "options": [
        {
          "type": "text",
          "key": "banner",
          "value": "",
          "placeholder": "https://(1440*220)"
        }
      ],
    }
   ]
}
```

The results are presented in the dashboard as follows

<figure><img src="/files/fnyNa7lPjOJQGl5d4uMv" alt=""><figcaption></figcaption></figure>

**Textarea**

Textarea can be used when there is a lot of text to be entered.

```JSON
    {
          "name": "Name of configuration item",
          "options": [
            {
              "type": "textarea",
              "key": "",
              "value": "",
              "placeholder": ""
            }
          ]
    }
```

Example

```JSON
{
  "config":[
    {
      "name": "Textarea Control",
      "options": [
        {
          "type": "textarea",
          "key": "textareaControlGroup",
          "value": "",
          "placeholder": "https://"
        }
      ] 
    }
  ]
}
```

The results are presented in the dashboard as follows

<figure><img src="/files/KgtUAuZBe9QehRgU6oLi" alt=""><figcaption></figcaption></figure>

**Tables**

The table configuration option supports any number of columns, and you may also limit the maximum number of rows that the template user can add.

```JSON
 {
       "name": "Name of configuration item",
       "options": [
          {
              "type":"table",
              "key":"",
              "headers": [
                {
                  "text": "lable1", //Name of the table header displayed in the dashboard
                  "value": "value1" //The field will be marked with a value in the following items
                },
                {
                  "text": "lable2",
                  "value": "value2"
                },
                {...},
                {...} //Multiple columns can be added freely
              ],
              "items": [
                {"value1": "",
                 "value2": "",
                 ...,
                 ...}
              ],  //Value entered by the user
              "maxLength":  //Maximum number of items that can be added by the user
          }
       ],
 }
```

Example: a table with two columns

```JSON
{
  "config":[
    {
       "name": "IPNS Resources",
       "options": [
          {
              "type":"table",
              "key":"ipnsResourceTable",
              "headers": [
                {
                  "text": "Resource name",
                  "value": "name"
                },
                {
                  "text": "IPNS",
                  "value": "ipns"
                }
              ],
              "items": [
                {"name": "ipns1-26", "ipns": "k51qzi5uqu5dkeq7o4lll1oo8gilnujbx2vhnta6xvxlf21ralvul6lkht59hi"}
              ],
              "maxLength": 100
          }
       ],
    },  
  ]
}
```

The results are presented in the dashboard as follows

<figure><img src="/files/Y7w0c76nC9TQT7WZuvwq" alt=""><figcaption></figcaption></figure>

**Drop-down selector**

```JSON
 {
       "name": "Name of configuration item",
       "options": [
          {
            "type":"select",
            "key":"",
            "select": 1, //The value of the selected option
            "items": [
              {"text": "item1", "value": 1}, //text represents the text of the options displayed
              {"text": "item2", "value": 2},
              .... //Freely add the number of options
            ],
            "placeholder":""
          }
        ]
   }
```

Example

```JSON
{
  "config":[
  {
       "name": "Select Control",
       "options": [
          {
            "type":"select",
            "key":"selectControlGroup",
            "select": 1,
            "items": [
              {"text": "dog", "value": 1},
              {"text": "cat", "value": 2},
              {"text": "rabbit", "value": 3},
              {"text": "monkey", "value": 4}
            ],
            "placeholder":"https://"
          }
        ]
    }
  ]
}
```

The results are presented in the dashboard as follows

<figure><img src="/files/wJ8RXsWr2qmF5EUrZUHa" alt=""><figcaption></figcaption></figure>

<div data-full-width="true"><figure><img src="/files/QaXFzhfSOFgTVhFxvEWf" alt=""><figcaption></figcaption></figure></div>

**Sliding selectors**

```JSON
  {
      "name": "Name of configuration item",
       "options": [
          {
              "type":"switch",
              "key":"",
              "value":true, //Default state
              "text": "" //Button text description
          }
       ],
    }
```

Example:

```JSON
{
  "config":[
        "name": "Display IPNS Input",
        "options": [
          {
              "type":"switch",
              "key":"displaySwitch",
              "value":true,
              "text": "Display the IPNS input field and allow users to enter other IPNS?"
          }
       ]
  ]
}
```

The results are presented in the dashboard as follows

<figure><img src="/files/7Cp3ll0rYQ8f9fMDgT4H" alt=""><figcaption></figcaption></figure>

**Configuration Item Classification:**

If you have a large number of configuration items, it is recommended to categorize them according to different scenarios. This can improve the user's reading experience when filling in parameters. You only need to add a "tag" item to the configuration options.Example:

```JSON
{
  "config": [
    {
       "name": "Website name",
       "options": [
          {
              "type":"text",
              "key":"websiteName",
              "value":"IPNS LinkShare",
              "placeholder":"please enter Website name"
          }
       ],
       "tag": "Website Basic Info"
    },
     {
       "name": "Avatar",
       "options": [
          {
              "type":"text",
              "key":"avatar",
              "value":"https://4evernodelete.4everland.store/271686120104_.pic.jpg",
              "placeholder":"please enter Avatar"
          }
       ],
       "tag": "Website Basic Info"
    }，
    {...}, //Configuration item for NAME
    {...} //Configuration item for Bio
   ]
  }
```

The results are presented in the dashboard as follows<br>

<figure><img src="/files/4J4wsOlVXoIqgRkU4dh6" alt=""><figcaption></figcaption></figure>

##


# Quick Addition


# Implement Github 4EVER Pin

4EVER IPFS Pin contains code examples to help your Github project quickly implement file fixing and access on an IPFS network.

## Prerequisites

* Open [Dashboard](https://dashboard.4everland.org/) and connect with wallet.
* Create token in [Auth Tokens](https://dashboard.4everland.org/hosting/auth-tokens).

## Github actions secrets

Add [Auth Tokens](https://dashboard.4everland.org/hosting/auth-tokens) as EVER\_TOKEN in Settings > Secrets > Actions.

<figure><img src="/files/TAfSar7Rtg8m5uqSXlUF" alt=""><figcaption></figcaption></figure>

## Add script below to workflows

The code to be added should be as follows:

```
 name: GITNAME
          uses: 4everland/pin-action@main
          continue-on-error: true
          timeout-minutes: 2
          with:
            EVER_TOKEN: ${{ secrets.EVER_TOKEN }}
            EVER_PROJECT_NAME: 'uniswap-interface'
            path: './build'
```

&#x20; **REQUEST PARAMS**

* `EVER_TOKEN`: Dashboard- Hosting Auth Tokens.
* `GIT_NAME`: Your project name.

**TEMPLATES**

[Project-templates-vue](https://github.com/4everland/project-templates/blob/main/examples/vue/.github/workflows/main.yml)

{% hint style="info" %}
If you have any questions, please join our [Discord server](https://discord.com/invite/Cun2VpsdjF), or send us an email at <contact@4everland.org>.
{% endhint %}


# Github Deployment Button

The Deploy button allows you to quickly run deployments with 4EVERLAND in your Git repository by clicking the 'Deploy button'.

The buttons should be as follows:

<figure><img src="/files/8Tr9bXgpU9UyICFfnyro" alt=""><figcaption></figcaption></figure>

## Git Repository URL

**Parameter**: `GITHUB_REPO_URL`

**Value**: `The source Git repository URL`

**Type**: `String`

The Git Repository URL parameter allows you to define a Git repository URL, optionally including the sub directory within a repository, that you will clone into your GitHub account when going through the 4EVERLAND **Project Creation Flow**.

{% code overflow="wrap" %}

```
https://dashboard.4everland.org/hosting/new?type=clone-flow&s=GITHUB_REPO_URL
```

{% endcode %}

{% hint style="info" %}
An example Deploy Button source URL using the git repository url parameter
{% endhint %}

## Sample code

GITHUB\_REPO\_URL:

`https://github.com/4everland/project-templates/tree/main/examples/vue`

{% code overflow="wrap" %}

```
<a href="https://dashboard.4everland.org/hosting/new?type=clone-flow&s=https://github.com/4everland/project-templates/tree/main/examples/vue"><img src="https://4ever-web.4everland.store/img/deploy.svg" alt="Deploy with 4EVERLAND"/></a>
```

{% endcode %}

{% hint style="info" %}
A HTML snippet that shows a linked Deploy Button.
{% endhint %}

{% hint style="info" %}
If you have any questions, please join our [Discord server](https://discord.com/invite/Cun2VpsdjF), or send us an email at <contact@4everland.org>.
{% endhint %}


# Hosting API

## REST API <a href="#rest-api" id="rest-api"></a>

The 4EVERLAND API offers easy access to the platform's fully-featured, stable performance, and flexible service. With the API, you can deploy your custom projects by integrating them with your existing projects, making it easy to build and manage your applications and websites.

The API documentation provides detailed information on how to use the API, including how to authenticate and authorize requests, how to create and manage projects, and how to deploy and update your projects. This makes it easy to integrate your custom projects with the 4EVERLAND platform, enabling you to take advantage of its powerful features and capabilities.

## API Basics <a href="#api-basics" id="api-basics"></a>

Our API is exposed as an HTTP/1 and HTTP/2 service over SSL.&#x20;

All endpoints live under the URL below and follow the REST architecture:

```
https://hosting.api.4everland.org/ 
```

## Authentication <a href="#auth" id="auth"></a>

To authenticate and utilize the Hosting API, you require a [**Hosting Auth Token**](https://dashboard.4everland.org/hosting/auth-tokens). You can achieve this by navigating to your 4EVERLAND dashboard, selecting Hosting > Auth Token, and then clicking "Generate".

<figure><img src="/files/8WHyCX7gSssWSixgYIOX" alt=""><figcaption></figcaption></figure>

{% hint style="info" %}
Once created, the token will only be displayed once. Please keep it safe. You can create a new one if you lose it.
{% endhint %}

{% hint style="info" %}
If you have any questions, please join our [Discord server](https://discord.com/invite/Cun2VpsdjF), or send us an email at <contact@4everland.org>.
{% endhint %}


# Create Project API

The Create Project API enables users to create a new project using the provided configuration. This API requires the following parameters:&#x20;

* Project name
* Deployment platform
* Deployment type&#x20;

By utilizing this API, users can efficiently initiate the creation of projects with specific configurations to suit their deployment needs.

{% openapi src="/files/xuFD9hql3cgOwptOMFEE" path="/project" method="post" %}
[HostingAPI(1).yaml](https://4107147272-files.gitbook.io/~/files/v0/b/gitbook-x-prod.appspot.com/o/spaces%2FEVHC4TEQKrh3Bfvq5dDi%2Fuploads%2F2QuCvvsuq3ufaOqc91ox%2FHostingAPI\(1\).yaml?alt=media\&token=66967582-5ee7-4845-aabf-3dae7f31edfe)
{% endopenapi %}

{% hint style="info" %}
If you have any questions, please join our [Discord server](https://discord.com/invite/Cun2VpsdjF), or send us an email at <contact@4everland.org>.
{% endhint %}


# Deploy Project API

The Deploy Project API facilitates the deployment of projects based on user-specified project IDs. Users are required to upload a compressed project archive to initiate and complete the deployment process efficiently.

{% openapi src="/files/xuFD9hql3cgOwptOMFEE" path="/deploy" method="post" %}
[HostingAPI(1).yaml](https://4107147272-files.gitbook.io/~/files/v0/b/gitbook-x-prod.appspot.com/o/spaces%2FEVHC4TEQKrh3Bfvq5dDi%2Fuploads%2F2QuCvvsuq3ufaOqc91ox%2FHostingAPI\(1\).yaml?alt=media\&token=66967582-5ee7-4845-aabf-3dae7f31edfe)
{% endopenapi %}

{% hint style="info" %}
If you have any questions, please join our [Discord server](https://discord.com/invite/Cun2VpsdjF), or send us an email at <contact@4everland.org>.
{% endhint %}


# Get Task Info API

The Get Task Info API facilitates the retrieval of task details based on the provided Task ID. Users can seamlessly query specific task information, enhancing efficiency in task management and tracking.

{% openapi src="/files/xuFD9hql3cgOwptOMFEE" path="/tasks/{taskId}" method="get" %}
[HostingAPI(1).yaml](https://4107147272-files.gitbook.io/~/files/v0/b/gitbook-x-prod.appspot.com/o/spaces%2FEVHC4TEQKrh3Bfvq5dDi%2Fuploads%2F2QuCvvsuq3ufaOqc91ox%2FHostingAPI\(1\).yaml?alt=media\&token=66967582-5ee7-4845-aabf-3dae7f31edfe)
{% endopenapi %}

{% hint style="warning" %}
Due to synchronization delays, it is recommended to query the projects deployed on Greenfield /Arweave after 3-5 minutes. The IPFS project remains unaffected.
{% endhint %}

{% hint style="info" %}
If you have any questions, please join our [Discord server](https://discord.com/invite/Cun2VpsdjF), or send us an email at <contact@4everland.org>.
{% endhint %}


# IPNS Deployment Update API

This API is used to update projects that have been deployed by IPNS.

### API List

<table data-header-hidden><thead><tr><th width="82"></th><th></th><th width="204"></th><th></th></tr></thead><tbody><tr><td>No.</td><td>APIs</td><td>Description</td><td>Date</td></tr><tr><td>1</td><td>IPNS resolve</td><td>Update deploy</td><td>2023/03/01</td></tr><tr><td>2</td><td>Get IPNS resolve status</td><td>Get IPNS resolve Name and Status</td><td>2023/03/01</td></tr></tbody></table>

### IPNS resolve API

#### Description

1. Request Method: POST
2. Request Address: [https://api.4everland.org](https://api.4everland.org.)
3. Path: /api/ipns/resolve

#### Request parameter

**Headers:**

| Name         | Value                             | Required | Note        |
| ------------ | --------------------------------- | -------- | ----------- |
| Content-Type | application/x-www-form-urlencoded | True     | <p><br></p> |
| Token        | <p><br></p>                       | Ture     | Auth Token  |

**Query**

| Name        | Required | Note              |
| ----------- | -------- | ----------------- |
| projectName | True     | IPNS Project Name |

* Request Case: <https://api.4everland.org/api/ipns/resolve?projectName=testProject>
* Limit flow based on user, one second to initiate one successful request

**Return data**

<table data-header-hidden><thead><tr><th></th><th></th><th></th><th></th><th data-hidden></th></tr></thead><tbody><tr><td>Name</td><td>Type</td><td>Required</td><td>Note</td><td>Draft value</td></tr><tr><td>code</td><td>number</td><td>False</td><td>Return Code</td><td><br></td></tr><tr><td>message</td><td>string</td><td>False</td><td><br></td><td><br></td></tr><tr><td>data</td><td>object</td><td>False</td><td><br></td><td><br></td></tr></tbody></table>

**Response**

```
{
  "code": 200,
  "message": "success",
  "data": {}
}
```

**Error**

```
10025: Access is denied!
10009 :  Project is not exist!
100072 : This is not an IPNS project!
100073 :  Request limit: 1 request per second!
```

### Get IPNS resolve status API

#### Description

1. Request Method: GET
2. Request Address: [https://api.4everland.org](https://api.4everland.org.)
3. Path: /api/ipns/resolve/status

#### Request parameter

**Headers:**

<table data-header-hidden><thead><tr><th></th><th></th><th></th><th></th><th data-hidden></th></tr></thead><tbody><tr><td>Name</td><td>Required</td><td>Case</td><td>Note</td><td>Value</td></tr><tr><td>token</td><td>True</td><td><br></td><td>Auth Token</td><td><br></td></tr></tbody></table>

#### Query

<table data-header-hidden><thead><tr><th></th><th></th><th></th><th data-hidden></th></tr></thead><tbody><tr><td>Name</td><td>Required</td><td>Note</td><td>Case</td></tr><tr><td>projectName</td><td>True</td><td>IPNS Project Name</td><td><br></td></tr></tbody></table>

Request Case: <https://api.4everland.org/api/ipns/resolve/status?projectName=testProject>

**Return data**

<table data-header-hidden><thead><tr><th></th><th></th><th></th><th></th><th data-hidden></th></tr></thead><tbody><tr><td>Name</td><td>Type</td><td>Required</td><td>Note</td><td>Draft value</td></tr><tr><td>code</td><td>number</td><td>False</td><td>Return Code</td><td><br></td></tr><tr><td>message</td><td>string</td><td>False</td><td><br></td><td><br></td></tr><tr><td>data</td><td>object</td><td>False</td><td><br></td><td><br></td></tr><tr><td>ipnsResolve</td><td>string</td><td>False</td><td>Latest cid</td><td><br></td></tr><tr><td>status</td><td>string</td><td>False</td><td>Last deployment status</td><td><br></td></tr><tr><td>updateAt</td><td>string</td><td>False</td><td>Time(UTC+0)</td><td><br></td></tr></tbody></table>

**Response**

```
{
    "code": 200,
    "message": "success",
    "data": {
        "ipnsResolve": "bafybeifjojp4mri2k775lsv3tgf5r2lg5jtxcdfufop52ygkwmqxjakl3m",
        "status": "SUCCESS",
        "updateAt": "2023-03-01 07:12:32"
    }
}
```

**Error**

```
10025: Access is denied!
10009 :  Project is not exist!
100072 : This is not an IPNS project!
```

{% hint style="info" %}
If you have any questions, please join our [Discord server](https://discord.com/invite/Cun2VpsdjF), or send us an email at <contact@4everland.org>.
{% endhint %}


# Hosting CLI

## Overview

<figure><img src="/files/Mmt1iyVvan5dYlbeTMIk" alt=""><figcaption></figcaption></figure>

{% hint style="success" %}
Hosting offers a command-line interface for the 4EVERLAND CLI, which enables you to deploy and manage projects with a set of commands. This makes it easier for you to interact with the platform using a terminal or automated system.&#x20;
{% endhint %}

## Getting started with 4EVERLAND CLI

#### Installation <a href="#installation" id="installation"></a>

To install the CLI, run the following command:

```npmignore
npm install -g @4everland/hosting-cli
```

#### View Version <a href="#view-version" id="view-version"></a>

You can view the current version of the 4everland CLI by running the command:

```npmignore
4ever-hosting -v
```

#### Login <a href="#login" id="login"></a>

You can login your Hosting account via the 4everland CLI by running the command:

```npmignore
4ever-hosting login

```

#### Enter Token <a href="#enter-token" id="enter-token"></a>

You can see your token in the Hosting setting.

<figure><img src="/files/o2519x3AI3k8VcZuSuZD" alt=""><figcaption></figcaption></figure>

The following operations are available only after successful login:

* Project Deployment
* Domain Operation

### Deployment

To deploy a project, please run the '4ever-hosting deploy' command.

```
4ever-hosting deploy
```

After entering the build command you need to do two steps&#x20;

* Give the project a name.&#x20;
* Select the platform on which the project will be deployed.

{% hint style="info" %}
Currently IPFS, Arweave, Internet Computer and BNB Greenfield are supported.
{% endhint %}

### Platform Quick Deployment

Build and deploy a project to a given platform, run the following command.

Deploy on IPFS

```
4ever-hosting deploy -ipfs
```

Deploy on Arweave

```
4ever-hosting deploy -ar
```

Deploy on Internet Computer

```
4ever-hosting deploy -ic
```

Deploy on BNB Greenfield&#x20;

```
4ever-hosting deploy -gnfd
```

### IPNS

IPNS can be obtained by running the command ''`4ever-hosting getipns`'' in the project directory(only valid for IPFS projects).

```
4ever-hosting getipns
```

Use the IPNS Deployment, fill the `<ipns>` of deployment.

```
4ever-hosting ipns <ipns>
```

Select the platform(IPFS, Arweave, Internet Computer and BNB Greenfield) for deployment by using the following commands.

```
4ever-hosting ipns <ipns> -ipfs
```

```
4ever-hosting ipns <ipns> -ar
```

```
4ever-hosting ipns <ipns> -ic
```

```
4ever-hosting ipns <ipns> -gnfd
```

Update the corresponding CID to IPNS and redeploy.

```
4ever-hosting update <ipns>
```

### CID

Use the CID to deploy the project, fill the `<cid>` of deployment.

```Plain
4ever-hosting cid <cid> -ipfs
```

```Plain
4ever-hosting cid <cid> -ar
```

```Plain
4ever-hosting cid <cid> -ic
```

```
4ever-hosting cid <cid> -gnfd
```

#### Help

If you need to see all the CLI commands, you can run the help command.

```
4ever-hosting -h
```

{% hint style="info" %}
If you have any questions, please join our [Discord server](https://discord.com/invite/Cun2VpsdjF), or send us an email at <contact@4everland.org>.
{% endhint %}


# Hosting MCP Server

## Overview

The 4EVERLAND Hosting MCP Server is a comprehensive implementation of the Model Context Protocol (MCP) designed to facilitate the instant deployment of AI-generated code to decentralized storage networks. This solution empowers developers to seamlessly publish applications on networks such as Greenfield, IPFS, and Arweave, combining the efficiency of AI workflows with the security and resilience of decentralized storage.\
Upon deployment, the system automatically generates a directly accessible webpage domain, eliminating the complexity typically associated with deploying decentralized applications. This streamlines the development-to-production pipeline, allowing creators to focus on building innovative solutions rather than managing infrastructure.

## Core Features

#### 1. Instant Deployment with Domain Generation

* Deploy AI-generated code to decentralized storage networks with a single command
* Automatically receive a unique, immediately accessible webpage domain for each deployment
* Enables rapid iteration and sharing of applications without manual domain configuration

#### 2. Multi-Network Decentralized Storage Support

* Supports deployment to Greenfield, IPFS, and Arweave networks
* Provides flexibility to choose the optimal storage solution based on project requirements
* Ensures redundancy and resilience through decentralized infrastructure

#### 3. Secure and Immutable Storage

* Leverages the tamper-resistant nature of decentralized storage
* Provides high availability and data durability
* Eliminates single points of failure inherent in centralized hosting solutions

#### 4. Visual Project Management Interface

* Manage deployed projects through the intuitive [4EVERLAND Dashboard](https://dashboard.4everland.org/)
* View detailed deployment information and statistics
* Configure custom domains directly from the management interface

## MCP Tool: deploy\_site

The `deploy_site` tool is the primary interface for deploying applications to the 4EVERLAND hosting platform. This command-line utility simplifies the deployment process with a straightforward parameter structure.

#### Parameters

| Parameter     | Type                           | Description                                                                   |
| ------------- | ------------------------------ | ----------------------------------------------------------------------------- |
| code\_files   | Record\<string, string>        | Map of file paths to their content                                            |
| project\_name | string                         | Project name (alphanumeric, underscore, hyphen; cannot start/end with hyphen) |
| project\_id   | string (optional)              | Existing project ID to deploy to (new project created if omitted)             |
| platform      | "IPFS" \| "AR" \| "GREENFIELD" | Storage platform to deploy to (default: `"IPFS"`)                             |

## Getting Started

#### Obtaining an Auth Token

1. Log in to your [4EVERLAND Dashboard](https://dashboard.4everland.org/) account
2. Navigate to **Hosting** -> **Auth Token**
3. Click "**Create**" to generate a new authentication token
4. Copy and securely store the token (it will only be displayed once)

#### Integrations

**Cursor Integration**

1. Open Cursor and go to Settings (gear icon in the top right)
2. Click on "MCP" in the left sidebar
3. Click "Add new global MCP server"
4. Enter the following configuration:

```json
{
  "mcpServers": {
    "4ever-mcpserver": {
      "command": "npx",
      "args": [
        "-y",
        "@4everland/hosting-mcp@latest",
        "serve"
      ],
      "env": {
        "TOKEN": "your-hosting-auth-token"
      }
    }
  }
}
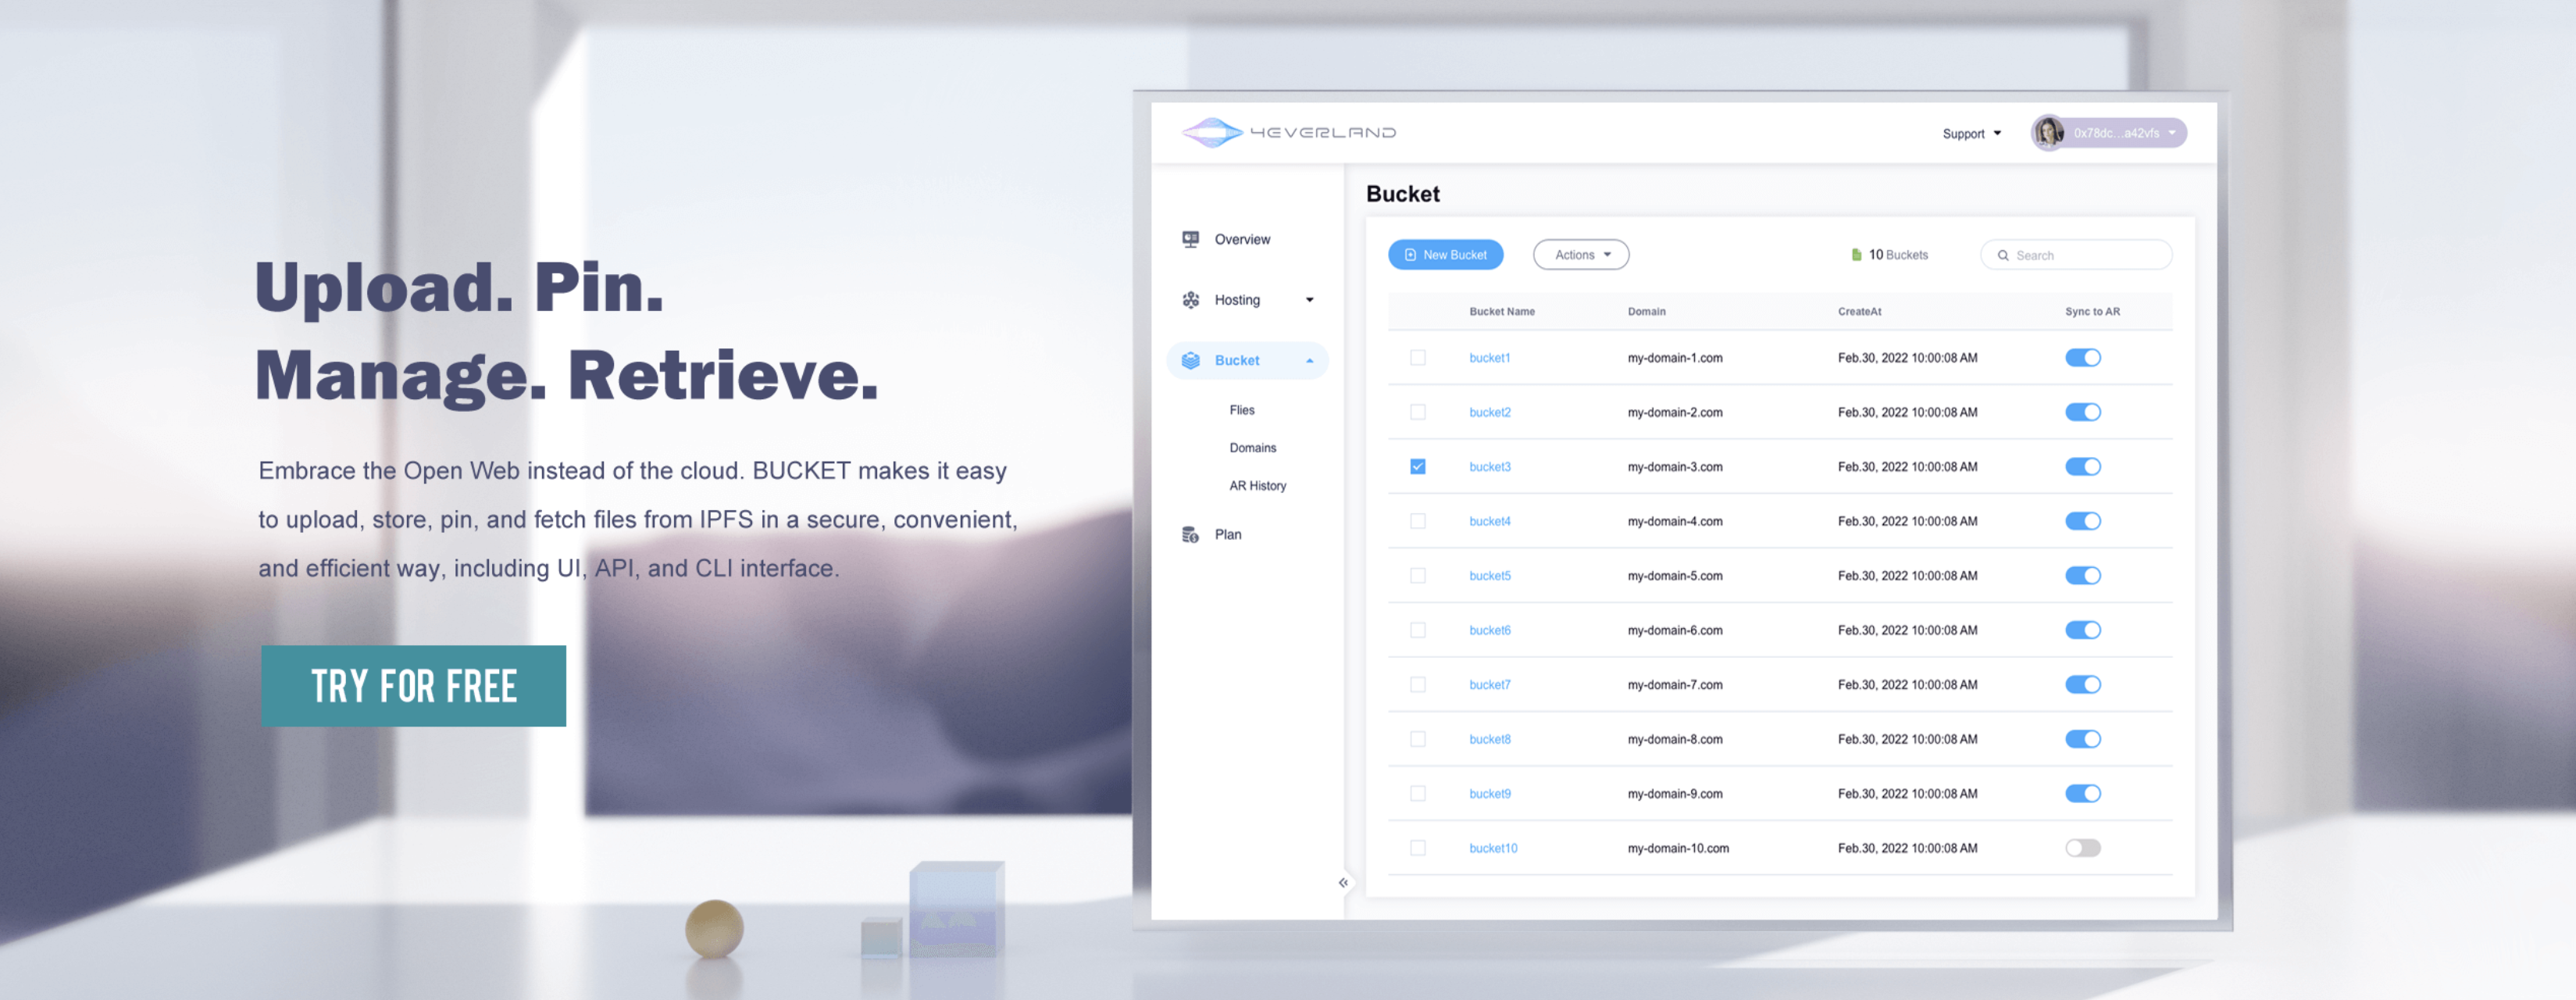
```

**Claude Desktop Integration**

1. Open Claude Desktop and go to Settings
2. Click on "Developer" in the left sidebar
3. Click the "Edit Config" button
4. Add the following to `claude_desktop_config.json`:

<pre class="language-json"><code class="lang-json"><strong>{
</strong><strong>  "mcpServers": {
</strong><strong>    "4ever-mcpserver": {
</strong><strong>      "command": "npx",
</strong><strong>      "args": [
</strong><strong>        "-y",
</strong><strong>        "@4everland/hosting-mcp@latest",
</strong><strong>        "serve"
</strong><strong>      ],
</strong><strong>      "env": {
</strong><strong>        "TOKEN": "your-hosting-auth-token"
</strong><strong>      }
</strong><strong>    }
</strong><strong>  }
</strong><strong>}
</strong></code></pre>

5. Save the file and restart Claude Desktop

#### Local Development

To run the server locally for development and testing:

```bash
# Clone repository
git clone https://github.com/4everland/4everland-hosting-mcp.git
cd 4everland-hosting-mcp

# Install dependencies
npm install

# Build the project
npm run build

# Run the server locally
npm run serve
```

## Security Considerations

* All deployments are secured using industry-standard encryption protocols
* Auth tokens are treated as sensitive credentials and should be stored securely
* The system implements role-based access control for project management
* Decentralized storage ensures that data is stored across multiple nodes, reducing the risk of unauthorized access or data loss

### Support and Community

For technical support, feature requests, or bug reports, please open an issue on the [4EVERLAND Hosting MCP GitHub repository](https://github.com/4everland/4everland-hosting-mcp/issues).

{% hint style="info" %}
If you have any questions, please join our [Discord server](https://discord.com/invite/Cun2VpsdjF), or send us an email at <contact@4everland.org>.
{% endhint %}


# Bucket

<figure><img src="/files/ht13ZFfa72meSbP9r5Ns" alt=""><figcaption></figcaption></figure>

Bucket is 4EVERLAND's storage file system, the best storage solution for uploading, storing, and retrieving data to IPFS, Arweave, and other platforms.

You can interact and integrate programmatically using the 4EVERLAND API, which is compatible with AWS S3 APIs, or you may use the interface operations, CLI, and other methods to upload, browse, and manage all of your files.

{% hint style="info" %}
Decentralized storage is a technique for storing data that, instead of traditional servers, uses a distributed network with many participants providing storage capacity.
{% endhint %}

## Decentralise your files for the first time

{% content-ref url="/pages/uDj0oIyTg4XfqMByQTxi" %}
[IPFS Bucket](/storage/bucket/ipfs-bucket)
{% endcontent-ref %}

{% content-ref url="/pages/he6fvea9xLHZWOCtyJzn" %}
[Arweave Bucket](/storage/bucket/arweave-bucket)
{% endcontent-ref %}


# IPFS Bucket

4EVERLAND's IPFS Bucket is a storage file system that provides a convenient and efficient way to upload, pin, and fetch files on IPFS. It is designed to be easy to use, with simple interfaces that make it accessible to both non-technical and technical users.

Whether you prefer to use simple interfaces or programmatic interfaces, or if you want to use your current code, 4EVERLAND's IPFS Bucket has you covered. With support for a wide range of programming languages and frameworks, it is easy to integrate the IPFS Bucket into your existing workflows and projects.

In addition to its ease of use and flexibility, the IPFS Bucket also offers high performance and reliability, thanks to its integration with the IPFS network. This makes it an excellent choice for developers and businesses looking to take advantage of the benefits of IPFS for file storage and retrieval.

Overall, 4EVERLAND's IPFS Bucket is a powerful and flexible storage solution for IPFS, offering high performance, reliability, and ease of use. Whether you are a non-technical user or an experienced developer, it provides a convenient and efficient way to manage your files on the IPFS network.

{% content-ref url="/pages/Vm6Z8A0EGmIpnZeNcR8C" %}
[Bucket API - S3 Compatible](/storage/bucket/bucket-api-s3-compatible)
{% endcontent-ref %}

All files have been uploaded to IPFS and can be viewed and referenced using the Bucket URL or the IPFS gateway.&#x20;

{% hint style="info" %}
You can view and reference the files through the Bucket Storage URL, and can view directly on the IPFS gateway.
{% endhint %}

{% content-ref url="/pages/HwbzDMYMoiWiMXWX00LT" %}
[IPFS Gateway](/gateways/ipfs-gateway)
{% endcontent-ref %}

**Getting Started**

{% content-ref url="/pages/qNiryKdr6fRLyxitQ0U8" %}
[Guides](/storage/bucket/guides)
{% endcontent-ref %}


# Get Root CID - Snapshots

## What is a snapshot

In the field of computer science, creating a snapshot of a folder means generating a static copy of the folder's current state. Similarly, within the 4EVERLAND BUCKET, taking a snapshot of a folder provides an IPFS CID value that represents a complete copy of all the files and subfolders within the folder. This snapshot can be used to restore the folder to a specific point in time, making it useful for data backup, recovery, version control, and more.

Benefits and Use Cases

1. Data Integrity: In the Web3 and NFT domains, blockchain technology is frequently used to record and verify data ownership and integrity. By taking a snapshot of a folder and associating the hash value of the snapshot with a corresponding blockchain transaction, an immutable proof of the folder's state can be provided.
2. Sharing and Distribution: By creating a snapshot of a folder, it becomes possible to transfer the entire copy of the folder to other users without the need to transfer each file individually. This simplifies sharing and distribution processes, especially in scenarios involving large folders or collaborations.
3. Controlled Uploads: In the NFT field, it is common to take snapshots of the storage content of entire artworks or collections and store the associated IPFS CID value. By doing so, creators can choose the appropriate moment to release or display their creations, providing better control over the publication process.
4. Remote Collaboration: Managing and sharing snapshots of folders facilitates convenient remote collaboration. Team members can access the folder's state at specific points in time as per their requirements, enabling them to work and make edits based on a common understanding.

By leveraging the power of snapshots, users can effectively manage and restore the state of their folders, ensuring efficient data management and collaboration

## How to Create a Snapshot in a Bucket

First, you need to create an IPFS Bucket.

<figure><img src="/files/IofIFovstrQ3Sf6QYWty" alt=""><figcaption></figcaption></figure>

Then click on 'New Folder' to create a folder.

<figure><img src="/files/fYRuOs8wxieI5AFRZQY6" alt=""><figcaption></figcaption></figure>

Select the folder and click on the 'Shapshot' option below

<figure><img src="/files/D5skeROCZkiykMlqCFKB" alt=""><figcaption></figcaption></figure>

You will be asked if you want to publish the CID created by this snapshot to the IPFS network now. Click 'Yes' and you will be able to immediately query the CID on the IPFS network and get the data.

<figure><img src="/files/UkTWvVaojgA7Xkco9QMW" alt=""><figcaption></figcaption></figure>

Alternatively, you can choose to publish manually later, an action that will only generate the corresponding CID and will not be able to query the data on the IPFS network. You can publish manually later in the snapshot list

<figure><img src="/files/O89rrNjec3Sd20yTTZ3d" alt=""><figcaption></figcaption></figure>

View or manipulate your completed snapshots in the Snapshots list.

<figure><img src="/files/phS2rYi0kVviUlUjPtyc" alt=""><figcaption></figcaption></figure>


# Arweave Bucket

4EVERLAND Arweave Bucket is built on the Arweave blockchain, which is designed to provide permanent, decentralized, and tamper-proof data storage. This technology enables any type of digital data to be stored permanently, ensuring that it is always available and cannot be censored or controlled by any single authority.

Unlike traditional data storage solutions that rely on centralized servers and controlled nodes, Arweave uses a decentralized network infrastructure that puts power back into the hands of users. This means that data stored on Arweave is open, transparent, and cannot be censored or controlled by any single authority.

Arweave Bucket is designed to provide a convenient and efficient way to manage your data on the Arweave network, with support for a wide range of file formats and types. This makes it easy to upload, store, and retrieve your data on the Arweave network, ensuring that it is always available and secure.

Overall, Arweave Bucket is a powerful and flexible data storage solution for the Arweave network, offering high performance, reliability, and security. Whether you are a developer or a business, it provides a convenient and efficient way to manage your data on the Arweave network, ensuring that it is always available and secure.

## Why 4EVERLAND AR Bucket ?&#x20;

Making lasting data accessible to everyone has always been our goal at Arweave Bucket. We are thrilled to see how many individuals and organizations who have reaped the rewards of permanent data.

**Individuals:** Arweave Bucket is used by new users from all over the world every day to save their most priceless possessions. Its extensive out-of-the-box functionality makes it a simple software to utilize for your ongoing data requirements.

**NFT projects:** Several small to large NFT projects now reside at Arweave Bucket. A rising number of artists, whether creating digital art, video games, or music, have decided to use Arweave Bucket to manage their files on the permaweb.

**Developers:** With the power and flexibility of our file system, toolkits, and CLI, the Arweave Bucket core library allows developers to work faster inside the Arweave ecosystem.

## Advantages of the Bucket <a href="#id-3f6a" id="id-3f6a"></a>

The Bucket enables users to securely, conveniently, and efficiently upload, store, and retrieve files from various decentralized storage protocols. It offers the following benefits:

**S3 Compatible**

Seamless Integration with 4EVERLAND Arweave Bucket — 100% Compatibility with AWS S3 APIs, CLIs, and Apps

**High Performance**

Low Latency and Effortless Batch Uploads with 4EVERLAND Arweave Bucket

**Intuitive Dashboard**

Effortlessly Manage Your Files with our User-Friendly Interface

**Multi-chain Support**

Seamlessly Login and Make Payments across Multiple Chains

**Arweave Gateway**

Enjoy Zero-Latency Instant Access with Integrated Arseeding for Uninterrupted Connectivity

## **Getting Started**

{% content-ref url="/pages/qNiryKdr6fRLyxitQ0U8" %}
[Guides](/storage/bucket/guides)
{% endcontent-ref %}


# Path Manifests

## Overview

Path manifests are a simple and optional extension for Arweave gateways, they allow users to upload a small metadata transaction (the path manifest) which maps user-definable subpaths with other Arweave transaction IDs. This allows users to create logical groupings of content, for example a directory of related files, or the files and assets that make up a web application.

## Why Do You Even Need Path Manifests? <a href="#id-2b42" id="id-2b42"></a>

When you upload data to Arweave, it’s enveloped in a [transaction](https://docs.arweave.org/developers/server/http-api#transaction-format). This transaction has a URL identifier that’s basically a SHA-256 hash of the transaction signature. So, it’s not exactly human-friendly, nor is it something you can customize.

Here's an example of a typical directory structure for a small web application.

```
index.html
about.html
js/app.js
css/style.css
assets/fonts/font.woff
assets/fonts/font.ttf
assets/img/logo.png
assets/img/icon.png
```

Once uploaded, `css/style.css` will now be addressed using an ID like `XEfZIr3DOFXiKZ2I3XujAsPpvryTts2dVyr6dqrrmUm`, and would be accessed using <https://arweave.net/XEfZIr3DOFXiKZ2I3XujAsPpvryTts2dVyr6dqrrmUm> (using arweave.net as an example gateway).&#x20;

Now the developer has a problem, their code is written with references to other files, and once uploaded to Arweave, those paths will break and need updating in any code that referenced them.

In our `index.html` we might have a reference to our CSS, like this

```
<link href="css/style.css" rel="stylesheet" />
```

This needs to be translated to this

```
<link href="XEfZIr3DOFXiKZ2I3XujAsPpvryTts2dVyr6dqrrmUm" rel="stylesheet" />
```

Or inlined, like this

```
<style type="text/css">
  /* Contents of css.style.css */
</style>
```

This works to a point, and tools can automatically generate and update these references, or inline the content into a single file, but this gets complicated when we consider runtime references to files that aren't clear just from the original application source code (e.g. Javascript creating dynamic references to files). This is also not so useful for people, as there is nothing in the URL logically grouping files together, and there are no human readable paths and URLs.

There is also the possibility that circular dependencies can be created which cannot be resolved. If `index.html` is wrapped in an Arweave transaction and given an ID, `about.html` needs updating to point to transaction ID for `index.html`. If `index.html` also references `about.html` we now have a circular dependency. By changing even a single byte in either `index.html` or `about.html` to reference the others transaction ID, we need to re-sign them which changes the ID.

When uploading Arweave data using 4EVERLAND, any folder can be transformed into Manifest mode. The file names and paths will be represented in the Arweave Manifest, making it easier for developers and users to reference their content using the names used on their local file system.

Please note that Manifests must be public and unencrypted data so that they can be parsed by the Arweave gateway or 4EVERLAND nodes.


# Instructions for Building Manifest

## Understanding the Path Manifest Schema <a href="#fba5" id="fba5"></a>

Path Manifests are JSON objects and come with several key-value pairs. Each of these keys serves a specific purpose.&#x20;

### Mandatory Fields <a href="#db5f" id="db5f"></a>

* `manifest`: Type is string. This identifies that what you're creating is a path manifest for Arweave. It must be set to `arweave/paths`.
* `version`: Type is string. This tells us which version of the manifest specification you're using. As of now, it's `0.1.0`. For future updates, just keep an eye on [semver](https://semver.org/).
* `paths`: Type is object. This is where the magic happens. It maps your subpaths to Arweave transaction IDs. Each subpath key has an associated `id` which is the transaction ID for that particular file or asset.

### Optional Fields <a href="#id-2a92" id="id-2a92"></a>

* `index`: Type is object. This specifies what should happen when someone tries to access the manifest directly. If you set it, it must contain a behavior to adopt, which currently is `path`.
* `index.path`: Type is string. If set, this is the default path that will load when the manifest is accessed. It must reference a key in the `paths` object, not a transaction ID.

### Pro-Tips <a href="#id-7c22" id="id-7c22"></a>

* Your path manifest transaction must only contain this JSON object.
* The Content-Type tag must be set to `application/x.arweave-manifest+json`.

### Example <a href="#id-8909" id="id-8909"></a>

Here’s a sample manifest JSON code snippet to illustrate how it all comes together:

```
{
  "manifest": "arweave/paths",
  "version": "0.1.0",
  "index": {
    "path": "index.html"
  },
  "paths": {
    "index.html": {
      "id": "cG7Hdi_iTQPoEYgQJFqJ8NMpN4KoZ-vH_j7pG4iP7NI"
    },
    "js/app.js": {
      "id": "fZ4d7bkCAUiXSfo3zFsPiQvpLVKVtXUKB6kiLNt2XVQ"
    },
    "css/style.css": {
      "id": "fZ4d7bkCAUiXSfo3zFsPiQvpLVKVtXUKB6kiLNt2XVQ"
    },
    "css/mobile.css": {
      "id": "fZ4d7bkCAUiXSfo3zFsPiQvpLVKVtXUKB6kiLNt2XVQ"
    },
    "assets/img/logo.png": {
      "id": "QYWh-QsozsYu2wor0ZygI5Zoa_fRYFc8_X1RkYmw_fU"
    },
    "assets/img/icon.png": {
      "id": "0543SMRGYuGKTaqLzmpOyK4AxAB96Fra2guHzYxjRGo"
    }
  }
}
```

In this example, if someone accesses the manifest directly, it will load `index.html` by default. All the subpaths and their corresponding transaction IDs are clearly outlined in the `paths` object.

And there you have it! You’ve now become proficient in crafting and understanding Path Manifests. In the next part of this tutorial, we will look at how to actually implement these Path Manifests into your Web3 projects. So, don’t go too far!

## Understanding URL Resolution in Arweave Gateways <a href="#id-3dda" id="id-3dda"></a>

### Applicability Scope <a href="#c6f0" id="c6f0"></a>

Note that the rules for URL resolution are specific to the `/[:txid]` endpoint in Arweave gateways. These rules don't apply to `/tx/[:txid]` endpoints.

### URL Anatomy and Resolution <a href="#id-1f88" id="id-1f88"></a>

When a user requests a URL from an Arweave gateway, the gateway must first identify the manifest transaction ID (`manifestId`) and the specified subpath. A typical Arweave URL might look like this:

* Full URL: [`https://arweave.net/dtOrr7JHEI6MTy9fqUJ48inydg4EiunfSzWRmCJ0KgS/css/style.css`](https://arweave.net/dtOrr7JHEI6MTy9fqUJ48inydg4EiunfSzWRmCJ0KgS/css/style.css)
* Protocol: `https`
* Host: `arweave.net`
* Manifest ID: `dtOrr7JHEI6MTy9fqUJ48inydg4EiunfSzWRmCJ0KgS`
* Subpath: `css/style.css`

### Gateway Resolution Steps <a href="#c16b" id="c16b"></a>

1. Content-Type Verification: The gateway must first check the `Content-Type` of the page being requested. If the `Content-Type` is `application/x.arweave-manifest+json`, then further processing is needed; otherwise, the data is served as-is.
2. Manifest Parsing and Validation: Next, the gateway parses the manifest transaction’s data and should verify its contents according to the schema described in the document.
3. Subpath Matching: The gateway searches the manifest for a key that corresponds to the requested subpath. If a match is found, the gateway responds with the transaction ID content specified in `manifest.paths[subpath].id`.
4. HTTP Codes and Redirects: A `HTTP 200` status code should be returned if content is found. Redirects are not allowed; the user's URL must remain unchanged in the browser.
5. Error Handling: If the manifest points to an invalid transaction ID or one that can’t be accessed, a `HTTP 404` status should be returned.
6. Index Mapping: If a manifest is accessed directly (no subpath specified), and it has an `index.path` value, that value should be mapped to the manifest paths and resolved accordingly. Redirects to `index.path` are not allowed.
7. Listing Available Paths: If no `index.path` is defined, the gateway should display a list of all valid `paths` in a user-friendly HTML format.
8. `ETag` for Caching: ETag headers are important for caching. The ETag should be set to the transaction ID of the actual content, not the manifest, unless the manifest is being accessed without a subpath and no index is defined.

### Examples <a href="#id-45ff" id="id-45ff"></a>

Here are some example scenarios based on hypothetical manifest files:

* No subpath specified: The gateway will resolve to the data in `cG7Hdi_iTQPoEYgQJFqJ8NMpN4KoZ-vH_j7pG4iP7NI` as `index.html` is defined as `index.path`.
* Valid subpath specified: A request for `/mmJhKOPp2o73LXze05mj5qPVlgu4MsDzqCwpWKqoc7U/assets/img/logo.png` would return the content at `QYWh-QsozsYu2wor0ZygI5Zoa_fRYFc8_X1RkYmw_fU`.
* Invalid subpath: A request for a non-existing path like `/mmJhKOPp2o73LXze05mj5qPVlgu4MsDzqCwpWKqoc7U/path/does/not/exist.txt` will return a `HTTP 404`.
* No default index defined: If no `index.path` is present, the gateway will display an HTML page listing all valid paths available in the manifest.

By understanding these resolution rules, you’ll be better equipped to interact with the Arweave decentralized web, whether you’re a developer or an end user.


# Arweave Tags

To add tags when uploading to Arweave

## What are Tags?

Tags are a field in Arweave transactions composed of an array consisting of `name` and `value` pairs. By customizing the content of this field, you can include specific tag information for each transaction.

This feature allows you to easily filter and retrieve the transactions you need using Arweave Tags. Tags are widely used in Arweave transactions. In addition to marking the data you store on Arweave, Tags also allow Arweave gateways to directly add data types to the HTTP response header based on the tagged data type.&#x20;

The benefit of doing this is that the content recipient, such as a browser, can directly determine the data type from the Content-Type in the header and render it accordingly, such as images, videos, audios, PDFs, and so on.

## How to add Arweave Tags

When uploading data to Arweave using the 4EVER Bucket, you can add tags using the [S3 Tags method](https://docs.4everland.org/~/changes/ycVjkJMFVMCivZt0fFzQ/storage/bucket/bucket-api-s3-compatible/s3-tags-instructions). These tags will be automatically embedded into each Arweave transaction.Arweave Tags are embedded into Arweave transactions based on the Bucket Tag information, and there are two main scenarios:

1. 1.If you directly upload data using an Arweave Bucket, the tags you added when uploading the files will be embedded.
2. 2.If you use an IPFS Bucket to sync a specific file to Arweave, the tags associated with that particular file will be embedded.

{% hint style="info" %}
Please note that modifying Bucket Tags will not change the existing tag content on Arweave, and it will not re-upload the file to Arweave. If you want a file to have different tags, you will need to re-upload the file and attach the new tags.
{% endhint %}

### IPFS-Hash Tag

The IPFS-Hash Tag is a special tag provided by the 4EVER Bucket. For each data uploaded to Arweave through the Bucket, the Bucket automatically calculates the IPFS hash based on the file and embeds the corresponding tag in the Arweave transaction.

This means that you can use the IPFS-Hash Tag to index and retrieve the corresponding file through the Arweave gateway. The benefit of this is that it establishes a bridge between IPFS and Arweave.&#x20;

You can use Arweave as a permanent backup for IPFS, so if the IPFS network cannot locate the data corresponding to the IPFS hash, you can retrieve the data from Arweave and re-pin it on the IPFS network.

{% hint style="info" %}
Please note that the IPFS-Hash Tag is automatically generated and embedded by the Bucket, and it does not support customization. It also will not be overwritten by custom tag information.
{% endhint %}

### Content-Type

When it comes to Arweave, Content-Type is a crucial tag that typically refers to the Content-Type found in a webpage. It plays an essential role in defining the type of network file and the encoding of the webpage itself. This determination enables the browser to understand how to read and interpret the file accurately. This explains why you may encounter situations where clicking on a PHP webpage results in downloading a file or an image.

When utilizing the Arweave gateway to retrieve data, it is vital to include the Content-Type header, which informs the client about the actual content type of the returned data. By specifying the appropriate Content-Type, the client can correctly interpret and display the content. Some commonly encountered media format types include:

```
text/html: HTML format
text/plain: plain text format
text/xml: XML format
image/gif : gif image format
image/jpeg : jpg image format
image/png : png image format
```

A media format type that begins with application:

```
application/xhtml+xml: XHTML format
application/xml : XML data format
application/atom+xml: Atom XML aggregation format
application/json: JSON data format
application/pdf : pdf format
application/msword: Word document format
application/octet-stream : Binary stream data (e.g. common file downloads)
```

The Arweave Content-Type Tag in 4EVER Bucket is defined by the [S3 Content-Type method](https://docs.aws.amazon.com/AmazonS3/latest/userguide/UsingMetadata.html) and is not affected by S3 Tags. By default, the Bucket automatically generates and embeds the corresponding Arweave Content-Type Tag based on the file format. You can also customize it during file upload using the Bucket's [S3 Content-Type method](https://docs.aws.amazon.com/AmazonS3/latest/userguide/UsingMetadata.html).

{% hint style="info" %}
Modifying the Content-Type will not change the existing Content-Type Tag on Arweave, nor will it re-upload the file to Arweave. If you want the file to have a different Content-Type, you need to re-upload the file.
{% endhint %}

## Example tutorial&#x20;

First, go to the Dashboard and find the corresponding bucket. Enable the "Syncing to ar" option(You can also choose to sync a single file to AR).

<figure><img src="/files/PNMEEl1VyoRt8h1UijZ9" alt=""><figcaption></figcaption></figure>

Second, add tags to the objects you're uploading. You can do this using the Bucket S3 Compatible API or with a compatible S3 client. Below is an API example:

```
func ExampleS3_PutObject() {
 svc := s3.New(session.New())
 input := &s3.PutObjectInput{
  Body:                 aws.ReadSeekCloser(strings.NewReader("filetoupload")),
  Bucket:               aws.String("examplebucket"),
  Key:                  aws.String("exampleobject"),
  Tagging:              aws.String("key1=4ever&key2=This is a 4everland tag"),
  //Tagging:              aws.String("key1=value1&key2=value2")
 }

 result, err := svc.PutObject(input)
 if err != nil {
  if aerr, ok := err.(awserr.Error); ok {
   switch aerr.Code() {
   default:
    fmt.Println(aerr.Error())
   }
  } else {
   // Print the error, cast err to awserr.Error to get the Code and
   // Message from an error.
   fmt.Println(err.Error())
  }
  return
 }

 fmt.Println(result)
}
```

The system will automatically embed the file tags into the Arweave transaction. You can retrieve the corresponding tag information by searching for the hash in the [Arweave browser](https://viewblock.io/arweave/tx/V-EfdH05JiHLmrbLpnjAHavNSgMQzOU3xxnWFqTr1-A).&#x20;

<figure><img src="/files/G9c2Vh8H5vWJow2vQyhY" alt=""><figcaption></figcaption></figure>


# Guides

## Bucket App

Upload, browse, and manage all your files through the app interface. All files uploaded are published to IPFS and Arweave.

To get started, go ahead and [log in](https://dashboard.4everland.org/login) to your 4EVERLAND account, where you will see your account dashboard.

<figure><img src="/files/VwMvarHaqzx93Xm56Qj1" alt=""><figcaption></figcaption></figure>

## Upload Folders and Files <a href="#upload-folders-and-files" id="upload-folders-and-files"></a>

Go to the 4EVERLAND Bucket and **create a new Bucket.**

<figure><img src="/files/QuaTO08z4wtWp24aejAi" alt=""><figcaption></figcaption></figure>

{% hint style="info" %}
**If you need to sync this Bucket file to an AR, turn on the ‘Sync to AR’ button.**
{% endhint %}

By clicking on the upload button, you can choose to upload in the following ways: Select a File, Folder, or CID (Content Identifier).

{% hint style="info" %}

* **File**: 4EVERLAND allows you to upload any type of file including image files, video files, music files, text files, apps—anything you can imagine.
* **Folder**: You can upload an entire folder of content that you want to store and manage, including a collection of marketplace assets like videos, images or app files.
* **CID:** A content Identifier (also referred to as a CID) is a unique string of letters and numbers which represents a piece of data, and in the case of NFTs, proves that the NFT is really yours. A CID cannot be changed once in the IPFS network without changing the content attached to the CID as well.&#x20;
  {% endhint %}

<figure><img src="/files/uJiCtTMovHuQlD5vVbMa" alt=""><figcaption></figcaption></figure>

Choose what you would like to upload, and press upload.&#x20;

<figure><img src="/files/t0WZTOAYQCxubSO62JYW" alt=""><figcaption></figcaption></figure>

## View the Bucket, Folders, or Files <a href="#view-the-bucket-folders-or-files" id="view-the-bucket-folders-or-files"></a>

You can view your bucket, folders, or files via the 4EVERLAND Storage URL or directly on the 4EVERLAND gateways (With Hash/CID).

{% content-ref url="/pages/tP56ntLVwJgRxsKV8sEA" %}
[Gateways](/gateways/ipfs-gateway)
{% endcontent-ref %}

## View File Details <a href="#view-file-details" id="view-file-details"></a>

When you open an individual file you can see details about that particual file including the Image Preview, Object URL, Name, Size, and the IPFS Hash.

<figure><img src="/files/ZhFForFzDLdMEac1rpMb" alt=""><figcaption></figcaption></figure>

## Snapshots <a href="#other-actions" id="other-actions"></a>

Make a snapshot of your folders, each version corresponds to a unique IPFS CID. Welcome! NFT artists!&#x20;

{% content-ref url="/pages/RTugw9SVWaK6BPcByl2o" %}
[Get Root CID - Snapshots](/storage/bucket/ipfs-bucket/get-root-cid-snapshots)
{% endcontent-ref %}

## Domain

Select a Bucket and add a domain to it.

<figure><img src="/files/cGeNVY89D4gxRSQLS6ON" alt=""><figcaption></figcaption></figure>

<figure><img src="/files/JbLkYxSUgeb8ZP3po0zs" alt=""><figcaption></figcaption></figure>

## Fragments

The fragmentation management centre, where you can delete some of the files that were previously uploaded intermittently or incorrectly to better plan your storage space.

<figure><img src="/files/LWgidRjWKSMwT6mgloKz" alt=""><figcaption></figcaption></figure>

## Sync to AR

Select any file or folder and click the ‘Sync to AR’ button to sync the file to Arweave.

<figure><img src="/files/pvCQ2zpGdDkjyRfoIji6" alt=""><figcaption></figcaption></figure>

You may need some time to get the AR Hash.

<figure><img src="/files/e8wMbBIQ0sLKTpIUrkXD" alt=""><figcaption></figcaption></figure>

## Access Keys

Use the API key for Storage SDK.

<figure><img src="/files/jgynGqScrL7SQuPlkueQ" alt=""><figcaption></figcaption></figure>

## Other Actions <a href="#other-actions" id="other-actions"></a>

Files can be downloaded and deleted. You may select multiple files and then choose delete from the Options menu if you want to delete them all at once.

{% hint style="info" %}
If you have any questions, please join our [Discord server](https://discord.com/invite/Cun2VpsdjF), or send us an email at <contact@4everland.org>.
{% endhint %}


# Bucket API - S3 Compatible

4EVERLAND Bucket's S3-compatible API is fully compatible with the Amazon S3 Cloud Storage service, which means that it can be used by a wide range of standardized S3-compatible frameworks, tools, clients and SDKs to manage data stored via Bucket.

This compatibility makes it easy to integrate the 4EVERLAND Bucket with existing workflows and applications, without the need for significant changes to existing code or infrastructure. It also means that developers can use familiar tools and frameworks to manage their data on the 4EVERLAND Bucket, which can help to streamline development and reduce the learning curve associated with new technologies.

In addition to its S3 compatibility, the 4EVERLAND Bucket also offers high performance, reliability, and security, making it an excellent choice for developers and businesses looking for a powerful and flexible cloud storage solution.

Overall, the 4EVERLAND Bucket's S3-compatible API provides a powerful and flexible cloud storage solution that is easy to integrate with existing workflows and applications. With support for a wide range of tools and frameworks, it is a convenient and efficient way to manage your data in the cloud.

You can refer to the official [Amazon S3 documentation ](https://docs.aws.amazon.com/AmazonS3/latest/API/Welcome.html)to implement the interface to the Bucket API.

{% embed url="<https://docs.aws.amazon.com/AmazonS3/latest/API/Welcome.html>" %}

If you need to upload content to Arweave, make sure that the corresponding bucket has the 'sync to ar' button enabled before using this API.

<figure><img src="/files/5Sc7OuS7yZJz51ieILZy" alt=""><figcaption></figcaption></figure>

## Methods for obtaining Hash

You can Get ipfs hash and arweave hash from object metadata.

Object metadata key:

```
{
  Metadata: {
    'arweave-hash': 'arweave hash',
    'ipfs-hash': 'ipfs cid'
  }
}
```

## Access Keys

To use the 4EVERLAND S3-compatible API, you will need to have your 4EVERLAND API Key and API Secret to submit API requests.

Click on Bucket and select 'Access Keys', then click on 'Generate' on the right side to generate an API Key.

<figure><img src="/files/lg6avzOmwEGwmenIr146" alt=""><figcaption></figcaption></figure>

## Endpoint

The Bucket S3-compatible API endpoint is:&#x20;

```
https://endpoint.4everland.co
```

This endpoint can be used with S3-compatible tools, SDKs, or frameworks to communicate with the 4EVERLAND Bucket.

{% hint style="info" %}
Location can be configured freely: Since 4EVERLAND storage nodes are globally distributed, endpoint will automatically match the nearest node according to the upload location for data upload, so you can configure the location parameter freely.
{% endhint %}

## HTTPS Protocol&#x20;

4EVERLAND maintains a strict HTTPS-only standard. This means objects and API calls are served only via HTTPS. The port for this connection is the HTTPS standard port 443.

Requests sent via the HTTP protocol will be redirected to HTTPS.

## **Supported Feature Calls**

Currently, the API supports Bucket Calls, Object Calls, and also supports Multipart Calls and Privacy Calls.

### Supported Bucket Calls

| Name                   | Supported                      |
| ---------------------- | ------------------------------ |
| MakeBucketWithLocation | Yes (partial, ingore Location) |
| GetBucketInfo          | Yes (fully)                    |
| ListBuckets            | Yes (fully)                    |
| DeleteBucket           | Yes (fully)                    |

### Supported Object Calls

| Name                | Supported   |
| ------------------- | ----------- |
| ListObjects         | Yes (fully) |
| ListObjectsV2       | Yes (fully) |
| GetObjectNInfo      | Yes (fully) |
| GetObject           | Yes (fully) |
| GetObjectInfo       | Yes (fully) |
| PutObject           | Yes (fully) |
| CopyObject          | Yes (fully) |
| DeleteObject        | Yes (fully) |
| DeleteObjects       | Yes (fully) |
| GetObjectTagging    | Yes (fully) |
| PutObjectTagging    | Yes (fully) |
| DeleteObjectTagging | Yes (fully) |

### Supported Multipart Calls

| Name                    | Supported   |
| ----------------------- | ----------- |
| ListMultipartUploads    | Yes (fully) |
| NewMultipartUpload      | Yes (fully) |
| PutObjectPart           | Yes (fully) |
| CopyObjectPart          | Yes (fully) |
| ListObjectParts         | Yes (fully) |
| AbortMultipartUpload    | Yes (fully) |
| CompleteMultipartUpload | Yes (fully) |

### Supported Policy Calls

| Name               | Supported |
| ------------------ | --------- |
| SetBucketPolicy    | No        |
| GetBucketPolicy    | Yes       |
| DeleteBucketPolicy | No        |

{% hint style="info" %}
More information about supported [AWS S3 STS](https://docs.aws.amazon.com/STS/latest/APIReference/welcome.html).&#x20;

Please also check the [4EVER Security Token Service API](/storage/bucket/4ever-security-token-service-api) for details.
{% endhint %}

## Limits of S3 API

| Item                                                                            | Specification |
| ------------------------------------------------------------------------------- | ------------- |
| Maximum number of buckets                                                       | 200           |
| Maximum number of objects per bucket                                            | no-limit      |
| Maximum object size                                                             | about 96 GiB  |
| Minimum object size                                                             | 0 B           |
| Maximum object size per PUT operation                                           | 100 MiB       |
| Maximum number of parts per upload                                              | 1000          |
| Part size range                                                                 | 5 MiB to 100  |
| Maximum number of parts returned per list parts request                         | 1000          |
| Maximum number of objects returned per list objects request                     | 1000          |
| Maximum number of multipart uploads returned per list multipart uploads request | 1000          |
| Maximum length for bucket names                                                 | 48            |
| Maximum length for object names                                                 | 1024          |
| Maximum length for '/' separated object name segment                            | 19            |

{% hint style="info" %}
If you have any questions, please join our [Discord server](https://discord.com/invite/Cun2VpsdjF), or send us an email at <contact@4everland.org>.
{% endhint %}


# Coding Examples

Coding


# AWS SDK - Go (Golang)

Please read the following to understand how to use the AWS SDK - Go with the 4EVERLAND Bucket. Combine the AWS SDK API for the Go language with the 4EVERLAND Bucket to achieve file uploads to the IPFS or Arweave storage networks.

## Preparation

* In your development environment, [download and install](https://go.dev/doc/install) Go.
* [Download and install ](https://github.com/aws/aws-sdk-go#getting-started)the AWS SDK for Go.
* [Register](https://www.4everland.org/) a free 4EVERLAND account.
* If you need to use Arweave storage, you need to create an Arweave bucket. Click to[ ](https://docs.4everland.org/storage/bucket/bucket-api-s3-compatible)[learn more](https://docs.4everland.org/storage/bucket/guides).
* To obtain the corresponding API key in the bucket, click to[ learn more](https://docs.4everland.org/storage/bucket/bucket-api-s3-compatible).

## Development Examples

### Install the S3 client

The following code example defines an S3 client and does not return any output. Replace the values in the code below to complete your configuration:

1. Endpoint：<https://endpoint.4everland.co>
2. 4EVERLAND-Bucket-APIKey: Bucket-Access Keys-API key
3. 4EVERLAND-Bucket-APISecret: Bucket-Access Keys-API Secret
4. Region: Default filled in with "4everland"

```go
package main
 
import (
        "fmt"
        "github.com/aws/aws-sdk-go/aws"
        "github.com/aws/aws-sdk-go/aws/session"
        "github.com/aws/aws-sdk-go/aws/credentials"
        "github.com/aws/aws-sdk-go/service/s3"
)
 
func main() {
        s3Config := aws.Config{
        Credentials:      credentials.NewStaticCredentials("4EVERLAND-Bucket-APIKey", "4EVERLAND-Bucket-APISecret", ""),
        Endpoint:         aws.String("https://endpoint.4everland.co"),
        Region:           aws.String("4everland"),
}
```

### Create a bucket

`bucket`：The desired name for creating the bucket

```go
goSession, err := session.NewSessionWithOptions(session.Options{
        Config:  s3Config,
        Profile: "4everland",
})
 
// check if the session was created correctly.
 
if err != nil {
        fmt.Println(err)
}
 
// create a s3 client session
s3Client := s3.New(goSession)
 
// set parameter for bucket name
bucket := aws.String("bucketname")
 
// create a bucket
_, err = s3Client.CreateBucket(&s3.CreateBucketInput{
        Bucket: bucket,
})
 
// print if there is an error
if err != nil {
        fmt.Println(err.Error())
return
}
}
```

### Upload a file

`bucket`: Your bucket name

`/path/to/4everland/4ever.png`: The file path for upload

`Key`: The file name for upload

```go
// create a new session using the config above and profile
goSession, err := session.NewSessionWithOptions(session.Options{
        Config:  s3Config,
        Profile: "4everland",
})
 
// check if the session was created correctly.
 
if err != nil {
        fmt.Println(err)
}
 
// create a s3 client session
s3Client := s3.New(goSession)
 
//set the file path to upload
file, err := os.Open("/path/to/4everland/4ever.png")
if err != nil {
        fmt.Println(err.Error())
return
}
 
defer file.Close()
// create put object input
        putObjectInput := &s3.PutObjectInput{
        Body:   file,
        Bucket: aws.String("4everland-bucketname"),
        Key:    aws.String("object-name"),
}
 
// upload file
_, err = s3Client.PutObject(putObjectInput)
 
// print if there is an error
if err != nil {
        fmt.Println(err.Error())
return
}
}
```

### To retrieve the bucket and file list

```go
listBucketOutPut, err := client.ListBuckets(context.TODO(), &s3.ListBucketsInput{})

if err != nil {
    log.Fatalf("unable ListBuckets: , %v", err)
}
    //listObjectV2
listObjectsV2Output, err := client.ListObjectsV2(context.TODO(), &s3.ListObjectsV2Input{
    Bucket: &bucket,
})

if err != nil {
    log.Fatalf("unable listObjectsV2: , %v", err)
}
fmt.Println(listObjectsV2Output)
```

### Requesting IPFS CID and Arweave Hash

`bucket`:The bucket name where the target file is stored

`objectKey`: The path of the target file

```go
var (
    bucket = "4everlandbucket"
    objectKey = "/path/to/4everland/4ever.png"
)
object, err := client.HeadObject(context.Background(), &s3.HeadObjectInput{
    Bucket: &bucket,
    Key:    &objectKey,
})
if err != nil {
    return
}
if err != nil {
    panic(err)
}
fmt.Println("ipfs cid:", object.Metadata["ipfs-hash"])
//If it is an Arweave type of bucket.
fmt.Println("arweave hash:", object.Metadata["arweave-hash"])
```

{% hint style="info" %}
If you have any questions, please join our [Discord server](https://discord.com/invite/Cun2VpsdjF), or send us an email at <contact@4everland.org>.
{% endhint %}


# AWS SDK - Java

Please read the following to understand how to use the AWS SDK - Java with the 4EVERLAND Bucket. Combine the AWS SDK API for the Java language with the 4EVERLAND Bucket to achieve file uploads to the IPFS or Arweave storage networks.

## Preparation

* In your development environment, [download and install](https://www.java.com/download/ie_manual.jsp) Java.
* [Download and install](https://github.com/aws/aws-sdk-go#getting-started) the AWS SDK for Java.
* [Register](https://www.4everland.org/) a free 4EVERLAND account.
* If you need to use Arweave storage, you need to create an Arweave bucket. Click to[ ](https://docs.4everland.org/storage/bucket/bucket-api-s3-compatible)[learn more](https://docs.4everland.org/storage/bucket/guides).
* To obtain the corresponding API key in the bucket, click to[ learn more](https://docs.4everland.org/storage/bucket/bucket-api-s3-compatible).

## Development Examples

### Create a bucket

`bucketName`: The desired bucket name to create

`accessKey`: Bucket-Access Keys-API key

`secretKey`: Bucket-Access Keys-API Secret

`endpoint_url`: <https://endpoint.4everland.co>

`region`: Default filled in with "4everland"

```java
import com.amazonaws.AmazonServiceException;
import com.amazonaws.SdkClientException;
import com.amazonaws.auth.profile.ProfileCredentialsProvider;
import com.amazonaws.regions.Regions;
import com.amazonaws.services.s3.AmazonS3;
import com.amazonaws.services.s3.AmazonS3ClientBuilder;
import com.amazonaws.services.s3.model.CreateBucketRequest;
import com.amazonaws.services.s3.model.GetBucketLocationRequest;

import java.io.IOException;

public class CreateBucket2 {

    public static void main(String[] args) throws IOException {
        String bucketName = "new-bucketname";
        String accessKey = "4EVERLAND-Bucket-APIKey";
        String secretKey = "4EVERLAND-Bucket-APISecret";
        String endpoint_url = "https://endpoint.4everland.co";
        String region = "4everland";
        try {
            AmazonS3ClientBuilder.standard();
            AWSCredentials credentials = new BasicAWSCredentials(accessKey,secretKey);
            AmazonS3 s3Client = AmazonS3ClientBuilder.standard()
                    .withCredentials(credentials)
                    .withEndpointConfiguration(new AwsClientBuilder.EndpointConfiguration(endpoint_url, region))
                    .build();

            if (!s3Client.doesBucketExistV2(bucketName)) {
                s3Client.createBucket(new CreateBucketRequest(bucketName));

                String bucketLocation = s3Client.getBucketLocation(new GetBucketLocationRequest(bucketName));
                System.out.println("Bucket location: " + bucketLocation);
            }
        } catch (AmazonServiceException e) {
            e.printStackTrace();
        } catch (SdkClientException e) {
            e.printStackTrace();
        }
    }
}
```

### Upload a file

`bucketName`: Your bucket name

`stringObjKeyName`: The name of the file to be uploaded

`fileObjKeyName`: The name of the file to be uploaded

`fileName`: The path of the file to be uploaded

`accessKey`: Bucket-Access Keys-API key

`secretKey`: Bucket-Access Keys-API Secret

`endpoint_url`: <https://endpoint.4everland.co>

`region:` Default filled in with "4everland"

```java
import com.amazonaws.AmazonServiceException;
import com.amazonaws.SdkClientException;
import com.amazonaws.regions.Regions;
import com.amazonaws.services.s3.AmazonS3;
import com.amazonaws.services.s3.AmazonS3ClientBuilder;
import com.amazonaws.services.s3.model.ObjectMetadata;
import com.amazonaws.services.s3.model.PutObjectRequest;

import java.io.File;
import java.io.IOException;

public class UploadObject {

    public static void main(String[] args) throws IOException {
        String bucketName = "4everland-bucketname";
        String stringObjKeyName = "object-name";
        String fileObjKeyName = "object-name";
        String fileName = "/path/to/4everland/4ever.png";
        String accessKey = "4EVERLAND-Bucket-APIKey";
        String secretKey = "4EVERLAND-Bucket-APISecret";
        String endpoint_url = "https://endpoint.4everland.co";
        String region = "4everland";

        try {
            AWSCredentials credentials = new BasicAWSCredentials(accessKey,secretKey);
            AmazonS3 s3Client = AmazonS3ClientBuilder.standard()
                    .withCredentials(credentials)
                    .withEndpointConfiguration(new AwsClientBuilder.EndpointConfiguration(endpoint_url, region))
                    .build();

            s3Client.putObject(bucketName, stringObjKeyName, "Uploaded String Object");

            PutObjectRequest request = new PutObjectRequest(bucketName, fileObjKeyName, new File(fileName));
            ObjectMetadata metadata = new ObjectMetadata();
            metadata.setContentType("plain/text");
            metadata.addUserMetadata("title", "someTitle");
            request.setMetadata(metadata);
            s3Client.putObject(request);
        } catch (AmazonServiceException e) {

            e.printStackTrace();
        } catch (SdkClientException e) {
            e.printStackTrace();
        }
    }
}
```

### Requesting IPFS CID and Arweave Hash

`bucket`: The bucket name where the target file is stored

`key`: The name of the target file

```java
HeadObjectRequest headObjectRequest = HeadObjectRequest.builder()
  .bucket("4everland-bucketname")
  .key("your-object-name")
  .build();
  
HeadObjectResponse headObjectResponse = s3Client.headObject(headObjectRequest);
System.out.println("ipfs hash: " + headObjectResponse.metadata().get("ipfs-hash");
//If it is an Arweave type of bucket.
System.out.println("arweave hash: " + headObjectResponse.metadata().get("arweave-hash");
```

{% hint style="info" %}
If you have any questions, please join our [Discord server](https://discord.com/invite/Cun2VpsdjF), or send us an email at <contact@4everland.org>.
{% endhint %}


# AWS SDK - JavaScript

Please read the following to understand how to use the AWS SDK - JavaScript with the 4EVERLAND Bucket. Combine the AWS SDK API for the JavaScript language with the 4EVERLAND Bucket to achieve file uploads to the IPFS or Arweave storage networks.

## Preparation

* [Download and install](https://github.com/aws/aws-sdk-js-v3#getting-started) the AWS SDK for JavaScript.
* [Register](https://www.4everland.org/) a free 4EVERLAND account.
* If you need to use Arweave storage, you need to create an Arweave bucket. Click to[ ](https://docs.4everland.org/storage/bucket/bucket-api-s3-compatible)[learn more](https://docs.4everland.org/storage/bucket/guides).
* To obtain the corresponding API key in the bucket, click to[ learn more](https://docs.4everland.org/storage/bucket/bucket-api-s3-compatible).

## Development Examples

### Install the S3 client

The following code example defines an S3 client and does not return any output. Replace the values in the code below to complete your configuration:

`endpoint`：<https://endpoint.4everland.co>

`accessKey`：Bucket-Access Keys-API Key

`secretKey`：Bucket-Access Keys-API Secret

`region`: Default filled in with "4everland"

```javascript
import { S3 } from '@aws-sdk/client-s3';

const s3 = new S3({
  endpoint:"https://endpoint.4everland.co",
  credentials: {
    accessKeyId: "4EVERLAND-Bucket-APIKey",
    secretAccessKey: "4EVERLAND-Bucket-APISecret"
  },
  region: "4EVERLAND",
});
```

### Create a bucket

`bucket`: The desired bucket name to create

```javascript
const params = {
    Bucket: "bucketname",
}
s3.createBucket(params,(err, data)=>{
    if(err){
        console.log(err)
    } else {
        console.log('Bucket created', data)
    }
});
```

### Upload a file

`bucket`: Your bucket name

`Key`: The file path for the file to be uploaded

`ContentType`: The type of the file to be uploaded

```javascript
const params = {
  Bucket: "4everland-bucketname",
  Key: "/path/to/4everland/4ever.png",
  ContentType: "image/png",
  Body: "data content",
}

s3.putObject(params, (err, data)=>{
     if(err){
        console.log(err)
    } else {
        console.log('Upload success', data)
    }
};
```

### List the files in the bucket

`Bucket`: Your bucket name

`Prefix`: Files will be listed according to the provided path. When the input is empty, all files in the bucket will be listed

```javascript
const params = {
  Bucket: "4everland-bucketname",
  Prefix: "/path/to/" 
};
s3.listObjectsV2(params, function (err, data) {
  if (err) {
    console.log("Error when listing objects", err);
  } else {
    console.log("Success when listing objects", data);
  }
});
```

### Requesting IPFS CID and Arweave Hash

`Bucket`: The bucket name where the target file is stored

`Key`: The path of the target file

```javascript
s3.headObject({
    Bucket: "4everlandbucket",
    Key: "/path/to/4everland/4ever.png",
},(err, data)=>{
    if(!err) {
        console.log(data)
        console.log("ipfs cid:", data.Metadata['ipfs-hash'])
        // If it is an Arweave type of bucke
        console.log("arweave hash:", data.Metadata['arweave-hash']) 
    }
})
```

{% hint style="info" %}
If you have any questions, please join our [Discord server](https://discord.com/invite/Cun2VpsdjF), or send us an email at <contact@4everland.org>.
{% endhint %}


# AWS SDK - .NET

Please read the following to understand how to use the 4EVERLAND Bucket with AWS SDK - .NET. This guide outlines the integration of AWS SDK API for .NET with the 4EVERLAND Bucket to facilitate file uploads to the IPFS or Arweave storage networks.

## Preparation

* [Download and install](https://dotnet.microsoft.com/en-us/download/dotnet-framework) .NET in your environment.
* [Download and install](https://aws.amazon.com/sdk-for-net/) the AWS SDK for .NET development toolkit.
* [Register](https://www.4everland.org/) a free 4EVERLAND account.
* If you need to use Arweave storage, you need to create an Arweave bucket. Click to[ ](https://docs.4everland.org/storage/bucket/bucket-api-s3-compatible)[learn more](https://docs.4everland.org/storage/bucket/guides).
* To obtain the corresponding API key in the bucket, click to[ learn more](https://docs.4everland.org/storage/bucket/bucket-api-s3-compatible).

## Development Examples

### Create a bucket

`ServiceURL`: <https://endpoint.4everland.co>

`accessKey`: Bucket-Access Keys-API Key

`secretKey`: Bucket-Access Keys-API Secret

```csharp
namespace CreateBucket
{
    using System;
    using System.Threading.Tasks;
    using Amazon.S3;
    using Amazon.S3.Model;

    public class CreateBucket
    {
        public static async Task Main()
        {

            // Specify a name for the new bucket.
            const string newBucketName = "bucketname";

             {
                string accessKey = "4EVERLAND-Bucket-APIKey";
                string secretKey = "4EVERLAND-Bucket-APISecret";
                var config = new AmazonS3Config()
            {
                ServiceURL = string.Format("https://endpoint.4everland.co"),
                ForcePathStyle = true,
            };
            var client = new AmazonS3Client(accessKey, secretKey, config);
            Console.WriteLine($"\nCreating a new bucket, named: {newBucketName}.");

            await CreatingBucketAsync(client, newBucketName);

        }

        static async Task CreatingBucketAsync(IAmazonS3 client, string bucketName)
        {
            try
            {
                var putBucketRequest = new PutBucketRequest
                {
                    BucketName = bucketName,
                    UseClientRegion = true,
                };

                var putBucketResponse = await client.PutBucketAsync(putBucketRequest);

            }
            catch (AmazonS3Exception ex)
            {
                Console.WriteLine($"Error creating bucket: '{ex.Message}'");
            }
        }
    }

}
}
```

### Upload a file

`bucket-name`: Your bucket name

`accessKey`: Bucket-Access Keys-API Key

`secretKey`: Bucket-Access Keys-API Secret

`/path/to/object`: The file path for the file to be uploaded

`objectname`: The name of the file to be uploaded

```csharp
namespace UploadObjectExample
{
    using System;
    using System.Threading.Tasks;
    using Amazon.S3;
    using Amazon.S3.Model;

    public class UploadObject
    {
        private static IAmazonS3 _s3Client;

        private const string bucket-name = "4everland-bucketname";
        private const string objectname = "object-name";

        private static string LOCAL_PATH = "/path/to/object";

        public static async Task Main()
        {
             {
                string accessKey = "4EVERLAND-Bucket-APIKey";
                string secretKey = "4EVERLAND-Bucket-APISecret";
                var config = new AmazonS3Config()
            {
                ServiceURL = string.Format("https://endpoint.4everland.co"),
                ForcePathStyle = true,
            };
            _s3Client = new AmazonS3Client(accessKey, secretKey, config);

            // The method expects the full path, including the file name.
            var path = $"{LOCAL_PATH}/{OBJECT_NAME1}";

            await UploadObjectFromFileAsync(_s3Client, bucket-name, objectname, path);
        }
        static async Task UploadObjectFromFileAsync(
            IAmazonS3 client,
            string bucketName,
            string objectName,
            string filePath)
        {
            try
            {
                var putRequest = new PutObjectRequest
                {
                    BucketName = bucketName,
                    Key = objectName,
                    FilePath = filePath,
                    ContentType = "text/plain",
                };

                putRequest.Metadata.Add("x-amz-meta-title", "FileName");

                PutObjectResponse response = await client.PutObjectAsync(putRequest);
            }
            catch (AmazonS3Exception e)
            {
                Console.WriteLine($"Error: {e.Message}");
            }
        }

    }
}
}
```

### Requesting IPFS CID and Arweave Hash

`Bucket`: The bucket name where the target file is stored

`Key`: The path of the target file

```csharp
var request = new GetObjectMetadataRequest
{
     BucketName = "4everlandbucket",
     Key = "/path/to/4everland/4ever.png"
};
var response = await client.GetObjectMetadataAsync(request);
// 获取文件的metadata
var ipfsHash = response.Metadata["ipfs-hash"];
var arweaveHash = response.Metadata["arweave-hash"];
Console.WriteLine($"IPFS Hash: {ipfsHash}");
//If it is an Arweave type of bucke
 Console.WriteLine($"Arweave Hash: {arweaveHash}");

```

{% hint style="info" %}
If you have any questions, please join our [Discord server](https://discord.com/invite/Cun2VpsdjF), or send us an email at <contact@4everland.org>.
{% endhint %}


# AWS SDK - PHP

Please read the following to understand how to use the 4EVERLAND Bucket with AWS SDK - PHP. This guide outlines the integration of AWS SDK API for PHP with the 4EVERLAND Bucket to facilitate file uploads to the IPFS or Arweave storage networks.

## **Preparation**

* [Download and install](https://www.php.net/manual/en/install.php) PHP in your development environment.
* [Download and install](https://docs.aws.amazon.com/zh_cn/sdk-for-php/v3/developer-guide/getting-started_installation.html) the AWS SDK for PHP version 3.
* [Register](https://www.4everland.org/) a free 4EVERLAND account.
* If you need to use Arweave storage, you need to create an Arweave bucket. Click to[ ](https://docs.4everland.org/storage/bucket/bucket-api-s3-compatible)[learn more](https://docs.4everland.org/storage/bucket/guides).
* To obtain the corresponding API key in the bucket, click to[ learn more](https://docs.4everland.org/storage/bucket/bucket-api-s3-compatible).

## Development Examples

### **Set the environment variables**

`4everland-Access-Key`：Bucket-Access Keys-API Key

`4everland-Secret-Key`：Bucket-Access Keys-API Secret

**Linux/Mac OS x:**

`export 4EVERLAND_ACCESS_KEY_ID=[4everland-Access-Key]`

`export 4EVERLAND_SECRET_ACCESS_KEY=[4everland-Secret-Key]`

**Windows:**

`SET 4EVERLAND_ACCESS_KEY_ID=[4everland-Access-Key]`

`SET 4EVERLAND_SECRET_ACCESS_KEY=[4everland-Secret-Key]`

### Configure the parameters within the environment variables

```php
use Aws\Credentials\CredentialProvider;
use Aws\S3\S3Client;

// Use the default credential provider
$provider = CredentialProvider::defaultProvider();

// Pass the provider to the client
$client = new S3Client([
    'endpoint'    => 'https://endpoint.4everland.co',
    'region'      => '4everland',
    'version'     => 'latest',
    'credentials' => $provider
]);
```

### Create a bucket

`Region`: Fill in the default value as "4everland"

`Bucket`: Specify the desired name for the Bucket during creation

```php
$s3client = new Aws\S3\S3Client(['region' => '4everland', 'version' => 'latest']);

try {
    $s3client->createBucket([
        'Bucket' => $bucket_name,
        'CreateBucketConfiguration' => ['LocationConstraint' => $region],
    ]);
    echo "Created bucket named: $bucket_name \n";
} catch (Exception $exception) {
    echo "Failed to create bucket $bucket_name with error: " . $exception->getMessage();
    exit("Please fix error with bucket creation before continuing.");
}


```

### Upload a file

`Bucket`: Your bucket name

`Key`: Provide the filename for the file you want to upload

`SourceFile`: Provide the path to the file you want to upload

```php
$s3client = new Aws\S3\S3Client(['region' => '4everland', 'version' => 'latest']);

$file_name = "local-file-" . uniqid();
try {
    $s3client->putObject([
        'Bucket' => $bucket_name,
        'Key' => $file_name,
        'SourceFile' => '/path/to/4everland/4ever.png'
    ]);
    echo "Uploaded $file_name to $bucket_name.\n";
} catch (Exception $exception) {
    echo "Failed to upload $file_name with error: " . $exception->getMessage();
    exit("Please fix error with file upload before continuing.");
}


```

### Check the files in the bucket

`Bucket`: Your bucket name

```php
$s3client = new Aws\S3\S3Client(['region' => '4everland', 'version' => 'latest']);

try {
    $contents = $s3client->listObjects([
        'Bucket' => $bucket_name,
    ]);
    echo "The contents of your bucket are: \n";
    foreach ($contents['Contents'] as $content) {
        echo $content['Key'] . "\n";
    }
} catch (Exception $exception) {
    echo "Failed to list objects in $bucket_name with error: " . $exception->getMessage();
    exit("Please fix error with listing objects before continuing.");
}


```

### Requesting IPFS CID and Arweave Hash

`Bucket`: Your bucket name

`Key`: Specify the path of the target object

```php
$result = $client->headObject([
    'Bucket' => '4everlandbucket', 
    'Key' => '/path/to/4everland/4ever.png', 
]);

echo "ipfs cid:" . $result["Metadata"]["ipfs-hash"]
//If it is an Arweave type of bucke
echo "arweave hash:" . $result["Metadata"]["arweave-hash"]
```

{% hint style="info" %}
If you have any questions, please join our [Discord server](https://discord.com/invite/Cun2VpsdjF), or send us an email at <contact@4everland.org>.
{% endhint %}


# AWS SDK - Python

Please read the following to understand how to use the 4EVERLAND Bucket with AWS SDK - Python. This guide outlines the integration of AWS SDK API for Python with the 4EVERLAND Bucket to facilitate file uploads to the IPFS or Arweave storage networks.

## **Preparation**

* [Download and install](https://www.python.org/downloads/) Python 3 in your development environment.
* [Download and install](https://github.com/boto/boto3#getting-started) the AWS SDK for Python (Boto3).
* [Register](https://www.4everland.org/) a free 4EVERLAND account.
* If you need to use Arweave storage, you need to create an Arweave bucket. Click to[ ](https://docs.4everland.org/storage/bucket/bucket-api-s3-compatible)[learn more](https://docs.4everland.org/storage/bucket/guides).
* To obtain the corresponding API key in the bucket, click to[ learn more](https://docs.4everland.org/storage/bucket/bucket-api-s3-compatible).

## Development Examples

### Create a bucket

`endpoint_url`: <https://endpoint.4everland.co>

`aws_access_key_id`: Bucket-Access Keys-API key

`aws_secret_access_key`: Bucket-Access Keys-API Secret

`bucket_name`: The desired name for creating the bucket

```python
import boto3

s3 = boto3.client('s3',
        endpoint_url='https://endpoint.4everland.co',
        aws_access_key_id="4EVERLAND-Bucket-APIKey",
        aws_secret_access_key="4EVERLAND-Bucket-APISecret")

bucket_name = "new-bucketname"

s3.create_bucket(Bucket=bucket_name)
```

### View the list of buckets

```python
# Retrieve the list of existing buckets
s3 = boto3.client('s3',
        endpoint_url='https://endpoint.4everland.co',
        aws_access_key_id="4EVERLAND-Bucket-APIKey",
        aws_secret_access_key="4EVERLAND-Bucket-APISecret")
response = s3.list_buckets()
# Output the bucket names
print('Existing buckets:')
for bucket in response['Buckets']:
    print(f'  {bucket["Name"]}')
```

### Upload a file

`bucket_name`: Your bucket name

`object_name`: The file path for upload

```python
import boto3

s3 = boto3.client('s3',
        endpoint_url='https://endpoint.4everland.co',
        aws_access_key_id="4EVERLAND-Bucket-APIKey",
        aws_secret_access_key="4EVERLAND-Bucket-APISecret")
        
with open("4ever.png", "rb") as 4ever:
    s3.upload_fileobj(4ever, "bucket_name", "object_name")

```

### Requesting IPFS CID and Arweave Hash

`BucketName`: The bucket name where the target file is stored

`Key`: The path of the target file

```python
import boto3
s3client = boto3.client('s3',
        endpoint_url='https://endpoint.4everland.co',
        aws_access_key_id="4EVERLAND-Bucket-APIKey",
        aws_secret_access_key="4EVERLAND-Bucket-APISecret")

        metadata = s3client.head_object(Bucket='BucketName', Key=file['Key'])
        print(metadata['ipfs-hash'])
        #If it is an Arweave type of bucke
        print(metadata['arweave-hash'])
      
```

{% hint style="info" %}
If you have any questions, please join our [Discord server](https://discord.com/invite/Cun2VpsdjF), or send us an email at <contact@4everland.org>.
{% endhint %}


# AWS SDK - Ruby

Please read the following to understand how to use the 4EVERLAND Bucket with AWS SDK - Ruby. This guide outlines the integration of AWS SDK API for Ruby with the 4EVERLAND Bucket to facilitate file uploads to the IPFS or Arweave storage networks.

## **Preparation**

* [Download and install Ruby](https://www.ruby-lang.org/en/downloads/) in your development environment.
* [Download and install](https://github.com/aws/aws-sdk-ruby) the AWS SDK for Ruby in your development environment.
* [Register](https://www.4everland.org/) a free 4EVERLAND account.
* If you need to use Arweave storage, you need to create an Arweave bucket. Click to[ ](https://docs.4everland.org/storage/bucket/bucket-api-s3-compatible)[learn more](https://docs.4everland.org/storage/bucket/guides).
* To obtain the corresponding API key in the bucket, click to[ learn more](https://docs.4everland.org/storage/bucket/bucket-api-s3-compatible).

## Development Examples

### Create a bucket

`endpoint`: <https://endpoint.4everland.co>

`aws_access_key_id`: Bucket-Access Keys-API key

`aws_secret_access_key`: Bucket-Access Keys-API Secret

`bucket_name`: The desired bucket name to create

```ruby
require 'aws-sdk-s3'

s3 = Aws::S3::Client.new(
access_key_id: '4EVERLAND-Bucket-APIKey',
secret_access_key: '4EVERLAND-Bucket-APISecret',
region: '4everland',
endpoint: 'https://endpoint.4everland.co'
)

bucket_name = 'new-bucketname'
s3.create_bucket(bucket: bucket_name)
```

### Upload a file

`bucket_name`: Your bucket name

`object_key`: The name of the file to be uploaded

`object_path`: The path of the file to be uploaded

```ruby
require 'aws-sdk-s3'

s3 = Aws::S3::Client.new(
access_key_id: '4EVERLAND-Bucket-APIKey',
secret_access_key: '4EVERLAND-Bucket-APISecret',
region: '4everland',
endpoint: 'https://endpoint.4everland.co'
)

bucket_name = '4everland-bucketname'
object_key = 'object-name'
object_path = '/path/to/4everland/4ever.png'

File.open(object_path, 'rb') do |file|
s3.put_object(bucket: bucket_name, key: object_key, body: file)
end
```

### Requesting IPFS CID and Arweave Hash

`endpoint`: <https://endpoint.4everland.co>

`aws_access_key_id`: Bucket-Access Keys-API Key

`aws_secret_access_key`: Bucket-Access Keys-API Secret

`bucket_name`: The bucket name where the target file is stored

`object_name`: The name of the target file

```ruby
require 'aws-sdk-s3'
  
Aws3 = Aws::S3::Client.new(
    access_key_id: '4EVERLAND-Bucket-APIKey',
    secret_access_key: '4EVERLAND-Bucket-APISecret',
    region: '4everland',
    endpoint: 'https://endpoint.4everland.co'
)

bucket_name = '4everland-bucketname'
object_name = 'your-object-name'

s3 = Aws3::S3::Resource.new

begin
  obj = s3.bucket(bucket_name).object(object_name)
  metadata = obj.metadata
  ipfs_hash = metadata['ipfs-hash']
  arweave_hash = metadata['arweave-hash']
  puts "IPFS Hash: #{ipfs_hash}"
  #If it is an Arweave type of bucke
  puts "Arweave Hash: #{arweave_hash}"

rescue Aws::S3::Errors::NoSuchKey
  puts "File does not exist"
rescue StandardError => e
  puts "An error occurred：#{e.message}"
end

```

{% hint style="info" %}
If you have any questions, please join our [Discord server](https://discord.com/invite/Cun2VpsdjF), or send us an email at <contact@4everland.org>.
{% endhint %}


# S3 Tags Instructions

### Introduction

When using the Bucket to store files, you can categorize the stored content using tags. Each tag is a key-value pair that you can add to a file when uploading it or add to already uploaded files. You can also query tags using the bucket and file name (Keyname). This method is compatible with AWS S3. For more detailed information about tags, please refer to [AWS S3 Tag](https://docs.aws.amazon.com/AmazonS3/latest/userguide/tagging-managing.html).

### Example

#### Uploading a file and adding tags

```Plain
func ExampleS3_PutObject() {
 svc := s3.New(session.New())
 input := &s3.PutObjectInput{
  Body:                 aws.ReadSeekCloser(strings.NewReader("filetoupload")),
  Bucket:               aws.String("examplebucket"),
  Key:                  aws.String("exampleobject"),
  Tagging:              aws.String("key1=value1&key2=value2"),
 }

 result, err := svc.PutObject(input)
 if err != nil {
  if aerr, ok := err.(awserr.Error); ok {
   switch aerr.Code() {
   default:
    fmt.Println(aerr.Error())
   }
  } else {
   // Print the error, cast err to awserr.Error to get the Code and
   // Message from an error.
   fmt.Println(err.Error())
  }
  return
 }

 fmt.Println(result)
}
```

#### Adding tags to existing files

```Plain
func ExampleS3_PutObjectTagging() {
    svc := s3.New(session.New())
    input := &s3.PutObjectTaggingInput{
       Bucket: aws.String("examplebucket"),
       Key:    aws.String("exampleobject"),
       Tagging: &s3.Tagging{
          TagSet: []*s3.Tag{
             {
                Key:   aws.String("Key3"),
                Value: aws.String("Value3"),
             },
             {
                Key:   aws.String("Key4"),
                Value: aws.String("Value4"),
             },
          },
       },
    }

    result, err := svc.PutObjectTagging(input)
    if err != nil {
       if aerr, ok := err.(awserr.Error); ok {
          switch aerr.Code() {
          default:
             fmt.Println(aerr.Error())
          }
       } else {
          // Print the error, cast err to awserr.Error to get the Code and
          // Message from an error.
          fmt.Println(err.Error())
       }
       return
    }

    fmt.Println(result)
}
```

#### Requesting the corresponding tag through the bucket and filename

```Plain
func ExampleS3_GetObjectTagging() {
    svc := s3.New(session.New())
    input := &s3.GetObjectTaggingInput{
       Bucket: aws.String("examplebucket"),
       Key:    aws.String("exampleobject"),
    }

    result, err := svc.GetObjectTagging(input)
    if err != nil {
       if aerr, ok := err.(awserr.Error); ok {
          switch aerr.Code() {
          default:
             fmt.Println(aerr.Error())
          }
       } else {
          // Print the error, cast err to awserr.Error to get the Code and
          // Message from an error.
          fmt.Println(err.Error())
       }
       return
    }

    fmt.Println(result)
}
```

### Field descriptions

**Container for the TagSet and Tag elements**

Tagging type：`map`

**A collection of a set of tags**

TagSet (required): `Array<map>`

**Name of the object key**

Key (required) type: `String`

**Value of the tag**

Value (required) type: `String`

{% hint style="info" %}
The key and value are case-sensitive. For more information about tag limitations, please refer to [User-Defined Tag Restrictions](https://docs.aws.amazon.com/awsaccountbilling/latest/aboutv2/allocation-tag-restrictions.html).
{% endhint %}


# 4EVER Security Token Service API

Welcome to the 4EVERLAND Security Token Service API

## Introduction

The 4EVERLAND Security Token Service is a service designed to generate temporary credentials, allowing you to request temporary credentials for partial or even full privileges for other users or a specified user.

4EVER Bucket STS fully compatible with AWS S3 STS. More information about STS can be found at [AWS S3 STS](https://docs.aws.amazon.com/STS/latest/APIReference/welcome.html).

## How to use

This is obtained by taking the API Secret and the API Key from the Master key and sending them to the endpoint. By default, all 4EVERLAND STS requests are sent to `https://endpoint.4everland.co.`

Javascript example:

```javascript
const {STSClient, AssumeRoleCommand} = require('@aws-sdk/client-sts')

const stsClient = new STSClient({
    endpoint: 'https://endpoint.4everland.co',
    region: 'us-west-1',
    credentials: {
        accessKeyId: 'Your api key.',
        secretAccessKey:  'Your api secret.',
    }
});

const params = {
    RoleSessionName: "only-put-object",
    DurationSeconds: 3600,
    Policy: `{
    "Version": "2012-10-17",
    "Statement": [
        {
            "Effect": "Allow",
            "Action": [
                "s3:PutObject",
                "s3:AbortMultipartUpload"
            ],
            "Resource": [
                "arn:aws:s3:::your-bucket-name/your-directory/*"
            ]
        }
    ]
}`
};


stsClient.send(new AssumeRoleCommand(params)).then(function (data) {
    console.log(data.Credentials)
});
```

## How to get the Master Key

Click on Bucket> Access key> Master-Key

<figure><img src="/files/8nhcY977kzPJnn74nGXd" alt=""><figcaption></figcaption></figure>

Copy API Key and API Secret

<figure><img src="/files/U93VvN93wPs9mqxcoeNe" alt=""><figcaption></figcaption></figure>

{% hint style="warning" %}
The API Secret can be reset if there is a security breach, the Master key cannot be deleted.
{% endhint %}

{% hint style="info" %}
If you have any questions, please join our [Discord server](https://discord.com/invite/Cun2VpsdjF), or send us an email at <contact@4everland.org>.
{% endhint %}


# Bucket Tools

## AWS S3 Integration

|                                   Tools                                   |                                                           Tutorial Links                                                           |                                                                                                               Discription                                                                                                              |
| :-----------------------------------------------------------------------: | :--------------------------------------------------------------------------------------------------------------------------------: | :------------------------------------------------------------------------------------------------------------------------------------------------------------------------------------------------------------------------------------: |
|                 [Mountain Duck](https://mountainduck.io/)                 |   [Link](https://medium.com/4everland/mounting-arweave-to-the-local-desktop-using-4everland-bucket-and-mountainduck-afdbe31506f3)  |                                                                              Mounting ARweave to The Local Desktop Using 4EVERLAND Bucket And MountainDuck                                                                             |
|                     [CyberDuck](https://cyberduck.io/)                    |  [Link](https://medium.com/4everland/4everland-bucket-supports-the-use-of-cyberduck-to-store-backup-and-manage-files-705386a80666) |                                                                            4EVERLAND Bucket Supports the Use of Cyberduck to Store, Backup and Manage Files                                                                            |
|                     [Arq](https://www.arqbackup.com/)                     |                  [Link](https://medium.com/4everland/backup-your-files-to-ipfs-via-arq-and-4everland-d4ca24c6d52b)                 |                                                                                               Backup Files to IPFS Via Arq And 4EVERLAND                                                                                               |
| [Arseeding](https://github.com/everFinance/arseeding/releases/tag/v1.0.3) |               [Link](https://medium.com/4everland/how-to-use-4everland-bucket-as-storage-for-arseeding-ae600c5a7b0d)               | Use the S3-compatible 4EVERLAND Bucket as storage for Arseeding, so that arseeding can be made unlimitedly extensible. (For maintaining a service that uploads large amounts of data to arseeding and is not limited by local storage) |
|                [WordPress](https://wordpress.org/download/)               |                   [Link](https://medium.com/4everland/storing-wordpress-media-content-on-4everland-43b3ac2cc476)                   |                                                                                              Storing WordPress Media Content on 4EVERLAND                                                                                              |
|                    [S3 Browser](https://s3browser.com/)                   | [Link](https://medium.com/4everland/4everland-bucket-supports-the-use-of-s3-browser-to-store-backup-and-manage-files-d689e5432694) |                                                                            4EVERLAND Bucket Supports the Use of S3 Browser to Store, Backup and Manage Files                                                                           |
|                 [CloudMounter](https://cloudmounter.net/)                 |    [Link](https://medium.com/4everland/connect-cloudmounter-to-4everland-for-unified-decentralised-file-management-f8bacf71569e)   |                                                                               Connect CloudMounter to 4EVERLAND for Unified Decentralised File Management                                                                              |

<br>


# Bucket Gateway Optimizer

The 4EVERLAND Optimizer is a real-time dynamic image optimization service that automatically optimizes images to accelerate image transmission speed and save bandwidth.&#x20;

It uses a simple API to process images in your 4EVERLAND Bucket.

## API Usage:&#x20;

Request Format:&#x20;

`{yourBucketName}.4everbucket.com/{fileName}?{parameter}={value}`

Example:&#x20;

To crop the file `04.jpeg` in the 'opflower' Bucket to a width of 250 and height of 150, with an aspect ratio of 5:3, the API request would be:&#x20;

`opflower.4everbucket.com/04.jpeg?width=250&height=150&aspect_ratio=2:3`

Request Result:&#x20;

<figure><img src="https://opflower.4everland.store/04.jpeg?width=250&#x26;height=150&#x26;aspect_ratio=2:3" alt=""><figcaption></figcaption></figure>

Original Image Before Processing:

<figure><img src="https://opflower.4everland.store/04.jpeg" alt=""><figcaption></figcaption></figure>

{% hint style="info" %}
Optimizer does not support the use of custom Bucket gateways at this time.
{% endhint %}

## Parameters

### Width

***Parameter:*** width    ***Units:*** Pixels   ***Default:*** auto

Resize the output image to the given width maintaining the current aspect ratio.

Aspect Ratio Crop has priority over the Width or Height commands. If the Aspect Ratio Crop is defined in the query and is not set to auto, it will be applied first.

{% hint style="info" %}
Aspect Ratio Crop has priority over the Width or Height commands. If the Aspect Ratio Crop is defined in the query and is not set to auto, it will be applied first.
{% endhint %}

?width=250

<figure><img src="https://opflower.4everland.store/04.jpeg?width=250&#x26;height=150" alt=""><figcaption></figcaption></figure>

?width=100

<figure><img src="https://opflower.4everland.store/04.jpeg?width=100&#x26;height=150" alt=""><figcaption></figcaption></figure>

### Height

***Parameter:*** height   &#x20;**&#x20;*****Units**:* Pixels    ***Default:*** auto

Resize the output image to the given width maintaining the current aspect ratio.

?height=250

<figure><img src="https://opflower.4everland.store/04.jpeg?width=250&#x26;height=250" alt=""><figcaption></figcaption></figure>

?height=100

<figure><img src="https://opflower.4everland.store/04.jpeg?width=250&#x26;height=100" alt=""><figcaption></figcaption></figure>

### Aspect Ratio Crop

***Parameter:*** aspect\_ratio     ***Units:*** Pixels    ***Default:*** auto

Crop the output image to match the given aspect ratio. The default origin point (gravity) is positioned on the center of the image.

?aspect\_ratio=1:1

<figure><img src="https://opflower.4everland.store/04.jpeg?width=250&#x26;height=150&#x26;aspect_ratio=1:1" alt=""><figcaption></figcaption></figure>

?aspect\_ratio=2:1

<figure><img src="https://opflower.4everland.store/04.jpeg?width=250&#x26;height=150&#x26;aspect_ratio=2:1" alt=""><figcaption></figcaption></figure>

### Quality

***Parameter:*** quality    ***Units:*** Percent   ***Range:*** 0-100    ***Default:*** 85

Determines the compression level of the resulting image with 100 being the lowest level of compression and 0 being the highest. Higher compression means smaller files, but might visually degrade the image (e.g. JPEG compression under 70 tends to produce visible artefacts.

?quality=10

<figure><img src="https://opflower.4everland.store/04.jpeg?width=250&#x26;height=150&#x26;quality=10" alt=""><figcaption></figcaption></figure>

?quality=100

<figure><img src="https://opflower.4everland.store/04.jpeg?width=250&#x26;height=150&#x26;quality=100" alt=""><figcaption></figcaption></figure>

### Sharpen

***Parameter:*** sharpen   ***Units:*** Boolean    ***Default:*** false

Sharpen the output image.

?sharpen=true

<figure><img src="https://opflower.4everland.store/04.jpeg?width=250&#x26;height=150&#x26;sharpen=true" alt=""><figcaption></figcaption></figure>

?sharpen=false

<figure><img src="https://opflower.4everland.store/04.jpeg?width=250&#x26;height=150&#x26;sharpen=false" alt=""><figcaption></figcaption></figure>

### Blur

***Parameter:*** blur    ***Units:*** Number    ***Range:*** 0-100    ***Default:*** 0

Blur the output image.

?blur=10

<figure><img src="https://opflower.4everland.store/04.jpeg?width=250&#x26;height=150&#x26;blur=10" alt=""><figcaption></figcaption></figure>

?blur=30

<figure><img src="https://opflower.4everland.store/04.jpeg?width=250&#x26;height=150&#x26;blur=30" alt=""><figcaption></figcaption></figure>

### Crop

***Parameter:*** crop   ***Units:*** Pixels    ***Format 1:*** width,height    ***Format 2:*** width,height,x,y

Crop the output image to the given width and height. Two formats are accepted. Format 1 one only includes the width and height of the crop. Format 2 also includes the X and Y position where the crop should start. Image resizing with the width and height parameters is processed after the crop and the resized measurements apply.

If only width and height are given, the Crop Gravity parameter will be used.

?crop=180,60

<figure><img src="https://opflower.4everland.store/04.jpeg?width=250&#x26;height=150&#x26;crop=180,60" alt=""><figcaption></figcaption></figure>

?crop=180,60,10,10

<figure><img src="https://opflower.4everland.store/04.jpeg?width=250&#x26;height=150&#x26;crop=180,60,10,10" alt=""><figcaption></figcaption></figure>

### Crop Gravity

***Parameter:*** crop\_gravity   ***Default:*** center

Values: center, forget, east, north, south, west, northeast, northwest, southeast, southwest

Set the gravity of the crop operation. This is used with the Format 1 cropping only and snaps the crop to the selected position.

?crop=180,60\&crop\_gravity=center

<figure><img src="https://opflower.4everland.store/04.jpeg?width=250&#x26;height=150&#x26;crop=180,60&#x26;crop_gravity=center" alt=""><figcaption></figcaption></figure>

?crop=180,60\&crop\_gravity=northeast

<figure><img src="https://opflower.4everland.store/04.jpeg?width=250&#x26;height=150&#x26;crop=180,60&#x26;crop_gravity=northeast" alt=""><figcaption></figcaption></figure>

### Flip

***Parameter:*** flip    ***Units:*** Boolean   ***Default:*** false

Flip the output image vertically.

?flip=true

<figure><img src="https://opflower.4everland.store/04.jpeg?width=250&#x26;height=150&#x26;flip=true" alt=""><figcaption></figcaption></figure>

?flip=false

<figure><img src="https://opflower.4everland.store/04.jpeg?width=250&#x26;height=150&#x26;flip=false" alt=""><figcaption></figcaption></figure>

### Flop

***Parameter:*** flop    ***Units:*** Boolean    ***Default:*** false

Flip the output image horizontally.

?flop=true

<figure><img src="https://opflower.4everland.store/04.jpeg?width=250&#x26;height=150&#x26;flop=true" alt=""><figcaption></figcaption></figure>

?flop=false

<figure><img src="https://opflower.4everland.store/04.jpeg?width=250&#x26;height=150&#x26;flop=false" alt=""><figcaption></figcaption></figure>

### Brightness

***Parameter:*** brightness    ***Units:*** Number    ***Range:*** -100-100    ***Default:*** 0

Adjusts the brightness of the output image. This can either brighten or darker the image.

?brightness=80

<figure><img src="https://opflower.4everland.store/04.jpeg?width=250&#x26;height=150&#x26;brightness=80" alt=""><figcaption></figcaption></figure>

?brightness=-20

<figure><img src="https://opflower.4everland.store/04.jpeg?width=250&#x26;height=150&#x26;brightness=-20" alt=""><figcaption></figcaption></figure>

### Saturation

***Parameter:*** saturation    ***Units:*** Number    ***Range:*** -100 - 100    ***Default:*** 0

Adjusts the saturation of the output image. Use -100 for grayscale.

?saturation=80

<figure><img src="https://opflower.4everland.store/04.jpeg?width=250&#x26;height=150&#x26;saturation=80" alt=""><figcaption></figcaption></figure>

?saturation=-20

<figure><img src="https://opflower.4everland.store/04.jpeg?width=250&#x26;height=150&#x26;saturation=-20" alt=""><figcaption></figcaption></figure>

### Hue

***Parameter:*** hue    ***Units:*** Number    ***Range:*** 0-100    ***Default:*** 0

Adjusts the hue of the output image by rotating the color wheel. The default value of 0 is the base color and increasing the value modulates to the next color for each 33 change.

?hue=80

<figure><img src="https://opflower.4everland.store/04.jpeg?width=250&#x26;height=150&#x26;hue=80" alt=""><figcaption></figcaption></figure>

?hue=20

<figure><img src="https://opflower.4everland.store/04.jpeg?width=250&#x26;height=150&#x26;hue=20" alt=""><figcaption></figcaption></figure>

### Contrast

***Parameter:*** contrast    ***Units:*** Number    ***Range:*** -100 - 100    ***Default:*** 0

Adjusts the contrast of the output image.

?contrast=-20

<figure><img src="https://opflower.4everland.store/04.jpeg?width=250&#x26;height=150&#x26;contrast=-20" alt=""><figcaption></figcaption></figure>

?contrast=80

<figure><img src="https://opflower.4everland.store/04.jpeg?width=250&#x26;height=150&#x26;contrast=80" alt=""><figcaption></figcaption></figure>

### Automatic Optimization

***Parameter:*** auto\_optimize ***Units:*** String    ***Values:*** low,medium,high    ***Default:*** none

Automatically enhance the output image with multiple levels of optimizations. With high, sharpening is also applied automatically.

?auto\_optimize=low

<figure><img src="https://opflower.4everland.store/04.jpeg?width=250&#x26;height=150&#x26;auto_optimize=low" alt=""><figcaption></figcaption></figure>

?auto\_optimize=high

<figure><img src="https://opflower.4everland.store/04.jpeg?width=250&#x26;height=150&#x26;auto_optimize=high" alt=""><figcaption></figcaption></figure>

### Sepia

***Parameter:*** sepia ***Units:*** Integer ***Values:*** 0 - 100 ***Default:*** 0

Changes the image color to the sepia color scheme.

?sepia=20

<figure><img src="https://opflower.4everland.store/04.jpeg?width=250&#x26;height=150&#x26;sepia=20" alt=""><figcaption></figcaption></figure>

?sepia=80

<figure><img src="https://opflower.4everland.store/04.jpeg?width=250&#x26;height=150&#x26;sepia=80" alt=""><figcaption></figcaption></figure>


# 4EVER Pin

4EVER Pin is a powerful and flexible IPFS pinning service that provides a range of developer-friendly tools for bulk CID uploads, file/folder uploads to IPFS networks, and `.car` file parsing. These tools make it easy to manage and store large amounts of data on the IPFS network, with high performance and reliability.

In addition to its powerful features and tools, 4EVER Pin also offers seamless integration with the IPFS network, ensuring that all files are uploaded to IPFS and can be viewed and referenced using the IPFS gateway. This makes it easy to share and access your data on the IPFS network, without the need for complex configurations or infrastructure.

As the implementation of all the features continues to iterate and improve, 4EVER Pin remains a powerful and flexible IPFS pinning service that can help developers and businesses to take advantage of the benefits of decentralized storage and retrieval.

Overall, 4EVER Pin provides a powerful and flexible IPFS pinning service that is easy to use, with high performance and reliability. Its developer-friendly tools and seamless integration with the IPFS network make it an excellent choice for managing and storing large amounts of data on the IPFS network.<br>

{% content-ref url="/pages/HwbzDMYMoiWiMXWX00LT" %}
[IPFS Gateway](/gateways/ipfs-gateway)
{% endcontent-ref %}

#### The IPFS Pinning Services API Spec

{% content-ref url="/pages/tkzNfS4MP2D3zCVKpQpT" %}
[Pinning Services API](/storage/4ever-pin/pinning-services-api)
{% endcontent-ref %}

**IPFS Migrator Services**

{% content-ref url="/pages/a7n0RgzhoYClrXvigb31" %}
[IPFS Migrator](/storage/4ever-pin/ipfs-migrator)
{% endcontent-ref %}

**Getting Started**

{% content-ref url="/pages/0weis1nPzGoF335n5y5B" %}
[Guides](/storage/4ever-pin/guides)
{% endcontent-ref %}

{% hint style="info" %}
If you have any questions, please join our [Discord server](https://discord.com/invite/Cun2VpsdjF), or send us an email at <contact@4everland.org>.
{% endhint %}


# Guides

Guides

### 4EVER Pin Dashboard

To get started, go ahead and [log in](https://dashboard.4everland.org/login) to your 4EVERLAND account, where you will see your account dashboard.

<figure><img src="/files/JIJ7SRdXDwxCl65HWQtI" alt=""><figcaption></figcaption></figure>

#### Selected CID or Bulk CIDs <a href="#upload-folders-and-files" id="upload-folders-and-files"></a>

<figure><img src="/files/pPeAa59arhkl9F2P5Q5S" alt=""><figcaption></figcaption></figure>

#### Pin By CID

Click the 'Upload' button, select 'Selected CID', fill in the information and then select 'Search and Pin'.

<figure><img src="/files/jQjTZMnIc47Wb0MGff1x" alt=""><figcaption></figcaption></figure>

#### Bulk CIDs Upload

You need to fill in the CIDs into a `.txt` file line by line and upload this file for parsing.Only the parsed CIDs can be searched and pinned.

Example file:

```Plaintext
1. QmaEZGiDrS7kDXMxbmpamrX1sPHZUM61a3YpjDoyaC3yfJ
2. QmTeRJXx623WwsoDk4371kh3JKCjoDcoWrqrhY9ekRasjE
3. QmUsQxC5bsgX53WhQ11DkxyB4uPYLEpdgmidFhGgUFK5aK
```

<figure><img src="/files/Fvzk0zsMQ2k1bAsU5ZCP" alt=""><figcaption></figcaption></figure>

As shown, when you click on 'Search and Pin', only 475 parsed CIDs will be submitted. You can view the CID details by clicking on 'View List'.

<figure><img src="/files/9vLHpwW9nfpHBhicaN3S" alt=""><figcaption></figcaption></figure>

{% hint style="info" %}
If you have any questions, please join our [Discord server](https://discord.com/invite/Cun2VpsdjF), or send us an email at <contact@4everland.org>.
{% endhint %}


# Pinning Services API

### Pinning Services API

#### The IPFS Pinning Services API Spec

IPFS builds a standardised set of specifications for developers, allowing applications to integrate pinning services without the need to understand the pinning service's unique API.

More information: <https://ipfs.github.io/pinning-services-api-spec/>.

#### Endpoints

Users who are looking to use the IPFS Pinning Services API can perform interactions from the following 4EVER dedicated API endpoints:

```
https://api.4everland.dev
```

Please visit the [Official Endpoint Documentation](https://ipfs.github.io/pinning-services-api-spec/#tag/pins) for more up-to-date information.

#### Authentication

You need to have an `accessToken` to authenticate with 4EVERLAND through the Pinning Services API spec and it can be easily found on the 4EVER Pin page. When you first enter the 4EVER Pin page, the `accessToken` is automatically generated.

This `accessToken` can not be deleted, but can be reset.

<figure><img src="/files/S3nftsLVqpWCD4f9MvnS" alt=""><figcaption></figcaption></figure>

Note: The Bearer Token method is used for authentication in the Pinning Services API Spec, and you'll provide an authentication header using your accessToken as follows:

```
Authorization: Bearer YourAccessToken
```

#### Configuring 4EVERLAND in the IPFS Desktop App

You can configure the 4EVER Pin in the IPFS desktop application. To do so, open the app > Preferences > Add Service:

<figure><img src="/files/OYq6jvsdErXSXeAmCLOn" alt=""><figcaption></figcaption></figure>

Select '**Add a custom one**', fill in the form information and your accessToken from the 4EVER Pin.

<figure><img src="/files/NrI8MburuQuw8AiNs0Vn" alt=""><figcaption></figcaption></figure>

{% hint style="info" %}
If you have any questions, please join our [Discord server](https://discord.com/invite/Cun2VpsdjF), or send us an email at <contact@4everland.org>.
{% endhint %}


# IPFS Migrator

Easy and fast migration of CIDs to 4EVER Pin

### IPFS Migrator

[IPFS Migrator](https://ipfsmigrator.4everland.app/) is a powerful tool that makes it easy to migrate CIDs between different IPFS node providers. With this tool, you can easily migrate your data from one IPFS pinning service to another, without the need for complex configurations or infrastructure.

The website provides a user-friendly interface that guides you through the migration process, making it easy to migrate your data with just a few clicks. By default, the website is set up to migrate CIDs from Pinata to 4EVER Pin, but you can replace this with any project that provides an IPFS pinning service API.

The tutorial that accompanies the website provides step-by-step instructions on how to use the IPFS Migrator tool to migrate your data, including how to authenticate and authorize your requests, how to select the CIDs to be migrated, and how to monitor the progress of the migration.

Overall, IPFS Migrator is a powerful and flexible tool that makes it easy to migrate your data between different IPFS node providers. With its user-friendly interface and comprehensive tutorial, it is an excellent choice for developers and businesses looking to take advantage of the benefits of decentralized storage and retrieval.

<figure><img src="/files/3nvCzBmoqyLpeJ4SXVi1" alt=""><figcaption></figcaption></figure>

#### Step 1: Prepare Your Pinata API Token

Create an API Key in the Pinata dashboard and make sure the permissions under 'Pinning' are allowed.

<figure><img src="/files/auXirYANYzMj15BSoIcT" alt=""><figcaption></figcaption></figure>

Copy the JWT(Secret access token). Please keep it safe as it will only display once.

<div align="center"><figure><img src="/files/FOiwrLokjr5UcrlLd9m3" alt=""><figcaption></figcaption></figure></div>

#### Step 2: Get Your 4EVER Pin Access Token

Click on 'Access Token' in the 4EVER Pin to get the access token.

<figure><img src="/files/cOR2lU3Am1ygLDrPdtI3" alt=""><figcaption></figcaption></figure>

#### Step 3: Input the Token to Get CIDs

Paste the token copied from Pinata on the left, and the token from 4EVER Pin on the right, click on 'Login to source' and 'Login to Destination' to get the CIDs of both service providers.

<figure><img src="/files/6nQMs9fibXsGfcLerxbC" alt=""><figcaption></figcaption></figure>

#### Step 4: Click 'Sync' and Wait for the CID Migration to Complete

<figure><img src="/files/wJQCSGOw4rd9CWvjQUE3" alt=""><figcaption></figcaption></figure>

{% hint style="info" %}
If you have any questions, please join our [Discord server](https://discord.com/invite/Cun2VpsdjF), or send us an email at <contact@4everland.org>.
{% endhint %}


# Storage SDK

## Introduction

The 4EVER Pin SDK provides a set of tools for directly uploading files to a specified 4EVER Pin account list. It includes three classes: `AuthClient`, `BucketClient`, and `PinClient`. Developers can refer to this documentation to combine and utilize these three classes to achieve file uploading functionality to 4EVER Pin. They can also refer to the [4EVER Pin SDK Demo](https://github.com/yepCing/4everland-sdk/tree/main) for guidance.

## Get started

Install @4everland/upload-pin

```JavaScript
npm i @4everland/upload-pin
yarn add @4everland/upload-pin
```

## AuthClient

To obtain the relevant permission information for the file upload functionality, developers would need to utilize the methods within the `AuthClient` class, which include `getSignText` and `verifySign`. These methods are essential for acquiring the necessary permissions and verifying the authentication of the file upload process.

**Parameters**

**`url: string`** Required parameter

The available **Auth API** to be filled in is:&#x20;

<pre><code><strong>https://auth.api.4everland.org
</strong></code></pre>

**Examples**

```JavaScript
// New AuthClint instance
import { AuthClient } from '@4everland/upload-pin'

const url = '' 
const authclient = new AuthClient(url)
```

### **`getSignText(address: string):string`**

The `getSignText` method is used to obtain plaintext for wallet signatures.

**Parameters**

**`address: string`**&#x52;equired parameter: the wallet address to be signed.<br>

**Returns**

**`signText: string`**&#x54;he plaintext information for the signature.

**Examples**

```JavaScript
let address = '' // metamask address
const signMessage = await authclient.getSignText(address)
```

### **`verifySign(address: string, signature: string):ValidSignResult`**

The `verifySign` method is used to verify the validity of the signature. Upon successful verification, **the relevant permission information required for file upload can be obtained**.

**Parameters**

**`address: string`**&#x52;equired parameter: the address to be validated for the signature.\
\&#xNAN;**`signature: string`**&#x52;equired parameter: the signature to be verified.<br>

**Returns**

`verifySign` returns a **`ValidSignResult`** object with seven properties:

* `expiration: number`: The expiration time of the signature (2 hours)
* `accessBucket: string`: The temporary Bucket used for file upload
* `folderPath: string`: The folder path within the temporary Bucket used for file upload
* `token: string`: Token for invoking 4EVER Pin
* `accessKeyId: string`: The KeyID for the temporary S3 Bucket
* `secretAccessKey: string`: The secret key for the temporary S3 Bucket
* `sessionToken: string`: The STS Token for the temporary S3 Bucket

**Examples**

```JavaScript
// Verification signature
// if expiration expired, you need Verification signature again
const { expiration } = await client.verifySign(address, signature)
```

## BucketClient

The `BucketClient` class contains an `upload` method used for uploading files to a specified Bucket and obtaining the file CID.

**Parameters**

**`params:BucketClientParams`**&#x54;he required properties for this object include:

* `accessKeyId:string`: Access key ID for the Bucket
* `secretAccessKey: string`: Private key for the Bucket
* `sessionToken:string`: Temporary token, valid for 24 hours
* `endpoint:string`: S3 endpoint, currently available at '<https://endpoint.4everland.co>'

**Examples**

```JavaScript
//New BucketClint instance
import { BucketClient } from '@4everland/upload-pin'

const {params}= {
  accessKeyId: ''
  secretAccessKey: ''
  sessionToken: ''
  endpoint: 'https://endpoint.4everland.co'
}
const bucketclient = new BucketClient(params)
```

### **`upload(params: ClientUploadParams) ：UploadResult`**

The `upload` method is used for uploading files to the specified Bucket.

**Parameters**

**`params: ClientUploadParams`**&#x52;equired parameters for this object include the following properties:

* `Key: string`: File path (folderPath + '/' + file name, where folderPath is a parameter returned from verifySign)
* `Body: StreamingBlobPayloadInputType`: File stream
* `ContentType?:string`: File type

**Returns**

The `upload` method returns an **`UploadResult`** object with three properties:

* `abort: () => Promise<void>`: Calling this function can terminate the file upload process.
* `done: () => Promise<{ cid: string }>`: Calling this function after the file upload is complete will provide its CID (object).
* `progress: (cb?: (e: Progress) => void) => void`: This callback function logs the file upload process steps in the console.

  &#x20;  \- Uploaded portion: e.loaded   \
  &#x20;  \- Total: e.total

**Examples**

```JavaScript
const task = bucketclient.upload({
    Key: folderPath + '/'+ file.name,
    Body: file,
    ContentType: file.type
})

task.progress((e) => {
    console.log(e.loaded)
    console.log(e.total)
})

const { cid } = await task.done()

```

## PinClient

Based on the Pinning Service API, the `PinClient` class includes three methods: `addPin`, `getPin`, and `listPin`. These methods enable the uploading of CIDs to 4EVER Pin and querying for relevant information.

**Parameters**

**`params:PinningClientParams`**&#x54;he required properties for this object include the following:

* `baseURL:string`: Pinning service endpoint. Currently available at '<https://api.4everland.dev>'
* `accessToken: string`: Access token for 4EVER Pin

**Examples**

```JavaScript
//New BucketClint instance
import { PintClient } from '@4everland/upload-pin'

const {params}= {
  baseURL: 'https://api.4everland.dev'
  accessToken:''
}
const pinclient = new PinClient(params)
```

### **`addPin(addPin: AddPinParams):PinInfo`**

The `addPin` method is used to directly add a CID to 4EVER Pin. This method is part of the Pinning Service API, and the meaning of the request and response parameters can be found in the [Pinning Service API documentation](https://ipfs.github.io/pinning-services-api-spec/#operation/addPin) under the "Add pin object" section.

**Parameters**

**`addPin: AddPinParams`**

```JavaScript
export interface AddPinParams {
  cid: string
  name?: string
  origins?: string[]
  meta?: {
    [K in string]: string
  }
```

**Returns**

**`PinInfo`**

```JavaScript
export interface PinInfo {
  requestid: string
  status: string
  created: string
  pin: {
    cid: string
    name?: string
    origins?: string[]
    meta?: {
      [K in string]: string
    }
  }
  delegates: string[]
  info?: {
    [K in string]: string
  }
}
```

**Examples**

```JavaScript
const { requestid } = await pinclinet.addPin({
  cid
})
```

### **`getPin(requestid: string):PinInfo`**

The `getPin` method is utilized to query the specified pinned file's information and status. This method is part of the Pinning Service API, hence, the meanings of its request and response parameters can be referenced in the [Pinning Service API documentation](https://ipfs.github.io/pinning-services-api-spec/#operation/getPinByRequestId) under the "Get pin object" section.

**Parameters**

**`requestid: strings`**&#x52;equired parameter: the `requestid` from the response of the `addPin` method.

**Returns**

**`PinInfo`**

```JavaScript
export interface PinInfo {
  requestid: string
  status: string
  created: string
  pin: {
    cid: string
    name?: string
    origins?: string[]
    meta?: {
      [K in string]: string
    }
  }
  delegates: string[]
  info?: {
    [K in string]: string
  }
}
```

**Examples**

```JavaScript
await pinclinet.getPin(requestid)
```

### **`listPin(params: PinParams):ListPin`**

The `listPin` method is used to query the specified pinned file's information and status. This method is part of the Pinning Service API, and its request and response parameters can be referenced in the [Pinning Service API documentation](https://ipfs.github.io/pinning-services-api-spec/#operation/getPins) under the "List pin object" section.<br>

**Parameters**

**`params: PinParams`**

```JavaScript
export interface PinParams {
  cid?: string
  name?: string
  status?: string
  limit?: number
  before?: string
  after?: string
}
```

**Returns**

**`PinInfo`**

```JavaScript
export interface ListPin {
  count: number
  results: PinInfo[]
}
```

**Examples**

```JavaScript
await pinclinet.listPin()
```

### **`replacePin(requestid: string, addPin: AddPinParams):PinInfo`**

**Parameters**

**`requestid: strings`**&#x52;equired parameter: the `requestid` from the response of the `addPin` method.**`addPin: AddPinParams`**

```JavaScript
export interface AddPinParams {
  cid: string
  name?: string
  origins?: string[]
  meta?: {
    [K in string]: string
  }
```

**Returns**

**`PinInfo`**

```JavaScript
export interface ListPin {
  count: number
  results: PinInfo[]
}
```

**Examples**

```JavaScript
await pinclinet.replacePin(requestid,addpinparams)
```

<br>


# IPFS Gateway

## Content Addressing

In a broad sense, most of today's networks operate using what is known as **location addressing**. Location addressing retrieves online information from a specific location on the network - i.e. from behind a URL.

{% hint style="info" %}
`https://example.com/page.html`
{% endhint %}

However, there are some critical issues with this approach. Location addressing is centralised, which means that anyone controlling the location can control the content.

4EVERLAND uses the CID generated by [IPFS](https://ipfs.io/) (Interplanetary File System) to enable content addressing for IPFS stored data. To make IPFS data accessible outside of peer-to-peer networks, special IPFS nodes called "[gateways](https://docs.ipfs.tech/concepts/ipfs-gateway/)" act as a bridge between the HTTP protocol, which all web browsers understand, and the peer-to-peer protocol.

## Using the gateway

Simply put, a gateway is an IPFS peer that accepts HTTP requests for IPFS CIDs.

{% hint style="success" %}
The 4EVERLAND public IPFS gateway is:

`ipfs.4everland.io`
{% endhint %}

{% hint style="warning" %}
To prevent the abuse of phishing content, the public gateway currently does not support access to HTML content.
{% endhint %}

## Rate limit

4EVERLAND IPFS open gateway is a public, shared resource and it is often in high demand. In order to provide fair access to all users, 4EVERLAND IPFS open gateway imposes request limits on large traffic sources.

{% hint style="info" %}
The 4EVERLAND Public IPFS Gateway has an effective rate limit of 300 RPM (requests per minute).
{% endhint %}

## Path style

The "path style" URL places the IPFS CID in the path section of the gateway URL, as follows.

`https://4everland.io/ipfs/<CID>`

If the CID points to a directory listing, you can append a file name to the directory to obtain the file.

`https://4everland.io/ipfs/<CID>/doc-1.txt`

## Subdomain style

The "subdomain style" gateway URL places the CID in the host section of the URL as a subdomain of the gateway host, as follows.

`https://<CID>.ipfs.4everland.io`

If the CID refers to a directory listing, you can use the path part of the URL to specify the filename.

`https://<CID>.ipfs.4everland.io/doc-1.txt`

## 4EVERLAND IPFS Browser

The IPFS gateway owns the content that can acquire the IPFS network by itself and deliver it to users via HTTPS. 4EVERLAND gateways offer global acceleration, custom domain, and SSL certificate technology to chaise better performance. Start to use IPFS gateways on the Open Web, check the link below:

{% embed url="<https://ipfs.4everland.io/>" %}
4EVERLAND IPFS rowser
{% endembed %}

{% hint style="info" %}
4EVERLAND gateways offer global acceleration, custom domain, and SSL certificate to chaise better performance,users will be benefit from the 4EVERLAND IPFS gateway by leveraging its geographically distributed swarm network.
{% endhint %}

## 4EVERLAND Edge Nodes

4EVERLAND's IPFS gateway has more than 200 global edge nodes that can globally accelerate, and when the user accesses the file path through 4EVERLAND's Edge node it will select the fastest node closest to the user.&#x20;

* Global Acceleration
* Automatic Allocation

{% hint style="info" %}
You can [sign up](https://dashboard.4everland.org/login) for a free 4EVERLAND account to get started today.

If you have any questions, please join our [Discord server](https://discord.com/invite/Cun2VpsdjF), or send us an email at <contact@4everland.org>.
{% endhint %}


# IC Gateway

For sites hosted on the Internet Computer through 4EVERLAND, we use the Internet Computer's main gateway, built by the DFINITY foundation.

## Using the gateway

Very simple, anyone can use this gateway with their IC canisters.

{% hint style="success" %}
The DFINITY IC public gateway is:

`identity.raw.ic0.app`
{% endhint %}

## Path style

The "path style" URL places the Canister ID in the path section of the gateway URL, as follows.

`[CANISTER_ID].raw.ic0.app`

{% hint style="info" %}
You may see an initial loading animation when accessing this content, please don't worry, this loading state usually only happens once.
{% endhint %}

{% hint style="info" %}
You can [sign up](https://dashboard.4everland.org/login) for a free 4EVERLAND account to get started today.

If you have any questions, please join our [Discord server](https://discord.com/invite/Cun2VpsdjF), or send us an email at <contact@4everland.org>.
{% endhint %}


# Arweave Gateway

For sites hosted on the Arweave through 4EVERLAND, we use the Arseeding gateway service, built by the everFinance.

## What is Arseeding?

Arseed is a powerful infrastructure within the Arweave ecosystem, providing not only Arweave gateway functionality but also for uploading, downloading and broadcasting any AR native transactions/data.

&#x20;Arseeding nodes: <https://github.com/everFinance/arseeding>.

<figure><img src="/files/4E62Laec7GbX3eVn0yh8" alt=""><figcaption></figcaption></figure>

Arseed is fully compatible with Arweave native nodes, allowing developers to send transactions directly to Arseed nodes, meaning that **Arseed automatically broadcasts transactions to all Arweave nodes in the network**.&#x20;

Arweave has a probabilistic storage system, which means that each node does not need to store all the data, and even the arwave.net gateway does not necessarily store all the data in the chain.

## Path style

The "path style" URL places the AR Hash in the path section of the gateway URL, as follows.

`arweave.net/<HASH>`

{% hint style="info" %}
After Arseeding receives the arId submitted by the user, it first fetches the transaction data from the arweave.net gateway, and if the fetching fails, it fetches the transaction data from the network-wide nodes until it succeeds.
{% endhint %}

Are you in search of an Arweave Dedicated Gateway outside of Arweave.net?

{% content-ref url="/pages/1VTIa3g7zfvgWHRRDGAz" %}
[Dedicated Gateways](/gateways/dedicated-gateways)
{% endcontent-ref %}

{% hint style="info" %}
You can [sign up](https://dashboard.4everland.org/login) for a free 4EVERLAND account to get started today.

If you have any questions, please join our [Discord server](https://discord.com/invite/Cun2VpsdjF), or send us an email at <contact@4everland.org>.
{% endhint %}


# Dedicated Gateways

4EVERLAND offers dedicated gateways for users who need greater speed or increased rate limits when retrieving content. These gateways are designed to provide fast and reliable access to content stored on the 4EVERLAND network, making it easy to retrieve data quickly and efficiently.

What's even better is that 4EVERLAND is now offering these dedicated gateways for **free**, allowing users to take advantage of their increased speed and rate limits at no additional cost. This makes it easier for developers and businesses to access their data quickly and efficiently, without worrying about additional costs or fees.

{% hint style="info" %}
Registered users will receive 100GB of dedicated gateway data per month.
{% endhint %}

## The benefits of an IPFS dedicated gateway:

* Globally distributed edge nodes provide global acceleration&#x20;
* No rate limiting&#x20;
* Support for custom domains

## How about an Arweave dedicated gateway(beta)?

The 4EVERLAND Arweave dedicated gateway will load uploaded Arweave data in real-time, without the need to wait for data to be packaged and processed.

* A faster response time compared to [arweave.net](https://www.arweave.net)
* Globally distributed edge nodes provide global acceleration
* No rate limiting&#x20;

{% hint style="info" %}
Currently, the Arweave dedicated gateway is intended solely for testing purposes. To qualify for testing access, interested parties are encouraged to join our Discord channel and [open a ticket](https://discord.com/channels/852482727164117022/1039457937594257448).
{% endhint %}

## Create a dedicated gateway

Find the dedicated gateway on the Gateway page and click on 'Generate'.

<figure><img src="/files/53J5rTx64l6UvwJhS50O" alt=""><figcaption></figcaption></figure>

Provide a name for your dedicated gateway.

<figure><img src="/files/EKuofAGN4WSMeBS1hkZy" alt=""><figcaption></figcaption></figure>

Choose whether your gateway is open or restricted.

<figure><img src="/files/usTrDj26G3NntcuYNdjt" alt=""><figcaption></figcaption></figure>

{% hint style="warning" %}
Currently, the free version of the dedicated gateway allows users to create up to three dedicated gateways and keep one as RESTRICTED.
{% endhint %}

## How I use my gateway

Here is an example of content through our public gateway:

*<mark style="color:blue;"><https://4everland.io/ipfs/bafkreienr4m3zpnnszzvtetmdizy3ziff73hq6astreuehcpx7syd37oqe></mark>*

And here's an example of a dedicated gateway if I named it 'dedicated':

*<mark style="color:blue;"><https://dedicated.4everland.link/ipfs/bafkreienr4m3zpnnszzvtetmdizy3ziff73hq6astreuehcpx7syd37oqe></mark>*

It can be found that you only need to get the CID of the file you want to view and add it to your gateway URL to view the content through your gateway, as follows.

`https://<Your Gateway Subdomain>.4everland.link/ipfs/<Your CID>`

Simple as that!

## Setting Page

Please click the 'edit' button to enter the settings page.

<figure><img src="/files/sHynA3hbqs2TlAtLEHBt" alt=""><figcaption></figcaption></figure>

### Default Page

<figure><img src="/files/dssd1iE0VTDygB0wed5A" alt=""><figcaption></figcaption></figure>

This function is used to set the default page when accessing the gateway domain, you can choose to enter the IPFS or URL address.&#x20;

For example, if the domain name of the gateway is `mydomain.4everland.link`, entering the domain name directly into the browser's address bar will show the specified URL or IPFS content.

### Adding Access Controls

To add access control please read [Gateway Access Controls](/gateways/dedicated-gateways/gateway-access-controls#open-or-restricted)

### Adding a Custom Domain <a href="#h_ba4fa57aa0" id="h_ba4fa57aa0"></a>

4EVERlAND allows you to create custom domains for dedicated gateways.&#x20;

<figure><img src="/files/tAvUBArZOER2pmg4cyPL" alt=""><figcaption></figcaption></figure>

You will need to have the domain you want to use. When you enter the domain, you will be prompted to enter DNS information via the registrar.

Start [experiencing](https://dashboard.4everland.org/) the dedicated gateway now!

{% hint style="info" %}
If you have any questions, please join our [Discord server](https://discord.com/invite/Cun2VpsdjF), or send us an email at <contact@4everland.org>.
{% endhint %}


# Gateway Access Controls

4EVERLAND's dedicated gateway provides fast and reliable access to IPFS content, and it also offers gateway control options to avoid unreasonable external use of the exposed gateways. These settings allow you to control the use of your dedicated gateway and ensure that it is used in a way that meets your specific needs and requirements.

With gateway control options, you can set limits on the number of requests that can be made to your dedicated gateway, as well as the types of requests that are allowed. This can help to prevent unauthorized access and ensure that your dedicated gateway is used in a way that is consistent with your business rules and policies.

## Open or Restricted?

The Open Gateway will be made available to any content on IPFS, even if it is not pinned to your account. This means that anyone with the link can access the content provided by the gateway.

Restricted gateways will only provide access to content that is pinned to your account.

## Restricted Gateway

After creating the dedicated gateway, visit the 'edit' page and select 'Settings'.

<figure><img src="/files/mOJObk3tnmxHrct4GtdH" alt=""><figcaption></figcaption></figure>

When enabled, the dedicated gateway will restrict access to external content as much as possible and only provide content that is pinned to your account. If you wish to add further security restrictions, please visit and add Allowlists.

## Allowlists

<figure><img src="/files/bEkQjjNbxoINLz2wA8In" alt=""><figcaption></figcaption></figure>

Enabling origins allowlists will allow only whitelisted sites to refer to the gateway for content on the IPFS network.&#x20;

Also, if you do not add any origins parameters, the gateway will only be accessible through the address bar.

{% hint style="info" %}
If you have any questions, please join our [Discord server](https://discord.com/invite/Cun2VpsdjF), or send us an email at <contact@4everland.org>.
{% endhint %}


# Video Streaming

The addition of video streaming to 4EVERLAND's dedicated gateway will make it much easier for users to access and enjoy video content stored on the IPFS network. With video streaming, users can stream videos in real-time, without having to wait for the entire video to download.

This is a significant improvement over traditional downloading methods, which can be slow and time-consuming, especially for larger video files. With video streaming, users can start watching a video almost immediately, without having to wait for the entire file to download.

Overall, the addition of video streaming to 4EVERLAND's dedicated gateway is a significant development, and it will help to make IPFS-based video content more accessible and enjoyable for users. This is an exciting development for developers and businesses who are looking to take advantage of the benefits of decentralized storage and retrieval, and it will undoubtedly help to drive adoption of IPFS technology in the coming years.

## **Current solution**

If you have a need for streaming service now, it is recommended that you add the livepeer service for quick and easy streaming.

Check the official livepeer documentation for details: <https://docs.livepeer.org/guides/developing/dstorage-playback>

{% hint style="info" %}
If you have any questions, please join our [Discord server](https://discord.com/invite/Cun2VpsdjF), or send us an email at <contact@4everland.org>.
{% endhint %}


# IPFS Image Optimizer

The 4EVERLAND Optimizer is a real-time dynamic image optimization service that automatically optimizes images to accelerate image transmission speed and save bandwidth.&#x20;

Due to the inability of CID to directly represent file types, when using a dedicated gateway for trimming, it is necessary to include the additional parameter '`optimizer=image`' in the request.

## API Usage:&#x20;

Request Format: \
`{yourGateway}.4everland.link/ipfs/{cid}?{parameter}={value}&optimizer=image`

Example:&#x20;

To crop the CID image `bafkreiebfj3ivxh7utbetgtettfaob7mze6xnd55evijdyfpdcbz6wlbty` to a width of 150, with an aspect ratio of 2:3, the API request would be: \
\
[`https://aaaaaaa.4everland.link/ipfs/bafkreiebfj3ivxh7utbetgtettfaob7mze6xnd55evijdyfpdcbz6wlbty?width=150&aspect_ratio=2:3&optimizer=image`](https://aaaaaaa.4everland.link/ipfs/bafkreiebfj3ivxh7utbetgtettfaob7mze6xnd55evijdyfpdcbz6wlbty?width=150\&aspect_ratio=2:3\&optimizer=image)

Request Result:&#x20;

<figure><img src="https://aaaaaaa.4everland.link/ipfs/bafkreiebfj3ivxh7utbetgtettfaob7mze6xnd55evijdyfpdcbz6wlbty?width=150&#x26;aspect_ratio=2:3&#x26;optimizer=image" alt=""><figcaption></figcaption></figure>

Original Image Before Processing:

<figure><img src="https://aaaaaaa.4everland.link/ipfs/bafkreiebfj3ivxh7utbetgtettfaob7mze6xnd55evijdyfpdcbz6wlbty" alt=""><figcaption></figcaption></figure>

{% hint style="info" %}
Optimizer does not support the use of custom Bucket gateways at this time.
{% endhint %}

## Parameters

### Width

***Parameter:*** width    ***Units:*** Pixels   ***Default:*** auto

Resize the output image to the given width maintaining the current aspect ratio.

Aspect Ratio Crop has priority over the Width or Height commands. If the Aspect Ratio Crop is defined in the query and is not set to auto, it will be applied first.

{% hint style="info" %}
Aspect Ratio Crop has priority over the Width or Height commands. If the Aspect Ratio Crop is defined in the query and is not set to auto, it will be applied first.
{% endhint %}

?width=250

<figure><img src="https://aaaaaaa.4everland.link/ipfs/bafkreiebfj3ivxh7utbetgtettfaob7mze6xnd55evijdyfpdcbz6wlbty?width=250&#x26;optimizer=image" alt=""><figcaption></figcaption></figure>

?width=100

<figure><img src="https://aaaaaaa.4everland.link/ipfs/bafkreiebfj3ivxh7utbetgtettfaob7mze6xnd55evijdyfpdcbz6wlbty?width=100&#x26;optimizer=image" alt=""><figcaption></figcaption></figure>

### Height

***Parameter:*** height   &#x20;**&#x20;*****Units**:* Pixels    ***Default:*** auto

Resize the output image to the given width maintaining the current aspect ratio.

?height=250

<figure><img src="https://aaaaaaa.4everland.link/ipfs/bafkreiebfj3ivxh7utbetgtettfaob7mze6xnd55evijdyfpdcbz6wlbty?height=250&#x26;optimizer=image" alt=""><figcaption></figcaption></figure>

?height=100

<figure><img src="https://aaaaaaa.4everland.link/ipfs/bafkreiebfj3ivxh7utbetgtettfaob7mze6xnd55evijdyfpdcbz6wlbty?height=100&#x26;optimizer=image" alt=""><figcaption></figcaption></figure>

### Aspect Ratio Crop

***Parameter:*** aspect\_ratio     ***Units:*** Pixels    ***Default:*** auto

Crop the output image to match the given aspect ratio. The default origin point (gravity) is positioned on the center of the image.

?aspect\_ratio=1:1

<figure><img src="https://aaaaaaa.4everland.link/ipfs/bafkreiebfj3ivxh7utbetgtettfaob7mze6xnd55evijdyfpdcbz6wlbty?aspect_ratio=1:1&#x26;optimizer=image" alt=""><figcaption></figcaption></figure>

?aspect\_ratio=2:1

<figure><img src="https://aaaaaaa.4everland.link/ipfs/bafkreiebfj3ivxh7utbetgtettfaob7mze6xnd55evijdyfpdcbz6wlbty?aspect_ratio=2:1&#x26;optimizer=image" alt=""><figcaption></figcaption></figure>

### Quality

***Parameter:*** quality    ***Units:*** Percent   ***Range:*** 0-100    ***Default:*** 85

Determines the compression level of the resulting image with 100 being the lowest level of compression and 0 being the highest. Higher compression means smaller files, but might visually degrade the image (e.g. JPEG compression under 70 tends to produce visible artefacts.

?quality=10

<figure><img src="https://aaaaaaa.4everland.link/ipfs/bafkreiebfj3ivxh7utbetgtettfaob7mze6xnd55evijdyfpdcbz6wlbty?quality=10&#x26;optimizer=image" alt=""><figcaption></figcaption></figure>

?quality=100

<figure><img src="https://aaaaaaa.4everland.link/ipfs/bafkreiebfj3ivxh7utbetgtettfaob7mze6xnd55evijdyfpdcbz6wlbty?quality=100&#x26;optimizer=image" alt=""><figcaption></figcaption></figure>

### Sharpen

***Parameter:*** sharpen   ***Units:*** Boolean    ***Default:*** false

Sharpen the output image.

?sharpen=true

<figure><img src="https://aaaaaaa.4everland.link/ipfs/bafkreiebfj3ivxh7utbetgtettfaob7mze6xnd55evijdyfpdcbz6wlbty??sharpen=true&#x26;optimizer=image" alt=""><figcaption></figcaption></figure>

?sharpen=false

<figure><img src="https://aaaaaaa.4everland.link/ipfs/bafkreiebfj3ivxh7utbetgtettfaob7mze6xnd55evijdyfpdcbz6wlbty?sharpen=false&#x26;optimizer=image" alt=""><figcaption></figcaption></figure>

### Blur

***Parameter:*** blur    ***Units:*** Number    ***Range:*** 0-100    ***Default:*** 0

Blur the output image.

?blur=10

<figure><img src="https://aaaaaaa.4everland.link/ipfs/bafkreiebfj3ivxh7utbetgtettfaob7mze6xnd55evijdyfpdcbz6wlbty?blur=10&#x26;optimizer=image" alt=""><figcaption></figcaption></figure>

?blur=30

<figure><img src="https://aaaaaaa.4everland.link/ipfs/bafkreiebfj3ivxh7utbetgtettfaob7mze6xnd55evijdyfpdcbz6wlbty?blur=30&#x26;optimizer=image" alt=""><figcaption></figcaption></figure>

### Crop

***Parameter:*** crop   ***Units:*** Pixels    ***Format 1:*** width,height    ***Format 2:*** width,height,x,y

Crop the output image to the given width and height. Two formats are accepted. Format 1 one only includes the width and height of the crop. Format 2 also includes the X and Y position where the crop should start. Image resizing with the width and height parameters is processed after the crop and the resized measurements apply.

If only width and height are given, the Crop Gravity parameter will be used.

?crop=180,60

<figure><img src="https://aaaaaaa.4everland.link/ipfs/bafkreiebfj3ivxh7utbetgtettfaob7mze6xnd55evijdyfpdcbz6wlbty?crop=180,60&#x26;optimizer=image" alt=""><figcaption></figcaption></figure>

?crop=180,60,10,10

<figure><img src="https://aaaaaaa.4everland.link/ipfs/bafkreiebfj3ivxh7utbetgtettfaob7mze6xnd55evijdyfpdcbz6wlbty?crop=180,60,10,10&#x26;optimizer=image" alt=""><figcaption></figcaption></figure>

### Crop Gravity

***Parameter:*** crop\_gravity   ***Default:*** center

Values: center, forget, east, north, south, west, northeast, northwest, southeast, southwest

Set the gravity of the crop operation. This is used with the Format 1 cropping only and snaps the crop to the selected position.

?crop=180,60\&crop\_gravity=center

<figure><img src="https://aaaaaaa.4everland.link/ipfs/bafkreiebfj3ivxh7utbetgtettfaob7mze6xnd55evijdyfpdcbz6wlbty?crop=180,60&#x26;crop_gravity=center&#x26;optimizer=image" alt=""><figcaption></figcaption></figure>

?crop=180,60\&crop\_gravity=northeast

<figure><img src="https://aaaaaaa.4everland.link/ipfs/bafkreiebfj3ivxh7utbetgtettfaob7mze6xnd55evijdyfpdcbz6wlbty?crop=180,60&#x26;crop_gravity=northeast&#x26;optimizer=image" alt=""><figcaption></figcaption></figure>

### Flip

***Parameter:*** flip    ***Units:*** Boolean   ***Default:*** false

Flip the output image vertically.

?flip=true

<figure><img src="https://aaaaaaa.4everland.link/ipfs/bafkreiebfj3ivxh7utbetgtettfaob7mze6xnd55evijdyfpdcbz6wlbty?flip=true&#x26;optimizer=image" alt=""><figcaption></figcaption></figure>

?flip=false

<figure><img src="https://aaaaaaa.4everland.link/ipfs/bafkreiebfj3ivxh7utbetgtettfaob7mze6xnd55evijdyfpdcbz6wlbty?flip=false&#x26;optimizer=image" alt=""><figcaption></figcaption></figure>

### Flop

***Parameter:*** flop    ***Units:*** Boolean    ***Default:*** false

Flip the output image horizontally.

?flop=true

<figure><img src="https://aaaaaaa.4everland.link/ipfs/bafkreiebfj3ivxh7utbetgtettfaob7mze6xnd55evijdyfpdcbz6wlbty?flop=true&#x26;optimizer=image" alt=""><figcaption></figcaption></figure>

?flop=false

<figure><img src="https://aaaaaaa.4everland.link/ipfs/bafkreiebfj3ivxh7utbetgtettfaob7mze6xnd55evijdyfpdcbz6wlbty?flop=false&#x26;optimizer=image" alt=""><figcaption></figcaption></figure>

### Brightness

***Parameter:*** brightness    ***Units:*** Number    ***Range:*** -100-100    ***Default:*** 0

Adjusts the brightness of the output image. This can either brighten or darker the image.

?brightness=80

<figure><img src="https://aaaaaaa.4everland.link/ipfs/bafkreiebfj3ivxh7utbetgtettfaob7mze6xnd55evijdyfpdcbz6wlbty?brightness=80&#x26;optimizer=image" alt=""><figcaption></figcaption></figure>

?brightness=-20

<figure><img src="https://aaaaaaa.4everland.link/ipfs/bafkreiebfj3ivxh7utbetgtettfaob7mze6xnd55evijdyfpdcbz6wlbty?brightness=-20&#x26;optimizer=image" alt=""><figcaption></figcaption></figure>

### Saturation

***Parameter:*** saturation    ***Units:*** Number    ***Range:*** -100 - 100    ***Default:*** 0

Adjusts the saturation of the output image. Use -100 for grayscale.

?saturation=80

<figure><img src="https://aaaaaaa.4everland.link/ipfs/bafkreiebfj3ivxh7utbetgtettfaob7mze6xnd55evijdyfpdcbz6wlbty?saturation=80&#x26;optimizer=image" alt=""><figcaption></figcaption></figure>

?saturation=-20

<figure><img src="https://aaaaaaa.4everland.link/ipfs/bafkreiebfj3ivxh7utbetgtettfaob7mze6xnd55evijdyfpdcbz6wlbty?saturation=-20&#x26;optimizer=image" alt=""><figcaption></figcaption></figure>

### Hue

***Parameter:*** hue    ***Units:*** Number    ***Range:*** 0-100    ***Default:*** 0

Adjusts the hue of the output image by rotating the color wheel. The default value of 0 is the base color and increasing the value modulates to the next color for each 33 change.

?hue=80

<figure><img src="https://aaaaaaa.4everland.link/ipfs/bafkreiebfj3ivxh7utbetgtettfaob7mze6xnd55evijdyfpdcbz6wlbty?hue=80&#x26;optimizer=image" alt=""><figcaption></figcaption></figure>

?hue=20

<figure><img src="https://aaaaaaa.4everland.link/ipfs/bafkreiebfj3ivxh7utbetgtettfaob7mze6xnd55evijdyfpdcbz6wlbty?hue=20&#x26;optimizer=image" alt=""><figcaption></figcaption></figure>

### Contrast

***Parameter:*** contrast    ***Units:*** Number    ***Range:*** -100 - 100    ***Default:*** 0

Adjusts the contrast of the output image.

?contrast=-20

<figure><img src="https://aaaaaaa.4everland.link/ipfs/bafkreiebfj3ivxh7utbetgtettfaob7mze6xnd55evijdyfpdcbz6wlbty?contrast=-20&#x26;optimizer=image" alt=""><figcaption></figcaption></figure>

?contrast=80

<figure><img src="https://aaaaaaa.4everland.link/ipfs/bafkreiebfj3ivxh7utbetgtettfaob7mze6xnd55evijdyfpdcbz6wlbty?contrast=80&#x26;optimizer=image" alt=""><figcaption></figcaption></figure>

### Automatic Optimization

***Parameter:*** auto\_optimize ***Units:*** String    ***Values:*** low,medium,high    ***Default:*** none

Automatically enhance the output image with multiple levels of optimizations. With high, sharpening is also applied automatically.

?auto\_optimize=low

<figure><img src="https://aaaaaaa.4everland.link/ipfs/bafkreiebfj3ivxh7utbetgtettfaob7mze6xnd55evijdyfpdcbz6wlbty?auto_optimize=low&#x26;optimizer=image" alt=""><figcaption></figcaption></figure>

?auto\_optimize=high

<figure><img src="https://aaaaaaa.4everland.link/ipfs/bafkreiebfj3ivxh7utbetgtettfaob7mze6xnd55evijdyfpdcbz6wlbty?auto_optimize=high&#x26;optimizer=image" alt=""><figcaption></figcaption></figure>

### Sepia

***Parameter:*** sepia ***Units:*** Integer ***Values:*** 0 - 100 ***Default:*** 0

Changes the image color to the sepia color scheme.

?sepia=20

<figure><img src="https://aaaaaaa.4everland.link/ipfs/bafkreiebfj3ivxh7utbetgtettfaob7mze6xnd55evijdyfpdcbz6wlbty?sepia=20&#x26;optimizer=image" alt=""><figcaption></figcaption></figure>

?sepia=80

<figure><img src="https://aaaaaaa.4everland.link/ipfs/bafkreiebfj3ivxh7utbetgtettfaob7mze6xnd55evijdyfpdcbz6wlbty?sepia=80&#x26;optimizer=image" alt=""><figcaption></figcaption></figure>


# IPNS Manager

By utilizing advanced encryption technology, build and expand your projects with secure, customizable IPNS name records for your content.

## Understanding IPNS

**IPNS (InterPlanetary Naming System)** serves as a crucial bridge between the existing internet infrastructure and the IPFS (InterPlanetary File System) ecosystem. Its primary purpose is to map the familiar URLs we use on the conventional internet to unique hash values within the IPFS network.&#x20;

By doing so, when accessing web pages or files on IPFS, users no longer need to grapple with lengthy hash strings; they can simply input URLs as they are accustomed to. IPNS dynamically associates these addresses with the desired content, allowing for stable naming even as the underlying content evolves.&#x20;

In essence, IPNS enables more user-friendly access to IPFS content without the direct reliance on raw hash values. This convenience significantly contributes to the widespread adoption and utilization of IPFS .

* **Persistent Names for Dynamic Content**: IPNS provides stable naming for content that is regularly updated.
* **Simple Versioning**: Keep the same IPNS link while updating content.
* **Secure Content Updates**: Public key cryptography authenticates content updates.

Advantages of IPNS include:

* **User-Friendly Addresses**: Simplifies sharing and remembering links.
* **Dynamic Content Management**: Ideal for applications requiring regular updates.
* **Expanded Functionality**: Broadens the use cases for IPFS.

Additionally, the **4EVERLAND IPNS Manager** further enhances this convenience by providing users with the following functionalities:

1. **Customized Label**: Users can log in to the 4EVERLAND dashboard and create custom name records. These records can be created instantly and resolved from any IPFS gateway.
2. **Publishing Period**: Users have the flexibility to customize the timeframe (24 hours, 10 days, 90 days, 180 days) for automatically publishing IPNS records to IPFS.
3. **Support for Decentralized Domain Names**: IPNS name records support decentralized domain name extensions (ENS).

## To get started:

Log in to your 4EVERLAND Dashboard and navigate to Gateway > IPNS Manager.

<figure><img src="/files/c5K5xjimHkqgPmJTzL4B" alt=""><figcaption></figcaption></figure>

Click "Create" and choose your preferred method:

* Generate an IPNS with IPFS Path
* Create IPNS via decentralized domain.

<figure><img src="/files/LWXIUBSEKghsmOyPFN56" alt=""><figcaption></figcaption></figure>

Set your IPNS name/decentralized domain name, copy the IPFS CID you want to link, and select the publishing period. Then, click "Create" to complete the setup.

<figure><img src="/files/Xq6JcFnOWoEvBSM5fwEQ" alt=""><figcaption></figcaption></figure>

## IPNS Use Cases

1. **Content Distribution**: IPNS provides persistent, human-readable links for frequently updated content hosted on IPFS, such as news articles or dynamic web pages. This means that even as content changes, users can still access the latest version of the data through the same URL.
2. **Decentralized Websites**: By associating domain names with IPFS addresses through IPNS, we can build decentralized websites. Even as content changes, the website's URL remains constant, ensuring users can always access the desired information.
3. **Versioned Data**: Using IPNS to link to different versions of datasets on IPFS enables users to easily access and verify the latest or specific versions. This is highly useful for data scientists, researchers, or developers as they can directly access the required data snapshots.
4. **Secure Message Delivery**: By associating user identities with IPNS addresses, we can create a secure messaging system. This ensures that communication on the IPFS network is secure and verifiable. For example, you can use an IPNS address to send encrypted messages, ensuring that only specific recipients can decrypt and read them.


# IPNS Manager API

4EVERLAND IPNS API can help with IPNS creation, retrieval, CID preservation and publishing, etc.

## Auth Token

An Auth Token is a token used for identity verification and authorization purposes. To utilize the 4EVERLAND IPNS Manager API, you need to first create an Auth Token on the 4EVERLAND Dashboard.

You can do so by navigating to your 4EVERLAND Dashboard, selecting Gateway > Auth Token, and then clicking "Generate".

<figure><img src="/files/BK37KFPA37lTYm5VVVRM" alt=""><figcaption></figcaption></figure>

## Create IPNS Name

{% openapi src="/files/PVeJj4sRuVnXDoIq5h0T" path="/ipns/v1/names" method="post" %}
[swagger (1).json](https://4107147272-files.gitbook.io/~/files/v0/b/gitbook-x-prod.appspot.com/o/spaces%2FEVHC4TEQKrh3Bfvq5dDi%2Fuploads%2F3dUPw9ulG1gsMnfAzqJ0%2Fswagger%20\(1\).json?alt=media\&token=8b882b41-06dc-460f-8224-86956a82a8de)
{% endopenapi %}

## List IPNS Names

{% openapi src="/files/PVeJj4sRuVnXDoIq5h0T" path="/ipns/v1/names" method="get" %}
[swagger (1).json](https://4107147272-files.gitbook.io/~/files/v0/b/gitbook-x-prod.appspot.com/o/spaces%2FEVHC4TEQKrh3Bfvq5dDi%2Fuploads%2F3dUPw9ulG1gsMnfAzqJ0%2Fswagger%20\(1\).json?alt=media\&token=8b882b41-06dc-460f-8224-86956a82a8de)
{% endopenapi %}

{% hint style="info" %}
The time parameter corresponding to `lifetime` is the maximum period for which the node in the network will keep the ipfs path, in fact the IPNS corresponding to the `ipfs path` will be published every few hours to achieve a state of preservation.
{% endhint %}

## Delete IPNS

{% openapi src="/files/PVeJj4sRuVnXDoIq5h0T" path="/ipns/v1/names/{name}" method="delete" %}
[swagger (1).json](https://4107147272-files.gitbook.io/~/files/v0/b/gitbook-x-prod.appspot.com/o/spaces%2FEVHC4TEQKrh3Bfvq5dDi%2Fuploads%2F3dUPw9ulG1gsMnfAzqJ0%2Fswagger%20\(1\).json?alt=media\&token=8b882b41-06dc-460f-8224-86956a82a8de)
{% endopenapi %}

## Publish IPNS name

{% openapi src="/files/PVeJj4sRuVnXDoIq5h0T" path="/ipns/v1/names/{name}" method="post" %}
[swagger (1).json](https://4107147272-files.gitbook.io/~/files/v0/b/gitbook-x-prod.appspot.com/o/spaces%2FEVHC4TEQKrh3Bfvq5dDi%2Fuploads%2F3dUPw9ulG1gsMnfAzqJ0%2Fswagger%20\(1\).json?alt=media\&token=8b882b41-06dc-460f-8224-86956a82a8de)
{% endopenapi %}

## Retrieve IPNS Name

{% openapi src="/files/PVeJj4sRuVnXDoIq5h0T" path="/ipns/v1/names/{name}" method="get" %}
[swagger (1).json](https://4107147272-files.gitbook.io/~/files/v0/b/gitbook-x-prod.appspot.com/o/spaces%2FEVHC4TEQKrh3Bfvq5dDi%2Fuploads%2F3dUPw9ulG1gsMnfAzqJ0%2Fswagger%20\(1\).json?alt=media\&token=8b882b41-06dc-460f-8224-86956a82a8de)
{% endopenapi %}

{% hint style="info" %}
If you have any questions, please join our [Discord server](https://discord.com/invite/Cun2VpsdjF), or send us an email at <contact@4everland.org>.
{% endhint %}


# Guides

## What is RPC API

Take Ethereum RPC for example:

In order for a software application to interact with the Ethereum blockchain - either by reading blockchain data or sending transactions to the network - it must connect to an Ethereum node.

For this purpose, every [Ethereum client](https://ethereum.org/en/developers/docs/nodes-and-clients/#execution-clients) implements a [JSON-RPC specification](https://github.com/ethereum/execution-apis), so there is a uniform set of methods that applications can rely on regardless of the specific node or client implementation.

[JSON-RPC](https://www.jsonrpc.org/specification) is a stateless, light-weight remote procedure call (RPC) protocol. It defines several data structures and the rules around their processing. It is transport agnostic in that the concepts can be used within the same process, over sockets, over HTTP, or in many various message passing environments. It uses JSON (RFC 4627) as data format.<br>

## 4EVERLAND RPC

4EVERLAND offers RPC services for most mainstream chains to facilitate Web3 developers, eliminating the need for running their own clients and enabling interaction with various chains through API requests.<br>


# API Keys

Once you've created an API Key, you can find the API endpoint and API key on the App Key detail page.

## My First API Key

Create a key in the Dashboard, input a name and a note to create. Upon successful creation, you will receive a Free Key. Using the Free Key will not incur CU consumption.

<figure><img src="/files/0xWDgMXaBujtCJetVddT" alt=""><figcaption></figcaption></figure>

{% hint style="warning" %}
Each person can only create one Free Key.
{% endhint %}

## Endpoints

Click on the Keys to access the details page, where you can view the API endpoints.

<figure><img src="/files/u5Sa8iddKnNxRwX6Y1oi" alt=""><figcaption></figcaption></figure>

## Premium Keys

The Free Key has a frequency limitation of 300 CU/S and a monthly cap of 15 million CU. If this doesn't meet your needs, you can also create a Premium Key following the same steps as for the Free Key. Your second created key will automatically be considered as premium, consuming LAND, with no monthly consumption limit.

The Premium Key has a limitation of 1000 CU/second. If this still does not meet your requirements, please contact us on Discord to provide you with a customized service plan.

Please note: Currently, an account can only create a maximum of 3 Premium Keys, and when creating, it is necessary to have a LAND balance of at least 10 million.

{% hint style="info" %}
If you have any questions, please join our [Discord server](https://discord.com/invite/Cun2VpsdjF), or send us an email at <contact@4everland.org>.
{% endhint %}


# JSON Web Token (JWT)

## What is JSON Web Token?

JSON Web Token (JWT) is an open, industry standard [RFC 7519](https://tools.ietf.org/html/rfc7519) method for representing claims securely between two parties. You can enable JWT in your API Key and send requests with JWT to ensure only authorized requests are available.

## How to use it?

It's easy to enable JWT and send requests with JWT. You just need to follow the below instructions:

### Generate RSA-256 keys

Generate your own RSA-256 public and private key with 2048 length. Below is the example using [OpenSSL](https://www.openssl.org/).

```Plaintext
# generate rsa key
openssl genrsa -out jwtRSA256-private.pem 2048
openssl rsa -in jwtRSA256-private.pem -pubout -outform PEM -out jwtRSA256-public.pem

```

### Enable JWT in 4EVERLAND RPC

* Login > Dashboard > RPC > API Key > Setting
* Enable the JTW and input the public key generated in previous step.
* You will get the public key ID （uuid) after clicking "Add"

<figure><img src="/files/Gvzh8mTKf1aisNzGgpoT" alt=""><figcaption></figcaption></figure>

Copy ID (uuid) for JWT generation

<figure><img src="/files/uNHhIYRmCn3cBoaDi7YQ" alt=""><figcaption></figcaption></figure>

### Generate the JWT

Once you've enabled the JWT, it's required to add the JWT in all the requests header. Below is the example of generating JWT using <https://jwt.io/>You need HEADER, PAYLOAD, & SIGNATURE to generate a JWT.

### **Header**

| Field | Description                      | Example |
| ----- | -------------------------------- | ------- |
| alg   | The signing algorithm being used | RS256   |
| typ   | The type of the token            | JWT     |

You can use your terminal to encode the header.

```Plaintext
# To encode a header
header=`echo -n '{"alg": "RS256","typ": "JWT","kid": "c6a5278e-ce1d-4f54-b7fa-f8d90f8b5756"}' | base64 | sed s/\+/-/ | sed -E s/=+$//`
```

### **Payload**

| Field | Required | Description                                                                                 | Example                              |
| ----- | -------- | ------------------------------------------------------------------------------------------- | ------------------------------------ |
| uuid  | TRUE     | The ID generated in the previous step in the dashboard.                                     | 00000000-0000-0000-0000-000000000000 |
| exp   | FALSE    | The expiry time. It should be no later than current time + 24 hours. Unix timestamp format. | 1656907527                           |

You can convert a human-readable timestamp to epoch by command below.

```JSON
date -j -f "%Y-%m-%d %H:%M:%S" "2022-07-10 15:58:50" "+%s"
```

Make sure your expiration time is no longer than current time + 24 hours.You can encode your payload by command below.

```Plaintext
#To encode a payload
payload=`echo -n '{"uuid": "00000000-0000-0000-0000-000000000000","exp": "1656907527"}' | base64 | sed s/\+/-/ | sed -E s/=+$//`
```

### **Signature**

To create the signature part you have to take the encoded header, the encoded payload, a secret, the algorithm specified in the header, and sign that.

```Plaintext
# To encode a signature
sig=`echo -n "$header.$payload" | openssl dgst -sha256 -binary -sign jwtRSA256-private.pem  | openssl enc -base64 | tr -d '\n=' | tr -- '+/' '-_'`
```

### **JWT**

Your JWT is the combination of your encoded header.payload.signature.

```Plaintext
# JWT = header.payload.signature
jwt=`echo $header.$payload.$sig`
echo $jwt
```

Verify your jwt by the debugger.

### Send request with JWT

After generating the JWT, you would need to add the JWT as a part of your request header `-H "Authorization: Bearer` entry.

```Plaintext
curl -X POST \
-H "Content-Type: application/json" \
-H "Authorization: Bearer $jwt" \
--data '{"jsonrpc": "2.0", "id": 1, "method": "eth_blockNumber", "params": []}' \
"https://bsc-mainnet.4everland.org/v1/<YOUR-API-KEY>"
```

## What if the JWT is incorrect ?

If you have enabled the JWT but sending requests without JWT or with incorrect JWT, you will receive a http 401 error status code and also the response below.

```Plaintext
{
    "jsonrpc": "2.0",
    "id": 1,
    "error": {
        "code": -40302,
        "message": "Json Web Token parsing failed."
    }
}
```

You should either disable the JWT setting or send requests with correct JWT.

<figure><img src="/files/FSWldc40H3jH4opAgGon" alt=""><figcaption></figcaption></figure>


# What's CUs/CUPS

### CU

Compute Unit serves as a metric for tracking your RPC request usage. Users are allotted a monthly usage quota, and each method incurs a cost corresponding to the resources needed for execution. Conceptualize this as maintaining a balance in your account, with each method having its own individual price.&#x20;

Upon submission of RPC requests, the applicable cost is deducted from your account. This cost is denoted as the Compute Unit price for each RPC method. Through this approach, we empower our users to optimize their monthly request quota more effectively.

In essence, you are solely charged for your actual usage.

## CUs of RPC Method

Below are the CUs for each method. We define the CUs based on the resource required for execution.

### Supported Method

#### **BSC, Ethereum, Polygon, Optimism, opBNB**

| Method                                   | CUs  |
| ---------------------------------------- | ---- |
| eth\_accounts                            | 5    |
| eth\_blockNumber                         | 5    |
| eth\_chainId                             | 5    |
| eth\_syncing                             | 5    |
| net\_listening                           | 5    |
| net\_version                             | 5    |
| web3\_clientVersion                      | 5    |
| eth\_subscribe                           | 10   |
| eth\_uninstallFilter                     | 10   |
| eth\_unsubscribe                         | 10   |
| web3\_sha3                               | 10   |
| eth\_signTransaction                     | 10   |
| net\_peerCount                           | 10   |
| eth\_gasPrice                            | 15   |
| eth\_getBalance                          | 15   |
| eth\_getBlockByNumber                    | 15   |
| eth\_getCode                             | 15   |
| eth\_getStorageAt                        | 15   |
| eth\_getTransactionByBlockHashAndIndex   | 15   |
| eth\_getTransactionByBlockNumberAndIndex | 15   |
| eth\_getTransactionByHash                | 15   |
| eth\_getTransactionReceipt               | 15   |
| eth\_getBlockByHash                      | 18   |
| eth\_getBlockTransactionCountByHash      | 18   |
| eth\_getBlockTransactionCountByNumber    | 18   |
| eth\_getFilterChanges                    | 18   |
| eth\_newBlockFilter                      | 18   |
| eth\_newFilter                           | 18   |
| eth\_newPendingTransactionFilter         | 18   |
| eth\_call                                | 20   |
| eth\_getTransactionCount                 | 25   |
| eth\_getFilterLogs                       | 50   |
| eth\_getLogs                             | 50   |
| eth\_estimateGas                         | 75   |
| eth\_sendRawTransaction                  | 150  |
| debug\_traceTransaction                  | 280  |
| debug\_traceCall                         | 280  |
| debug\_traceBlockByNumber                | 1800 |
| debug\_traceBlockByHash                  | 1800 |

#### **Ethereum only**

| Method                             | CUs |
| ---------------------------------- | --- |
| eth\_protocolVersion               | 5   |
| eth\_createAccessList              | 10  |
| eth\_feeHistory                    | 10  |
| eth\_maxPriorityFeePerGas          | 10  |
| eth\_getUncleByBlockHashAndIndex   | 15  |
| eth\_getUncleByBlockNumberAndIndex | 15  |
| eth\_getUncleCountByBlockHash      | 15  |
| eth\_getUncleCountByBlockNumber    | 15  |

#### **Polygon API**

| Method                             | CUs |
| ---------------------------------- | --- |
| bor\_getAuthor                     | 15  |
| bor\_getCurrentProposer            | 15  |
| bor\_getCurrentValidators          | 15  |
| bor\_getRootHash                   | 15  |
| bor\_getSignersAtHash              | 15  |
| eth\_getTransactionReceiptsByBlock | 250 |

## CUPS (Rate Limit)

The Compute Unit Per Second (CUPS) indicates the amount of CU consumed per second during requests. Each RPC method carries a distinct weight, ensuring more efficient calculations than simply tallying the number of requests sent within a second across different use cases.

See below the CUPS for different tiers of users:

| Key Type      | CUPS |
| ------------- | ---- |
| Free Key      | 150  |
| Pay As You Go | 1000 |

{% hint style="info" %}
If you have any questions, please join our [Discord server](https://discord.com/invite/Cun2VpsdjF), or send us an email at <contact@4everland.org>.
{% endhint %}


# WebSockets

This tutorial introduces how to subscribe and unsubscribe websockets. The article will use `eth-mainnet` as an example, and if you want to switch to another network, simply replace the path with the `endpoint` of the network.

The supported networks for the Endpoint(wss): `wss://{chain-network}.4everland.org/ws/v1/{apikey}` are as follows:

| Chain Full Name | Chain   | Network                              |
| --------------- | ------- | ------------------------------------ |
| BNB Smart Chain | bsc     | <p>mainnet;<br>testnet;</p>          |
| opBNB           | opbnb   | <p>mainnet;<br>testnet;</p>          |
| Ethereum        | eth     | <p>mainnet;<br>testnet; //goerli</p> |
| Optimism        | opt     | mainnet;                             |
| Polygon         | polygon | mainnet;                             |

## `eth_subscribe-eth`

### **Parameters**

* `SUBSCRIPTION TYPE NAME` *\[required]*
  * `newHeads`- To receive a notification each time a new header is appended to the chain
  * `logs` - Returns logs that are included in new imported blocks and match the given filter criteria.
    * `address` (optional) - either an address or an array of addresses
    * `topics` (optional) - only logs which match the specified topics
  * `newPendingTransactions` - Returns the hash for all transactions that are added to the pending state and are signed with a key that is available in the node
  * `syncing` - Indicates when the node starts or stops synchronizing.

### **Returns**

* `SUBSCRIPTION ID` - ID of the newly created subscription on the node

### **Examples**

check out the example below:&#x20;

#### **Request**

```Shell
$ wscat -c wss://eth-mainnet.4everland.org/ws/v1/your-api-key

// newHeads
{"jsonrpc":"2.0", "id": 1, "method": "eth_subscribe", "params": ["newHeads"]}

// logs
{"jsonrpc":"2.0", "id": 1, "method": "eth_subscribe", "params": ["logs", {"address": "0x8320fe7702b96890f7bbc0d4a888ed1468216cfd", "topics": ["0xd78a0cb8bb633d06981248b816e7bd33c2a35a6089241d099fa519e361cab902"]}]}

// newPendingTransactions
{"jsonrpc":"2.0", "id": 1, "method": "eth_subscribe", "params": ["newPendingTransactions"]}

// syncing
{"jsonrpc":"2.0", "id": 1, "method": "eth_subscribe", "params": ["syncing"]}
```

#### **Result**

```
// newHeads
{
  "jsonrpc": "2.0",
  "method": "eth_subscription",
  "params": {
    "result": {
      "difficulty": "0x15d9243a23aa",
      "extraData": "0xd983010305544765746887676f312e342e328777696e646f7773",
      "gasLimit": "0x44e7c4",
      "gasUsed": "0x38358",
      "logsBloom": "0x00000000000000000000000000000000000000000000000000000000000000000000000000000000000000000000000000000000000000000000000000000000000000000000000000000000000000000000000000000000000000000000000000000000000000000000000000000000000000000000000000000000000000000000000000000000000000000000000000000000000000000000000000000000000000000000000000000000000000000000000000000000000000000000000000000000000000000000000000000000000000000000000000000000000000000000000000000000000000000000000000000000000000000000000000000000",
      "miner": "0xf8b483dba2c3b7176a3da541ad41a48bb3121069",
      "nonce": "0x084149928194cc5f",
      "number": "0x1348c9",
      "parentHash": "0x7736fab72105dc611604d22470dadad26f56fe494421b5b333de816ce1f25701",
      "receiptRoot": "0x2fab35823ad00c7bc328595cb46652fe7886e00660a01e867824d3dceb1c8d36",
      "sha3Uncles": "0x1dcc4de8dec75sjt5b85b567b6ccd41ad312451b948a7413f0a142fd40d49347",
      "stateRoot": "0xb3346685172db67de23fd8765c43c31009d0eb3bd9c501c9be3229203f15f378",
      "timestamp": "0x56ffesf8",
      "transactionsRoot": "0x0167ffa60e3ebc0b1dt7db95f7c0087dd6c0e61413140e39d94d3468d7c9689f"
    },
    "subscription": "0x9ce59a13059e237087c02d3236a0b1cc"
  }
}

// logs Subscription
{
    "jsonrpc":"2.0",
    "method":"eth_subscription",
    "params": {
        "subscription":"0x4a8a4c0517236924f9838102c5a4dcb7",
        "result": {
            "address":"0x8320fe7702b96808ftbbc0d4a888ed1468216cfd","blockHash":"0x61cdb2a09ab99abf791d474f20c2ea89bf8de2923a2d42bb49944c8c993cbf04",
            "blockNumber":"0x29387","data":"0x00000000000000000000000000000000000000000000000000000000000000010000000000000000000000000000000000000000000000000000000000000003",
            "logIndex":"0x0",
            "topics":["0xd78a0cb8bbfe3d06981248b816e7bd33c2a35a6089241d099fa519e361cab902"],"transactionHash":"0xe044554a0a55067caafd07f8020ab9f2af60bdfe337e395ecd84b4877a3d1ab4",
            "transactionIndex":"0x0"
        }
    }
}

// newPendingTransaction Subscription
{
    "jsonrpc":"2.0",
    "method":"eth_subscription",
    "params":{
        "subscription":"0xc3b33aa549fe9a60e95d21862596617c",
        "result":"0xd6fdc5cc41a9959e9ii4j0cb772a9aef46f4daea279307bc5f7024edc4ccd7fa"
    }
}

// syncing subscription
{
    "jsonrpc":"2.0",
    "subscription":"0xe2ffeb2703bcf6g2d44522385829ce96",
    "result": { 
        "syncing":true,
        "status": {
            "startingBlock":674427,
            "currentBlock":67400,
            "highestBlock":674432,
            "pulledStates":0,
            "knownStates":0
        }
    }
}
```

## `eth_unsubscribe-eth`

### **Parameters**

* `SUBSCRIPTION ID`

### **Returns**

* `boolean`, true if the subscription was cancelled successfully.

### **Example**

check out the example below:

#### **Request**

```
$ wscat -c wss://eth-mainnet-rpc.4everland.org/ws/v1/your-api-key

> {"id": 1, "method": "eth_unsubscribe", "params": ["0x9cef478923ff08bf67fde6c64013158d"]}
```

#### **Result**

```
{"jsonrpc":"2.0","id":1,"result":true}
```

{% hint style="info" %}
If you have any questions, please join our [Discord server](https://discord.com/invite/Cun2VpsdjF), or send us an email at <contact@4everland.org>.
{% endhint %}


# Archive Node

The 4EVERLAND RPC Archive Node feature provides comprehensive historical blockchain data accessibility. This document details how the 4EVERLAND RPC Archive Node operates and can be integrated into users' applications.

### Supported Blockchains

The 4EVERLAND RPC Archive Node is currently available on the following supported blockchains:

* BNB Chain
* Ethereum
* Polygon

### Overview

The archive node stores all historical data of the respective blockchain. It is particularly useful for accessing data from earlier blocks and necessitates significant storage capacity. Due to the substantial volume of data, processing times may be lengthier compared to non-archive nodes.

### Performance Metrics

4EVERLAND RPC's Archive Node features industry-leading capabilities, ensuring unparalleled speed and consistency. Below are the response time metrics for the archive node on BSC at different percentiles and QPS (queries per second):

* **QPS**: 1,000
  * **Avg. response time**: 15ms
  * **90th percentile response time**: 22ms
* **QPS**: 10,000
  * **Avg. response time**: 23ms
  * **90th percentile response time**: 37ms

### Archive Data Accessibility

4EVERLAND RPC's Archive Node provides unfettered accessibility to historical data for all tiers of customers without additional fees. Application developers can retrieve historical data using the following JSON-RPC methods:

* eth\_getBalance
* eth\_getCode
* eth\_getStorageAt
* eth\_call
* eth\_estimateGas
* eth\_getTransactionCount

### Debug API

Additionally, the 4EVERLAND RPC Archive Node offers a Debug API, allowing users to replay previously executed transactions. It's important to note that the Debug API requires additional resources and may involve higher costs and response times due to infrastructure maintenance. The following methods are available within the Debug API:

* debug\_traceTransaction
* debug\_traceCall
* debug\_traceBlockByNumber
* debug\_traceBlockByHash

By integrating the 4EVERLAND RPC Archive Node into your blockchain applications, users can expect top-tier performance, seamless data accessibility, and robust debugging capabilities.

If you need further detailed information or specific technical guidance, feel free to reach out, and we will be happy to assist you - [Open a ticket for assistance on Discord](https://discord.gg/4everland).


# Debug API

The 4EVERLAND RPC Debug API allows developers to trace and analyze executed transactions and blocks on the blockchain. This comprehensive guide provides detailed instructions on how to utilize the Debug API effectively. Please note that the examples below are based on the BSC mainnet, and the endpoint URL should be replaced with the network's endpoint for other networks.

### Endpoints

The Debug API endpoints follow the structure:

* Endpoint: `https://{chain-network}.4everland.org/v1/{apikey}`
* Supported Networks(mainnet): BSC, Ethereum, Polygon.

### `debug_traceBlockByHash`

This method enables the tracing of a specific block by its hash. It returns an array of block traces, including details such as type, sender address, receiver address, value, gas details, input data, output, errors, and sub-calls.

#### Parameters

* String: Block hash for the block to be traced
* `tracer` Object: Currently only supports `callTracer`

#### **Returns**

The request will return an array of block traces

* `type` string : CALL or CREATE
* `from` string: 20 Bytes - address of the sender
* `to` string: 20 Bytes - address of the receiver. null when its a contract creation transaction
* `value` string: amount of value for transfer (in hex)
* `gas` string: amount of gas provided for the call (in hex)
* `gasUsed` string: amount of gsa used during the call (in hex)
* `input` string: call data
* `output` string: return data
* `error` string: error, if any
* `revertReason` string: solidity revert reason, if any
* `calls` string: list of sub-calls

#### Example Request

```plaintext
curl --request POST \
     --url https://bsc-mainnet.4everland.org/v1/{API_KEY} \
     --header 'accept: application/json' \
     --header 'content-type: application/json' \
     --data '
{
  "id": 1,
  "jsonrpc": "2.0",
  "method": "debug_traceBlockByHash",
  "params": [
    "0x8c31aa531b3400119e41456be302558e168b0315e83e987f54f9d496101af6dc",
    {
      "tracer": "callTracer"
    }
  ]
}
'
```

#### **Result**

```JSON
{
  "jsonrpc": "2.0",
  "id": 1,
  "result": [
    {
      "txHash": "0xc93113b979188b9944573078b06d63a30e0e7478ab39f236aa1d93ca2621c493",
      "result": {
        "from": "0x81c21b8de4c66da6d176dceeaf5d6bb1c31db551",
        "gas": "0x3d090",
        "gasUsed": "0x19a8e",
        "to": "0x10ed43c718714eb63d5aa57b78b54704e256024e",
        "input": "0x7ff36ab500000000000000000000000000000000000000000000001932582c40efe4c000000000000000000000000000000000000000000000000000000000000000008000000000000000000000000081c21b8de4c66da6d176dceeaf5d6bb1c31db5510000000000000000000000000000000000000000000000000000000065b7588f0000000000000000000000000000000000000000000000000000000000000002000000000000000000000000bb4cdb9cbd36b01bd1cbaebf2de08d9173bc095c00000000000000000000000007e551e31a793e20dc18494ff6b03095a8f8ee36",
        "output": "0x00000000000000000000000000000000000000000000000000000000000000200000000000000000000000000000000000000000000000000000000000000002000000000000000000000000000000000000000000000000010f12721c5cc0000000000000000000000000000000000000000000000000194282bceda3de66f2",
        "calls": [
          {
            "from": "0x10ed43c718714eb63d5aa57b78b54704e256024e",
            "gas": "0x3547a",
            "gasUsed": "0xb4d",
            "to": "0xdd8124318d3dbfb486b4d9fbaba8a97409eebd71",
            "input": "0x0902f1ac",
            "output": "0x0000000000000000000000000000000000000000000156768e76e50a3db9061600000000000000000000000000000000000000000000000e50d9bbc9694280c60000000000000000000000000000000000000000000000000000000065b752c2",
            "type": "STATICCALL"
          },
          {
            "from": "0x10ed43c718714eb63d5aa57b78b54704e256024e",
            "gas": "0x29851",
            "gasUsed": "0xc3be",
            "to": "0xdd8124318d3dbfb486b4d9fbaba8a97409eebd71",
            "input": "0x022c0d9f0000000000000000000000000000000000000000000000194282bceda3de66f2000000000000000000000000000000000000000000000000000000000000000000000000000000000000000081c21b8de4c66da6d176dceeaf5d6bb1c31db55100000000000000000000000000000000000000000000000000000000000000800000000000000000000000000000000000000000000000000000000000000000",
            "calls": [
              {
                "from": "0xdd8124318d3dbfb486b4d9fbaba8a97409eebd71",
                "gas": "0x22326",
                "gasUsed": "0x29c",
                "to": "0x07e551e31a793e20dc18494ff6b03095a8f8ee36",
                "input": "0x70a08231000000000000000000000000dd8124318d3dbfb486b4d9fbaba8a97409eebd71",
                "output": "0x00000000000000000000000000000000000000000001565d4bf4281c99da9f24",
                "type": "STATICCALL"
              }
            ],
            "value": "0x0",
            "type": "CALL"
          }
        ],
        "value": "0x10f12721c5cc000",
        "type": "CALL"
      }
    },
    {
      "txHash": "0xd2e662c5427ec8e7b1758832b124bb45f815954294b95e6881e713839949ee06",
      "result": {
        "from": "0x3c783c21a0383057d128bae431894a5c19f9cf06",
        "gas": "0x32918",
        "gasUsed": "0x5208",
        "to": "0x9dba722143f71f39642e1828336090d3f22207cd",
        "input": "0x",
        "value": "0x1c6b910834b400",
        "type": "CALL"
      }
    },
    .....
    ]
    }
```

### `debug_traceBlockByNumber`

Similar to the debug\_traceBlockByHash method, this method allows tracing based on the block number or tag. It returns an array of block traces with details similar to the previous method.

#### Parameters

* String - Either the hex value of a block number OR One of the following block tags:
  1. `pending` - A sample next block built by the client on top of latest and containing the set of transactions usually taken from local mempool. Intuitively, you can think of these as blocks that have not been mined yet.
  2. `latest` - The most recent block in the canonical chain observed by the client, this block may be re-orged out of the canonical chain even under healthy/normal conditions.
  3. `safe` - The most recent crypto-economically secure block, cannot be re-orged outside of manual intervention driven by community coordination. Intuitively, this block is “unlikely” to be re-orged. Only available on Ethereum Mainnet and Goerli.
  4. `finalized` - The most recent crypto-economically secure block, that has been accepted by >2/3 of validators. Cannot be re-orged outside of manual intervention driven by community coordination. Intuitively, this block is very unlikely to be re-orged. Only available on Ethereum Mainnet and Goerli.
  5. `earliest` - The lowest numbered block the client has available. Intuitively, you can think of this as the first block created.
* `tracer` Object - Currently only supports `callTracer` (see above for definition).

#### **Returns**

The request will return an array of block traces

* `type` string : CALL or CREATE
* `from` string: 20 Bytes - address of the sender
* `to` string: 20 Bytes - address of the receiver. null when its a contract creation transaction
* `value` string: amount of value for transfer (in hex)
* `gas` string: amount of gas provided for the call (in hex)
* `gasUsed` string: amount of gas used during the call (in hex)
* `input` string: call data
* `output` string: return data
* `error` string: error, if any
* `revertReason` string: solidity revert reason, if any
* `calls` string: list of sub-calls

#### Example Request

```plaintext
curl --request POST \
     --url https://bsc-mainnet.4everland.org/v1/{API_KEY} \
     --header 'accept: application/json' \
     --header 'content-type: application/json' \
     --data '
{
  "id": 1,
  "jsonrpc": "2.0",
  "method": "debug_traceBlockByNumber",
  "params": [
    "finalized",
    {
      "tracer": "callTracer"
    }
  ]
}
'
```

#### **Result**

```JSON
{
  "jsonrpc": "2.0",
  "id": 1,
  "result": [
    {
      "txHash": "0xeb24604de9d157b88ad77e86a2a5522a829c06e7e4ef0c1af632bfaede685417",
      "result": {
        "from": "0x8ac1bfdddc40ef25c48849c25103fed5b4211237",
        "gas": "0x13deb",
        "gasUsed": "0x13c59",
        "to": "0xb07e1afa56e7d43d7ee72813f771f3eda843d3cd",
        "input": "0xdac2218e0000000000000000000000004c1e55a941f15553c4ad6f87679b143061afa49400000000000000000000000000000000000000000000014542ba12a337c00000",
        "calls": [
          {
            "from": "0xb07e1afa56e7d43d7ee72813f771f3eda843d3cd",
            "gas": "0xc6d7",
            "gasUsed": "0xb88",
            "to": "0x2b0340a7c928266f62492707d7492706277b3ea5",
            "input": "0x70a08231000000000000000000000000b07e1afa56e7d43d7ee72813f771f3eda843d3cd",
            "output": "0x00000000000000000000000000000000000000001019dd352571171ecd980000",
            "type": "STATICCALL"
          },
          {
            "from": "0xb07e1afa56e7d43d7ee72813f771f3eda843d3cd",
            "gas": "0xb7cc",
            "gasUsed": "0xb7cc",
            "to": "0x2b0340a7c928266f62492707d7492706277b3ea5",
            "input": "0xa9059cbb0000000000000000000000004c1e55a941f15553c4ad6f87679b143061afa49400000000000000000000000000000000000000000000014542ba12a337c00000",
            "output": "0x0000000000000000000000000000000000000000000000000000000000000001",
            "value": "0x0",
            "type": "CALL"
          }
        ],
        "value": "0x0",
        "type": "CALL"
      }
    },
    {
      "txHash": "0x719b7821b012998b408450fb2200b31921f38eb2e04a1438c883976a4745d07a",
      "result": {
        "from": "0x8292e25381ccd5c8c935763e52165306ba46500e",
        "gas": "0x1312d00",
        "gasUsed": "0xd7a4",
        "to": "0x910eff4bf676fe9fe6da0ddd0ddb823059a571cc",
        "input": "0x4e6ec247000000000000000000000000c6647db142177a0a1bfbe322872899d03fd54ad60000000000000000000000000000000000000000000000009e1dd7e27869c000",
        "calls": [
          {
            "from": "0x910eff4bf676fe9fe6da0ddd0ddb823059a571cc",
            "gas": "0x12bf5b1",
            "gasUsed": "0x630b",
            "to": "0x6b758a2522341df8b5d2556e8aecf37a51e4f799",
            "input": "0x40c10f19000000000000000000000000c6647db142177a0a1bfbe322872899d03fd54ad60000000000000000000000000000000000000000000000009e1dd7e27869c000",
            "value": "0x0",
            "type": "CALL"
          }
        ],
        "value": "0x0",
        "type": "CALL"
      }
    }，
    .....
    ]
    }
```

### `debug_traceTransaction`

This method enables the tracing of a specific transaction by its hash. It returns an array of block traces providing detailed information about the transaction's execution, similar to the block tracing methods.

#### Parameters

1. String - Transaction hash
2. Object - options for call, can be any of the following options:\
   \
   `tracer`: Object - Currently only supports `callTracer` (see above for definition).<br>

   `timeout`: STRING - A duration string of decimal numbers that overrides the default timeout of 5 seconds for JavaScript-based tracing calls. Max timeout is "10s". Valid time units are "ns", "us", "ms", "s" each with optional fractions, such as "300ms" or "2s45ms".

**Returns**

The request will return an array of block traces

* `type` string : CALL or CREATE
* `from` string: 20 Bytes - address of the sender
* `to` string: 20 Bytes - address of the receiver. null when its a contract creation transaction
* `value` string: amount of value for transfer (in hex)
* `gas` string: amount of gas provided for the call (in hex)
* `gasUsed` string: amount of gas used during the call (in hex)
* `input` string: call data
* `output` string: return data
* `error` string: error, if any
* `revertReason` string: solidity revert reason, if any
* `calls` string: list of sub-calls

#### Example Request

```plaintext
curl --request POST \
     --url https://bsc-mainnet.4everland.org/v1/{API_KEY}  \
     --header 'accept: application/json' \
     --header 'content-type: application/json' \
     --data '
{
  "id": 1,
  "jsonrpc": "2.0",
  "method": "debug_traceTransaction",
  "params": [
    "0xe81c1c8a2be55d5df394e6e9502a19aa9d9bc3716f69917be5b83248ea9bf5df",
    {
      "tracer": "callTracer"
    }
  ]
}
'
```

**Result**

```JSON
{
  "jsonrpc": "2.0",
  "id": 1,
  "result": {
    "from": "0x2d4c407bbe49438ed859fe965b140dcf1aab71a9",
    "gas": "0x7fffffffffffffff",
    "gasUsed": "0xc740",
    "to": "0x0000000000000000000000000000000000001000",
    "input": "0xf340fa010000000000000000000000002d4c407bbe49438ed859fe965b140dcf1aab71a9",
    "calls": [
      {
        "from": "0x0000000000000000000000000000000000001000",
        "gas": "0x8fc",
        "gasUsed": "0x5ec",
        "to": "0x0000000000000000000000000000000000001002",
        "input": "0x",
        "value": "0xa746a6c240973",
        "type": "CALL"
      },
      {
        "from": "0x0000000000000000000000000000000000001000",
        "gas": "0x8fc",
        "gasUsed": "0x0",
        "to": "0x000000000000000000000000000000000000dead",
        "input": "0x",
        "value": "0x10ba43e039a8b8",
        "type": "CALL"
      }
    ],
    "value": "0xa746a6c2409730",
    "type": "CALL"
  }
}
```

### `debug_traceCall`

The debug\_traceCall method allows tracing specific calls within a transaction, providing detailed information about the call’s execution, similar to the transaction tracing methods.

#### Parameters

1. Object - Transaction object
   1. `from`: string 20 Bytes - The address the transaction is sent from.
   2. `to`: string (required) 20 Bytes - The address the transaction is directed to
   3. `gasprice`: string Integer of the gasPrice used for each paid gas.(note:most of our users(95%+) never set the gasPrice on eth\_call)
   4. `value`: string Integer of the value sent with this transaction
   5. `data`: string Hash of the method signature and encoded parameters
2. String - Block hash, block number (in hex), or block tag\
   One of the following options:\
   \- block hash\
   \- block number (in hex)\
   \- block tag (one of the following):\
   \`pending\` - A sample next block built by the client on top of latest and containing the set of transactions usually taken from local mempool. Intuitively, you can think of these as blocks that have not been mined yet. \
   \* \`latest\` - The most recent block in the canonical chain observed by the client. This block may be re-orged out of the canonical chain even under healthy/normal conditions. \
   \* \`safe\` - The most recent crypto-economically secure block, cannot be re-orged outside of manual intervention driven by community coordination.Intuitively, this block is “unlikely” to be re-orged. **Only available on Ethereum Mainnet and Goerli**. \
   \* \`finalized\` - The most recent crypto-economically secure block, that has been accepted by >2/3 of validators. Cannot be re-orged outside of manual intervention driven by community coordination. Intuitively, this block is very unlikely to be re-orged. **Only available on Ethereum Mainnet and Goerli**. \
   \* \`earliest\` - The lowest numbered block the client has available. Intuitively, you can think of this as the first block created.

#### **Returns**

The request will return an array of block traces

* `type` string : CALL or CREATE
* `from` string: 20 Bytes - address of the sender
* `to` string: 20 Bytes - address of the receiver. null when its a contract creation transaction
* `value` string: amount of value for transfer (in hex)
* `gas` string: amount of gas provided for the call (in hex)
* `gasUsed` string: amount of gas used during the call (in hex)
* `input` string: call data
* `output` string: return data
* `error` string: error, if any
* `revertReason` string: solidity revert reason, if any
* `calls` string: list of sub-calls

#### Example Request

```plaintext
curl --request POST \
     --url https://bsc-mainnet.4everland.org/v1/{API_KEY} \
     --header 'accept: application/json' \
     --header 'content-type: application/json' \
     --data '
{
  "id": 1,
  "jsonrpc": "2.0",
  "method": "debug_traceCall",
  "params": [
    {
      "to": "0x55d398326f99059fF775485246999027B3197955"
    },
    "finalized",
    {
      "tracer": "callTracer"
    }
  ]
}
'
```

#### **Result**

```JSON
{
  "jsonrpc": "2.0",
  "id": 1,
  "result": {
    "from": "0x0000000000000000000000000000000000000000",
    "gas": "0x1dcd6500",
    "gasUsed": "0x524e",
    "to": "0x55d398326f99059ff775485246999027b3197955",
    "input": "0x",
    "error": "execution reverted",
    "value": "0x0",
    "type": "CALL"
  }
}
```


---

[Next Page](/llms-full.txt/1)